Integrations
Connecting SecureSlate & Microsoft Azure Cloud
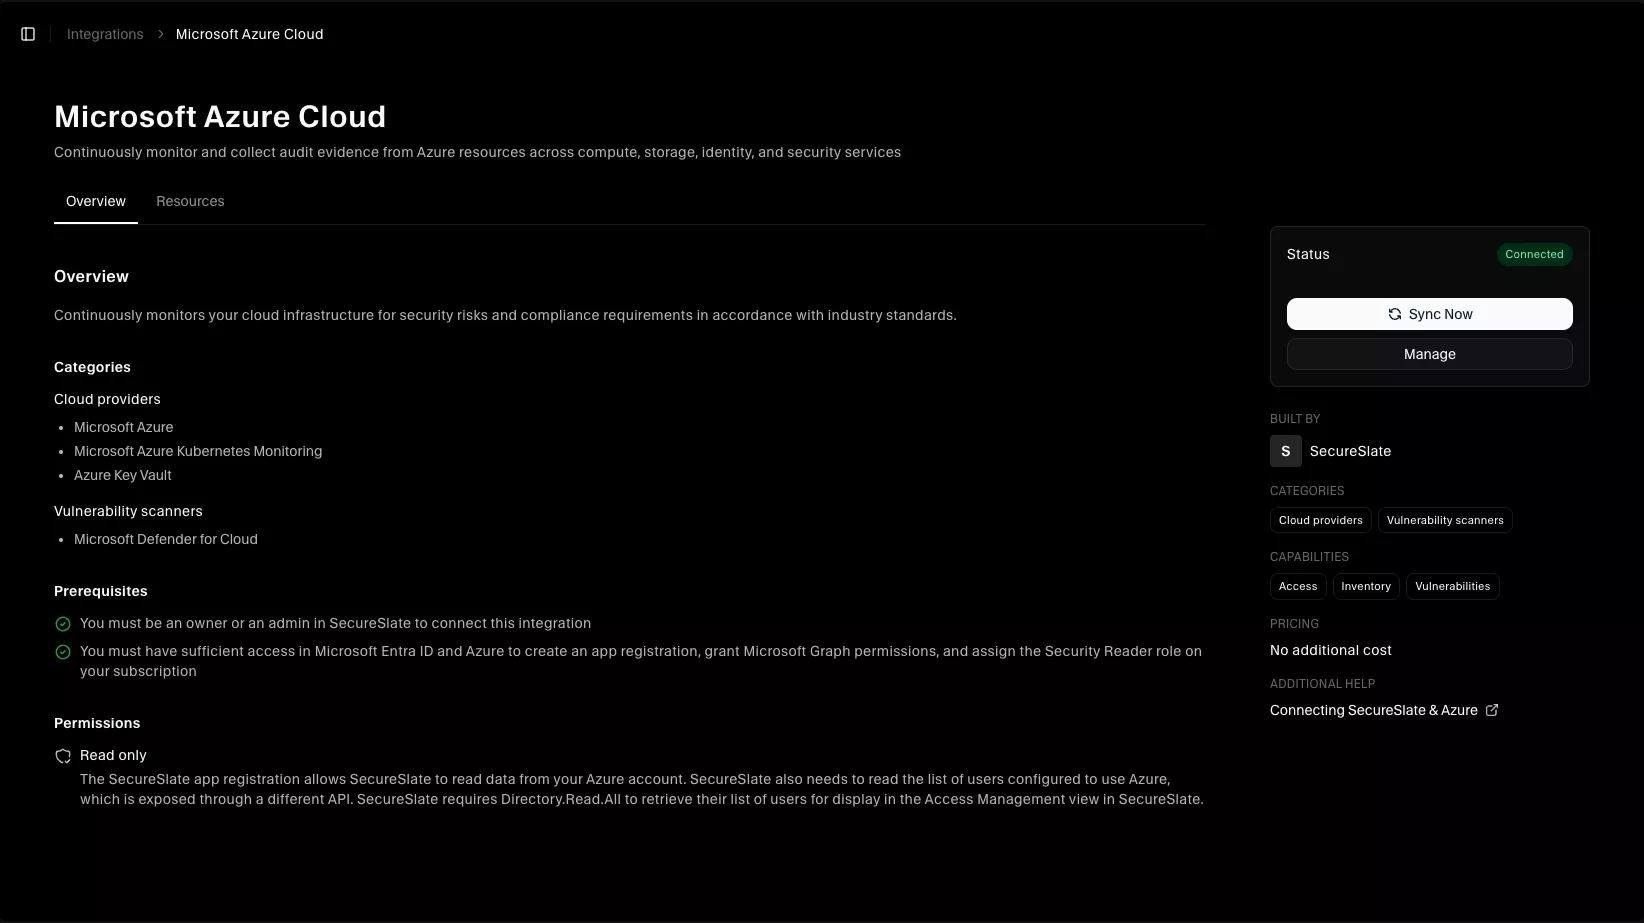
Connecting Microsoft Azure Cloud to SecureSlate enables continuous cloud monitoring, automated compliance tests, inventory sync, and access reviews. SecureSlate uses a read-only Microsoft Entra ID app registration and a Reader role on your subscription—it does not modify your Azure resources.
After setup, findings and synced data appear under Vulnerabilities for the connected cloud (including Checks, Inventory, and Access), and Azure-related automated tests run from Integrations.
This guide follows the Azure Portal setup path in SecureSlate. Cloud Shell automation is listed in the wizard but is not available yet.
Prerequisites
Before you start, make sure you have:
- SecureSlate permissions: access to create and manage integrations (typically Admin).
- Azure permissions: sufficient access in Microsoft Entra ID and Azure to create an app registration, grant Microsoft Graph application permissions with admin consent, create a client secret, and assign roles on the target subscription.
- At least one Azure subscription you can link (copy the Subscription ID from the Azure portal).
| Role in Azure | Typical requirement |
|---|---|
| Microsoft Entra ID | Create app registrations and grant admin consent for Microsoft Graph |
| Subscription | Assign Reader to the SecureSlate app on the subscription you connect |
Connect Microsoft Azure Cloud in SecureSlate
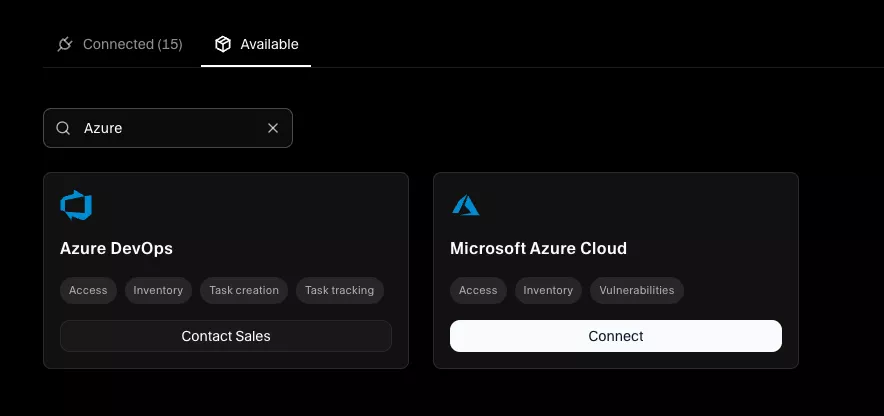
- In SecureSlate, open Integrations.
- On the Available tab, search for Microsoft Azure Cloud (or Azure).
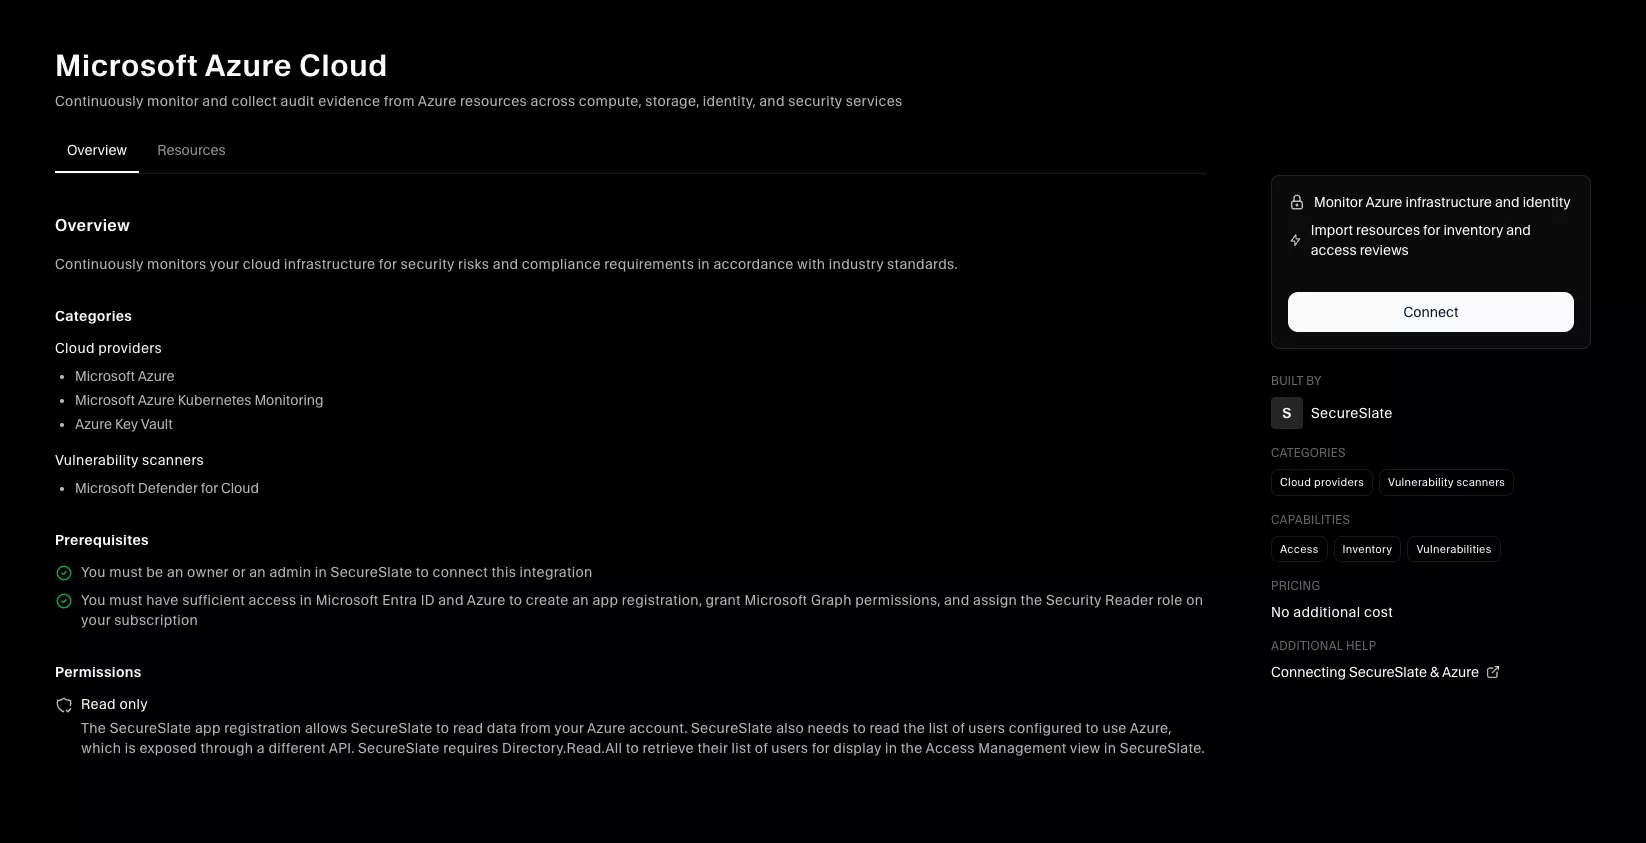
- Click Connect to open the Microsoft Azure Cloud integration overview, then click Connect again to start the setup wizard.
Choose your connection type
Select how you want to scope the integration:
- Subscription — Use this if you have one or a few subscriptions. Each subscription must be connected individually.
- Tenant — Use this if you manage many subscriptions under one Microsoft Entra tenant. (The Portal wizard steps are the same; repeat the flow per subscription as needed.)
Click Next.
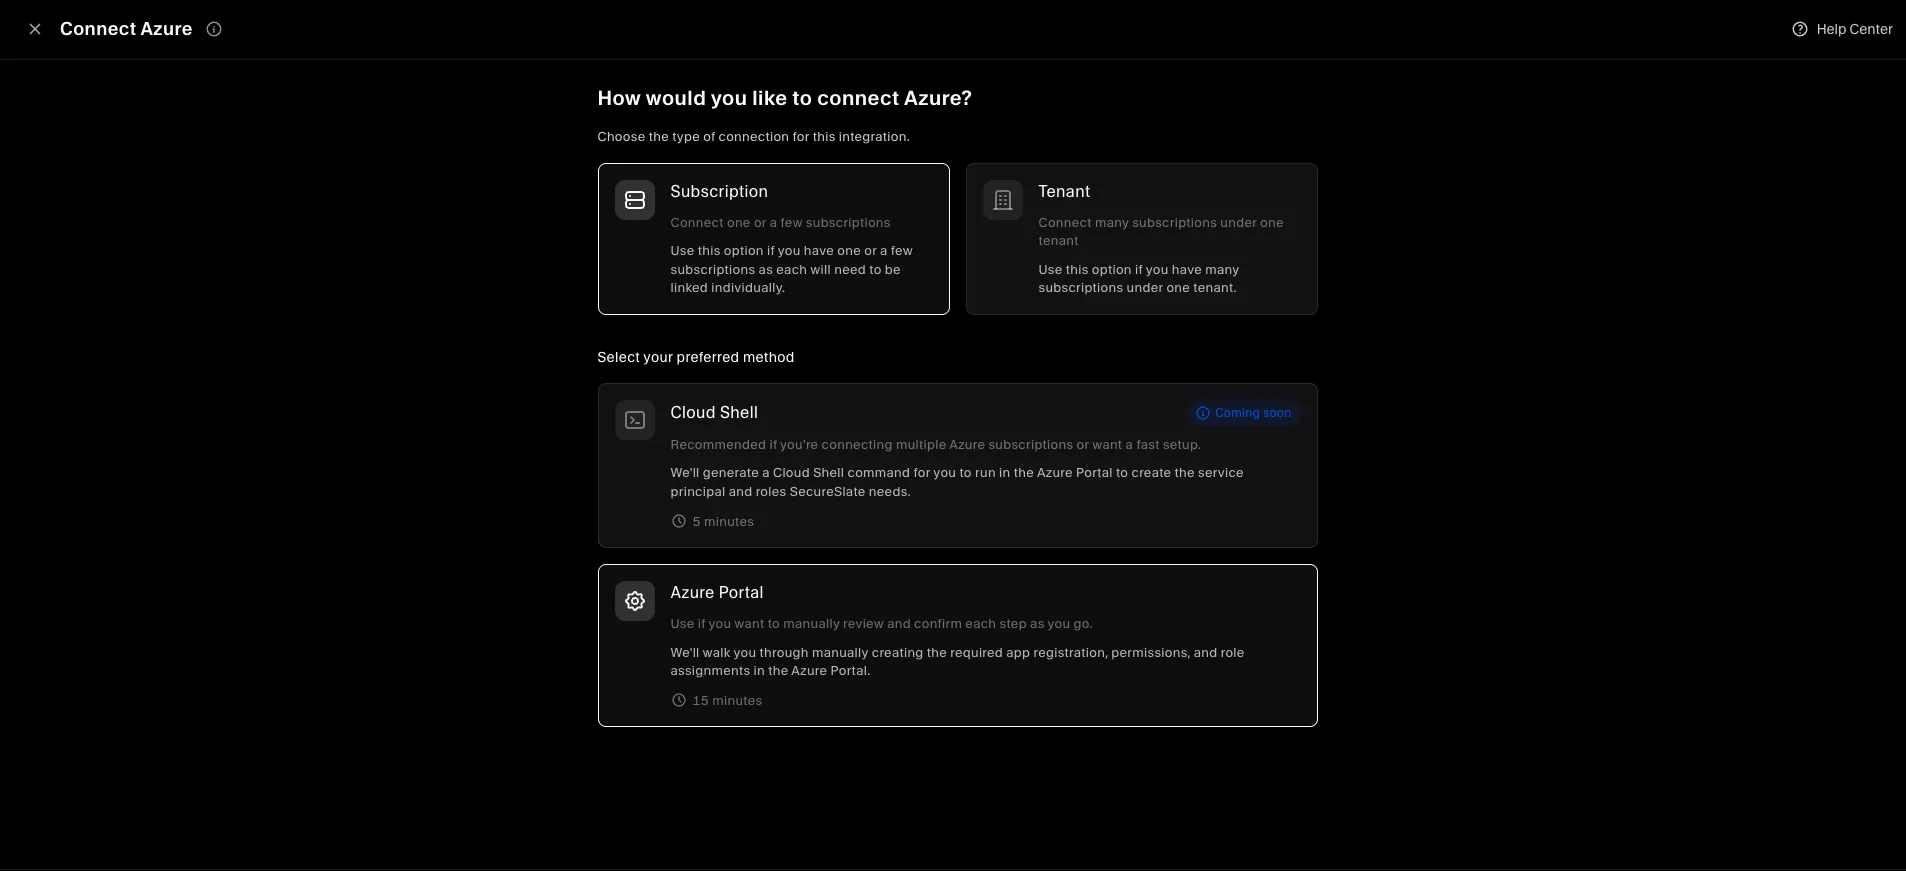
Select your setup method
Choose Azure Portal to walk through manual steps in the Azure UI.
- Cloud Shell — Faster setup for multiple subscriptions (marked Coming soon in SecureSlate).
Click Next.
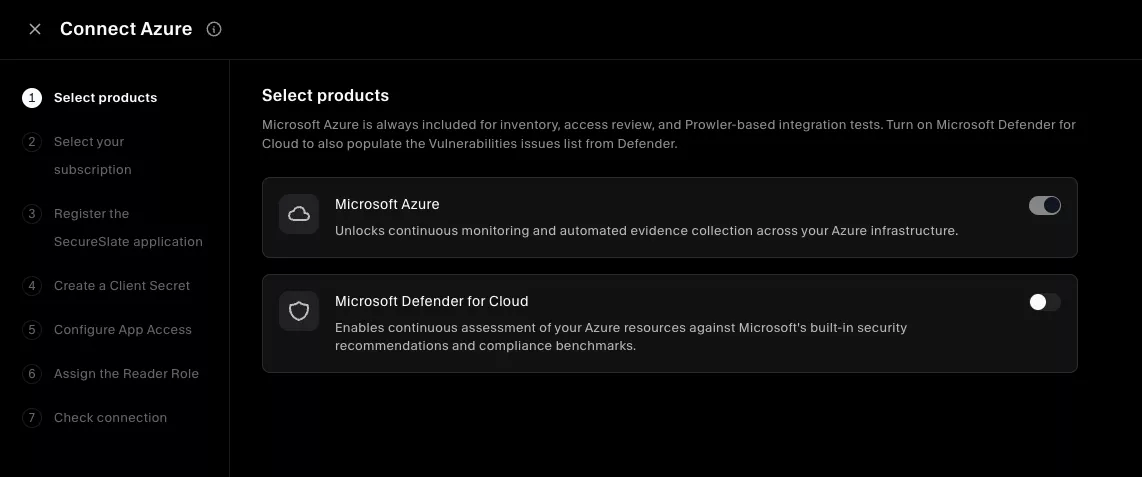
Select products
Choose which Azure capabilities to enable:
| Product | Default | Purpose |
|---|---|---|
| Microsoft Azure | Always on | Inventory sync, access review (directory users), and integration tests |
| Microsoft Defender for Cloud | Optional | Sync Defender assessments and vulnerabilities into SecureSlate |
Click Next when your selection is complete.

Select your Azure subscription
- In the Azure portal, go to Subscriptions (or open Subscriptions directly).
- Open the subscription you want SecureSlate to monitor.
- Copy the Subscription ID and paste it into SecureSlate.
- For Azure environment type, select Global (commercial Azure). Other sovereign clouds are not supported in this wizard yet.
Click Next.
Tip: If you do not see any subscriptions, confirm your account has access to a subscription in Azure before continuing.
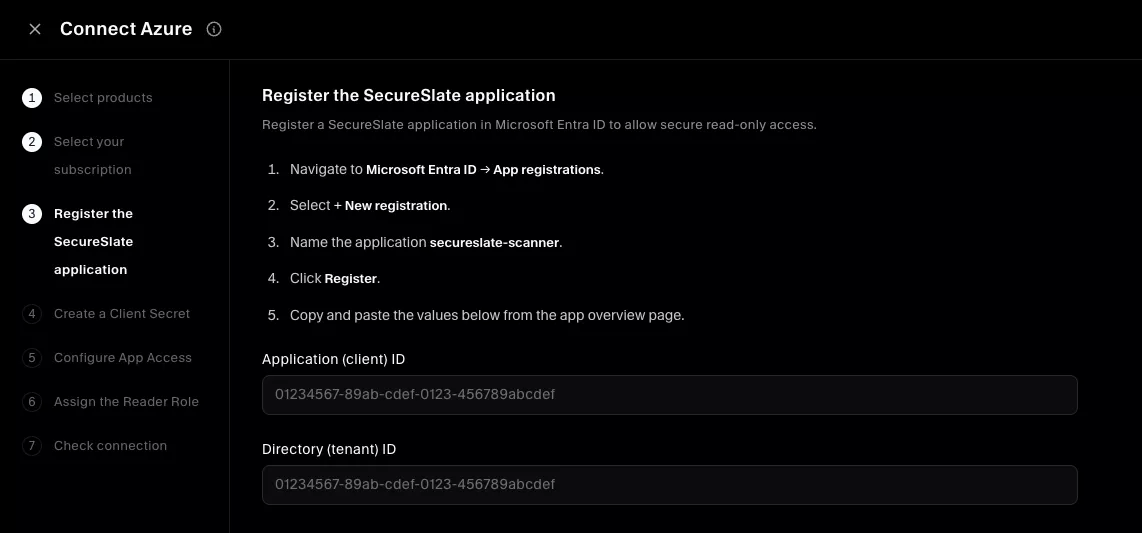
Register the SecureSlate application
Create an app registration so SecureSlate can authenticate with read-only credentials.
- In the Azure portal, go to Microsoft Entra ID → App registrations.
- Click + New registration.
- Enter
secureslate-scanneras the application name (use this exact name so you can find it later when assigning roles). - Leave Supported account types at the default: Accounts in this organizational directory only.
- Click Register.
- On the app Overview page, copy:
- Application (client) ID
- Directory (tenant) ID
- Paste both values into the corresponding fields in SecureSlate.
Click Next.
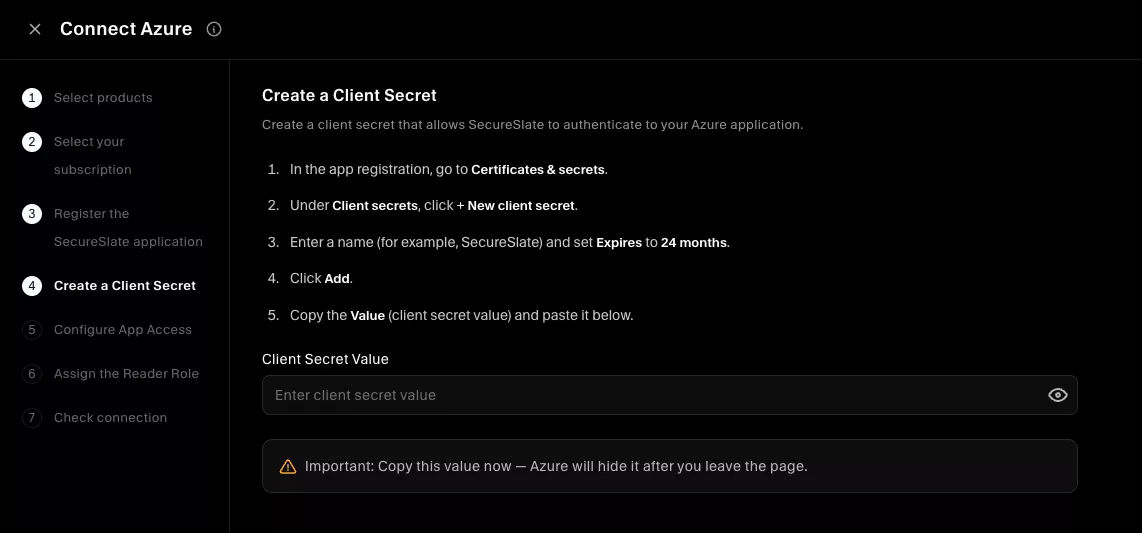
Create a client secret
- Open the
secureslate-scannerapp registration. - Go to Certificates & secrets.
- Under Client secrets, click + New client secret.
- Add a description (for example,
SecureSlate) and set Expires to 24 months (recommended). - Click Add.
- Copy the Value immediately the secret is only shown once.
Paste the Client Secret Value into SecureSlate and click Next.
Important: Azure hides the secret after you leave the page. If you lose it, create a new secret and update the integration in SecureSlate.
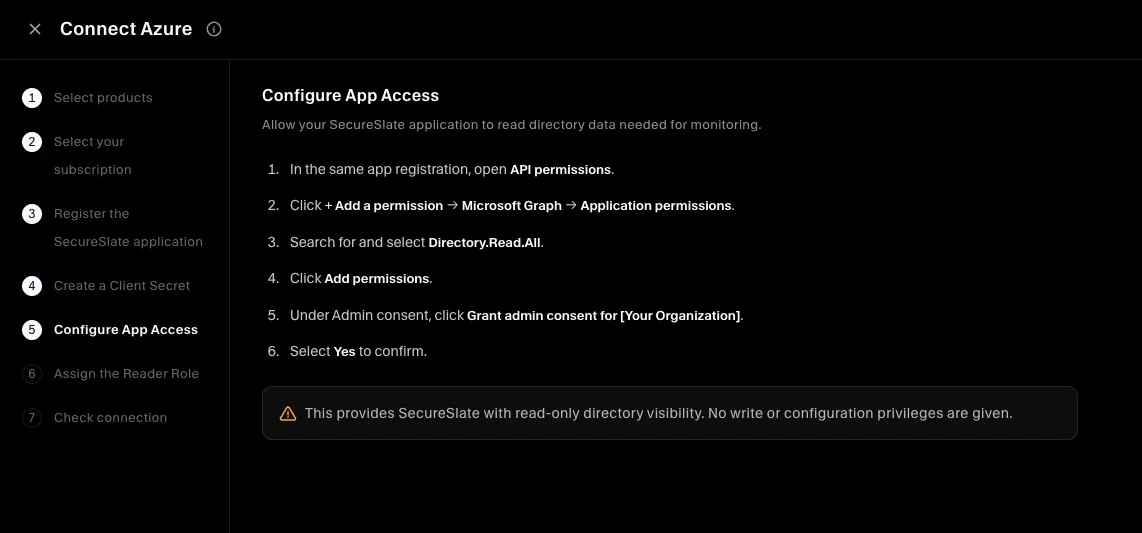
Configure app access
Grant read-only directory visibility for access reviews and user import.
- In the same app registration, open API permissions.
- Click + Add a permission → Microsoft Graph → Application permissions.
- Search for and select Directory.Read.All.
- Click Add permissions.
- Click Grant admin consent for [Your Organization] and confirm Yes.
SecureSlate only receives read-only directory data. No write or configuration privileges are granted.
Click Next.

Note: SecureSlate uses Microsoft Graph, not the legacy Azure AD Graph API. If you connected Azure to another tool before October 2021, you may need to recreate the app registration using Graph permissions.
Assign the Reader role
Grant the app read-only access to resources in the subscription you selected.
- In the Azure portal, open the subscription you connected (use the Subscription ID from the earlier step).
- Select Access control (IAM).
- Click + Add → Add role assignment.
- Under Role, select Reader.
- Under Assign access to, select User, group, or service principal.
- Click + Select members, search for
secureslate-scanner, and select the application. - Click Review + assign to finish.
Click Next in SecureSlate.
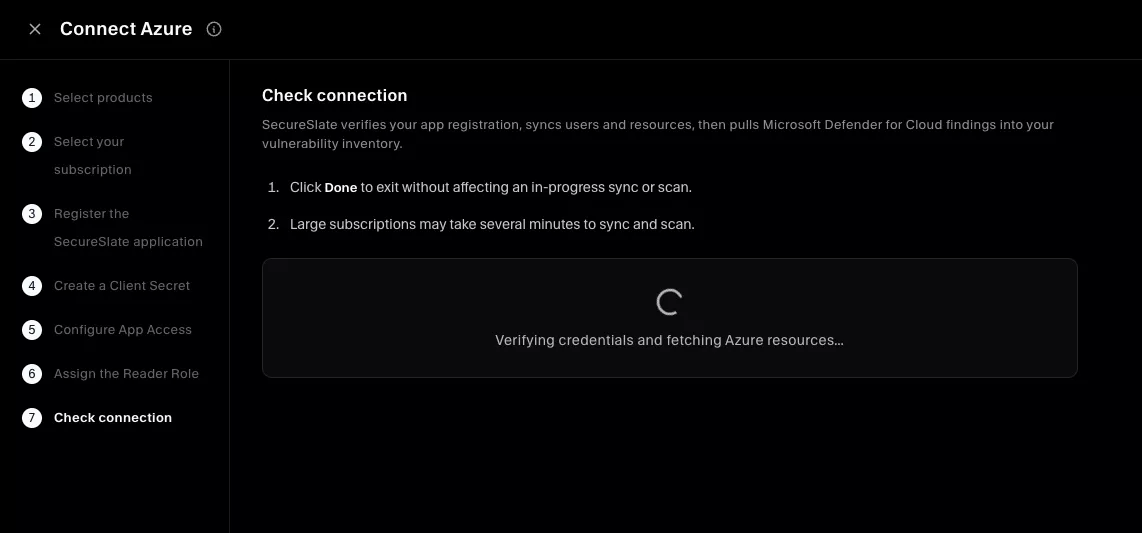
Check connection
On the final step, SecureSlate verifies credentials, saves the integration, and starts the initial sync (inventory, access data, integration tests, and—if enabled—Microsoft Defender for Cloud data).
When setup succeeds, you see a confirmation that the connection is established. The integration appears under Active connections on the Integrations page.
Verify the integration
To confirm everything is working:
- Open Integrations and confirm Microsoft Azure Cloud is listed under Active connections.
- Open Vulnerabilities and select the connected Azure cloud.
- Review:
- Checks — misconfiguration and compliance findings
- Inventory — synced Azure resources
- Access — directory users imported for access review (requires Directory.Read.All)
- If you enabled Microsoft Defender for Cloud, review vulnerability and assessment data on the relevant views after the first Defender sync completes.
Connect additional subscriptions
If you chose Subscription as the connection type, repeat this wizard for each subscription you want SecureSlate to monitor. Use the same secureslate-scanner app registration and assign Reader on each subscription, or create a dedicated app per subscription if your security policy requires it.
Related guides
- Getting started with Integrations — how Active connections and the integration catalog work.
- Connect Google Cloud Platform (GCP) to SecureSlate — similar cloud provider setup for GCP.
- Connecting SecureSlate & AWS Accounts — AWS role-based connection flow.
Troubleshooting
| Symptom | What to check |
|---|---|
| Connection fails at Check connection | Application (client) ID, Directory (tenant) ID, and client secret match the secureslate-scanner app; secret has not expired. |
| No inventory or subscription errors | Reader is assigned on the same subscription ID you entered in SecureSlate, for the secureslate-scanner enterprise application. |
| No users in Access | Directory.Read.All is added under Application permissions (not Delegated) and admin consent is granted. |
| Defender data missing | Microsoft Defender for Cloud was enabled in Select products; allow time for the first Defender sync after connection. |
| Wrong subscription monitored | Subscription ID in SecureSlate matches the subscription where IAM roles and resources were configured. |
If errors persist, open the integration from Active connections, update credentials (for example, a new client secret), and retry sync from the integration or cloud details page.
