User Access
Access Reviews
Access reviews in SecureSlate help you regularly confirm that the right people have the right level of access to your systems—similar to access review features in other compliance tools, but fully integrated with your existing SecureSlate data.
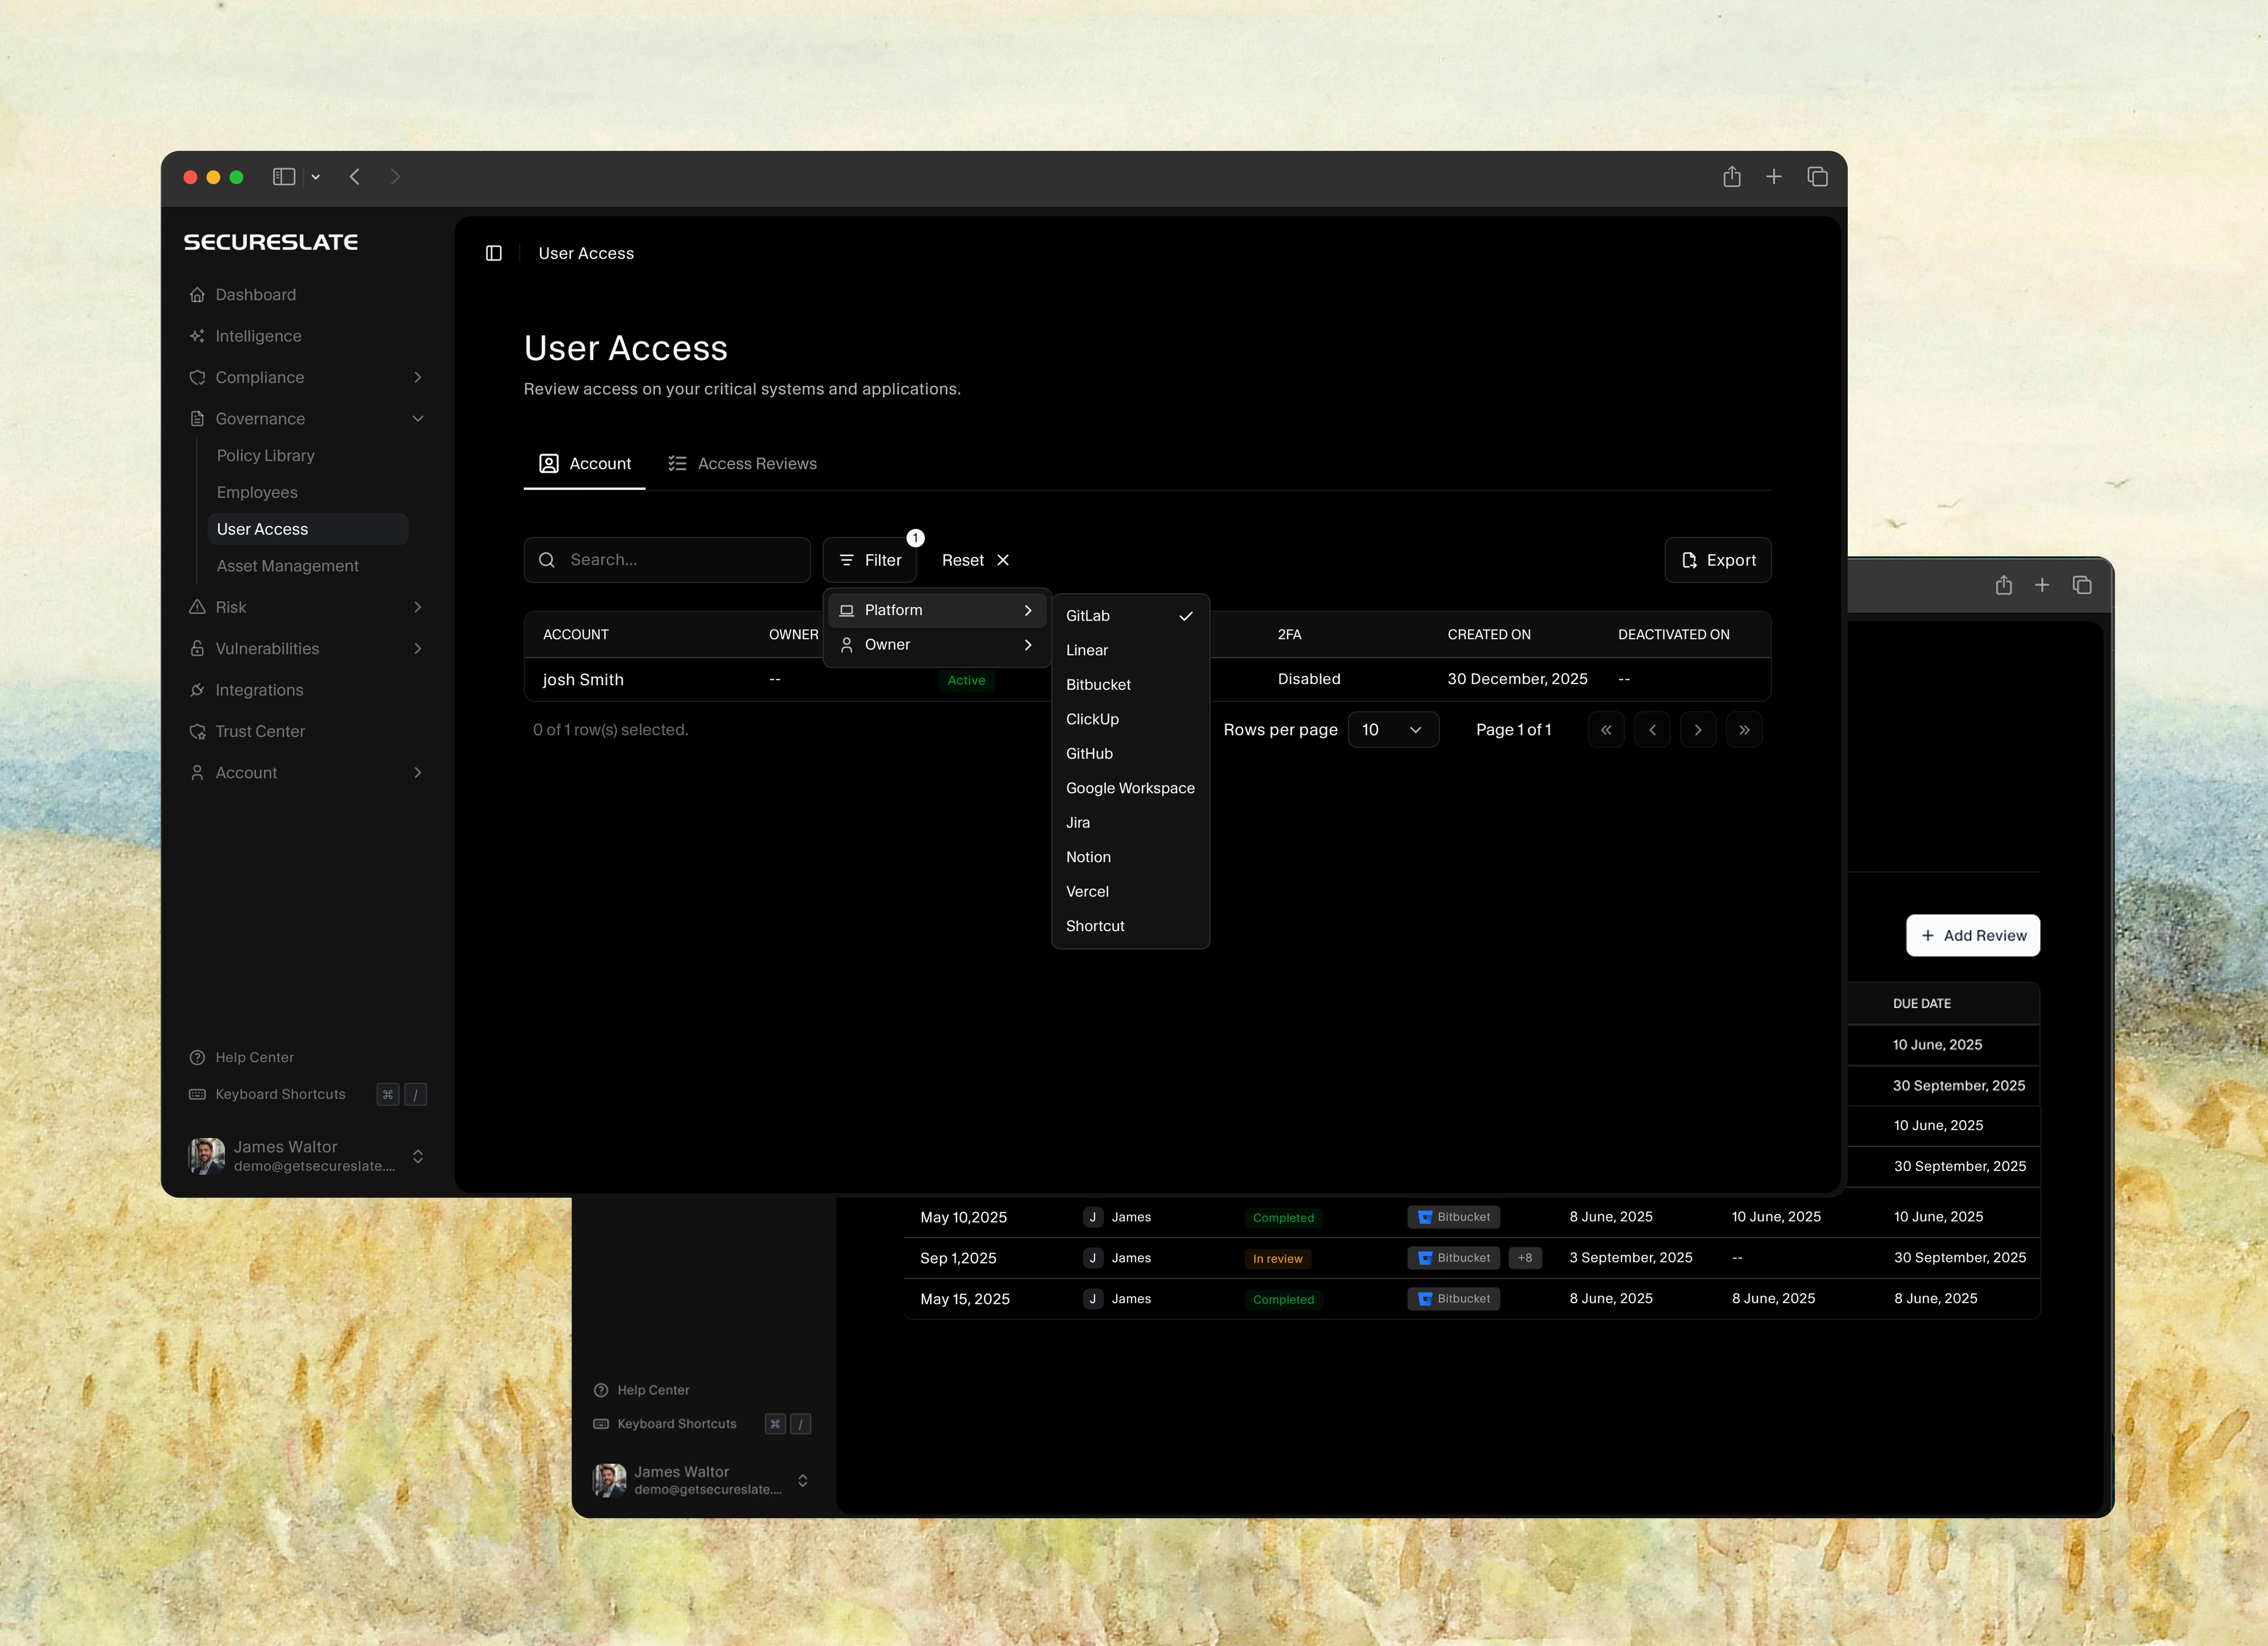
SecureSlate automatically pulls account access from your connected integrations into the User Access → Account tab. Access reviews use this data so you can periodically verify and document access decisions for audits.
The Account tab is SecureSlate’s built-in access inventory. When it surfaces issues—unassigned owners, disabled MFA, or inactive accounts—click Auto Fix to launch the auto-remediation workflow that prepares your stack for review. See Getting Started with User Access and Access review auto-remediation.
Before you start
Make sure:
- Your key systems (for example, SSO/IdP, code repos, ticketing, cloud, HR) are connected via Integrations.
- On User Access → Account, resolve issue badges (Unassigned, MFA off, Inactive) using Auto Fix or manual owner assignment.
- Every in-scope account has an owner assigned before you start a review.
Open the Access Reviews page
- From the sidebar, go to User Access.
- Click the Access Reviews tab at the top.
At the top of the page you’ll see:
- A donut chart of systems by inherent risk score (High, Medium, Low, Unscored).
- Totals for each risk band to help prioritize which systems to review first.
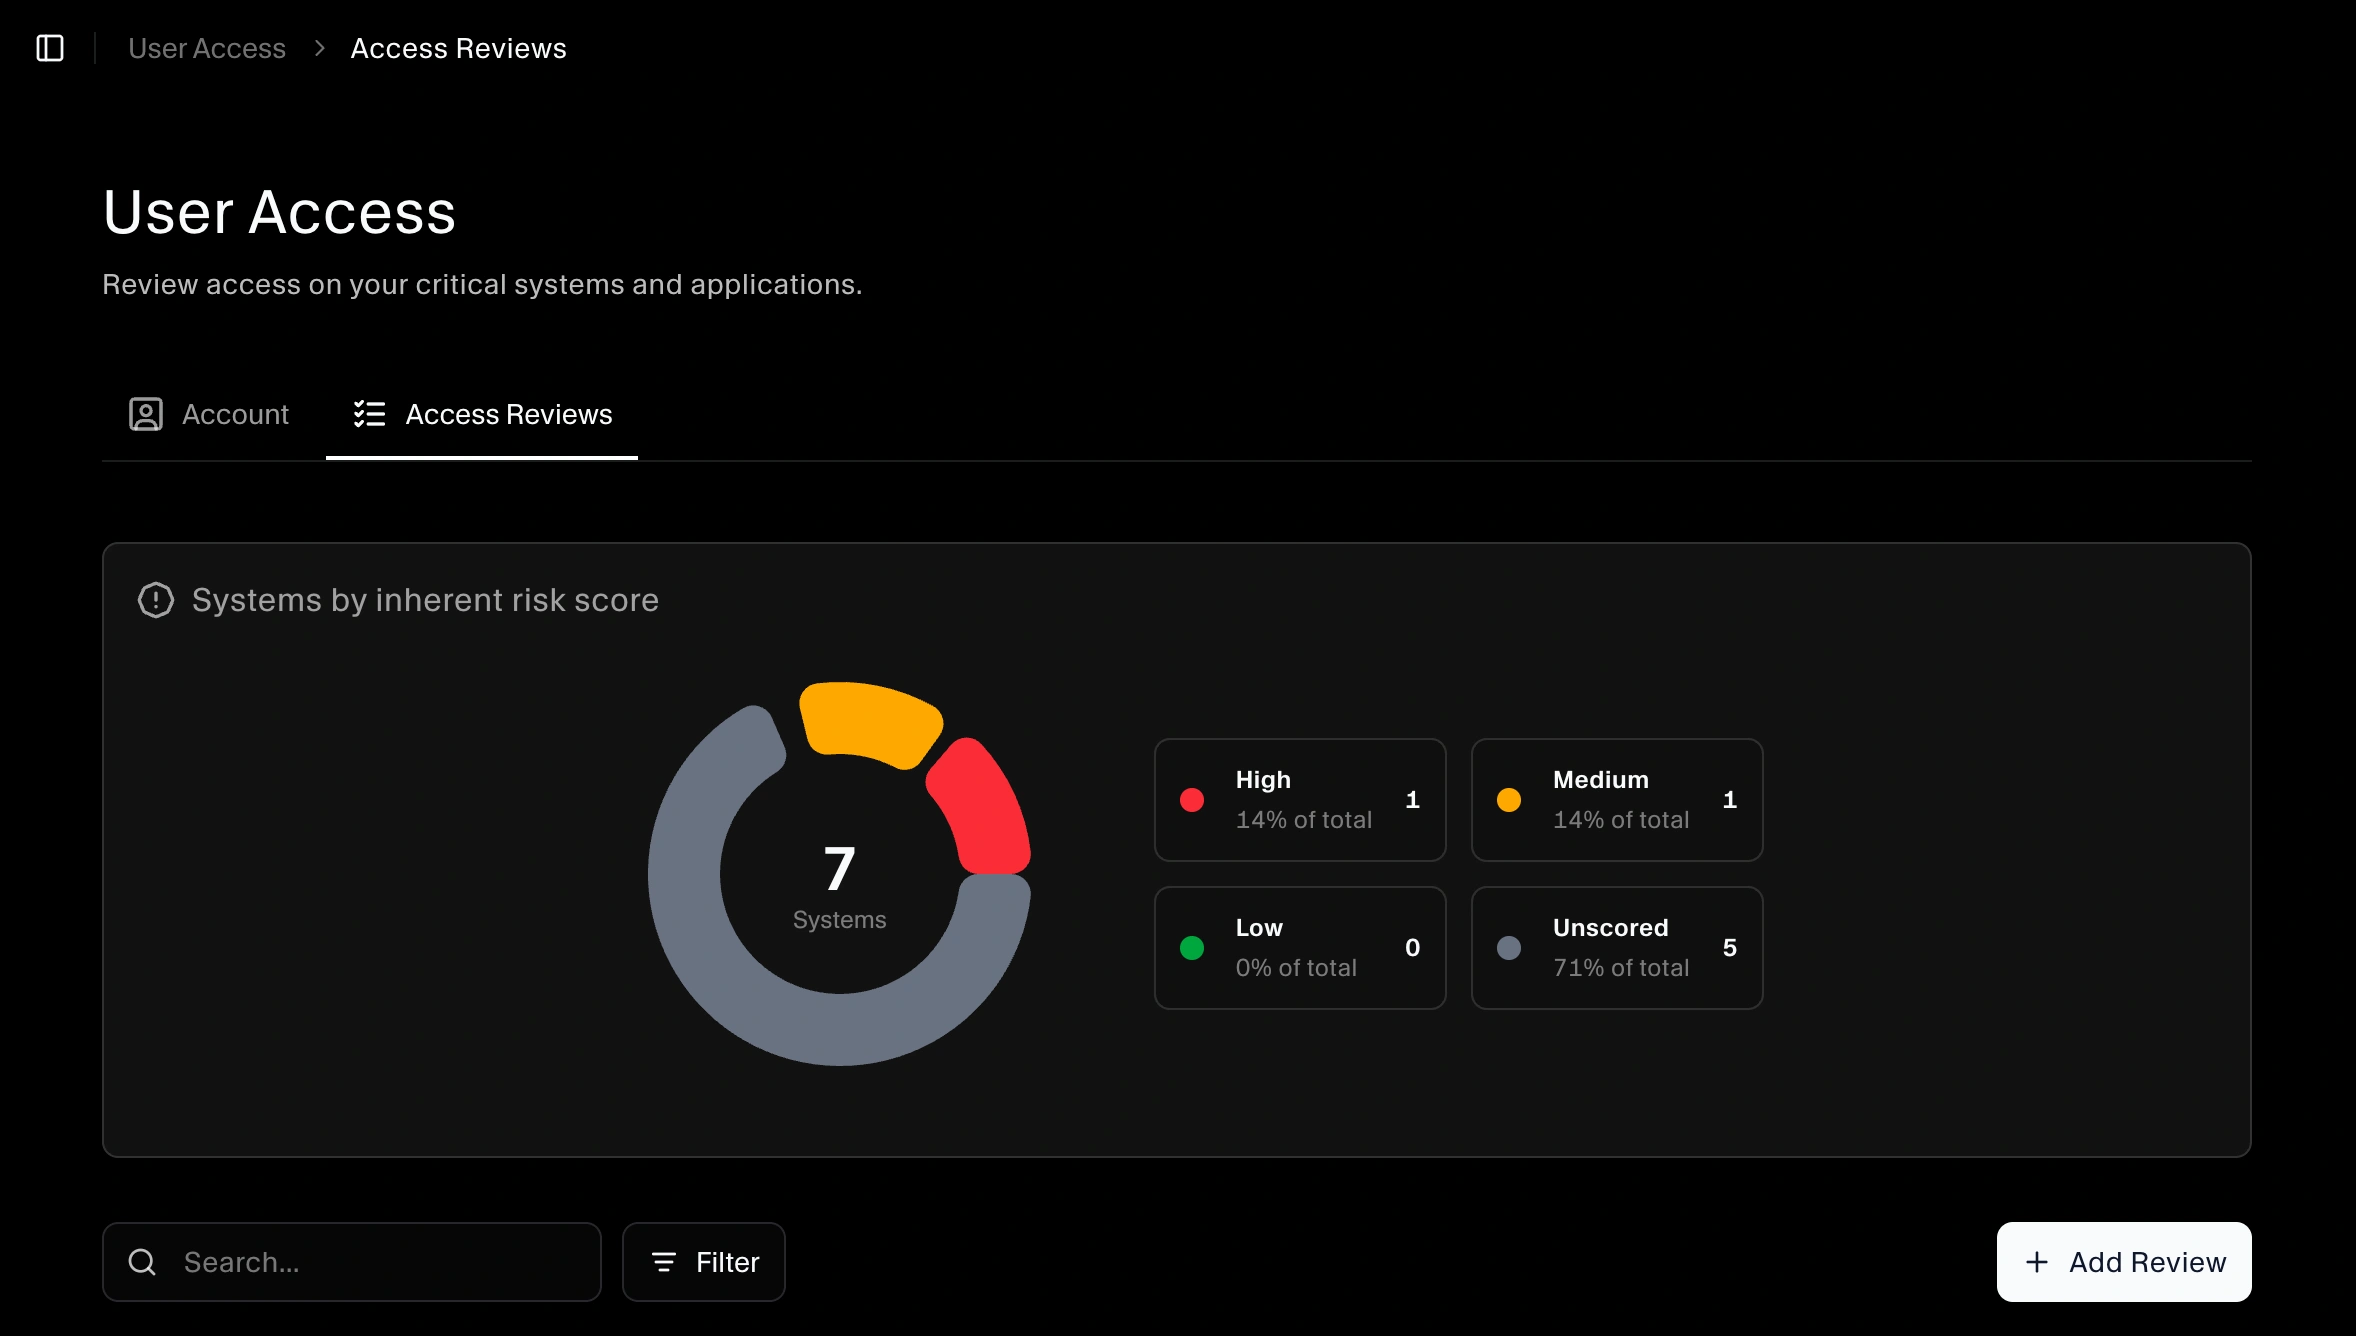
Below that is the reviews table with details like Review name, Reviewer, Status, Reviewing (system/vendor), Started on, Completed on, and Due date.
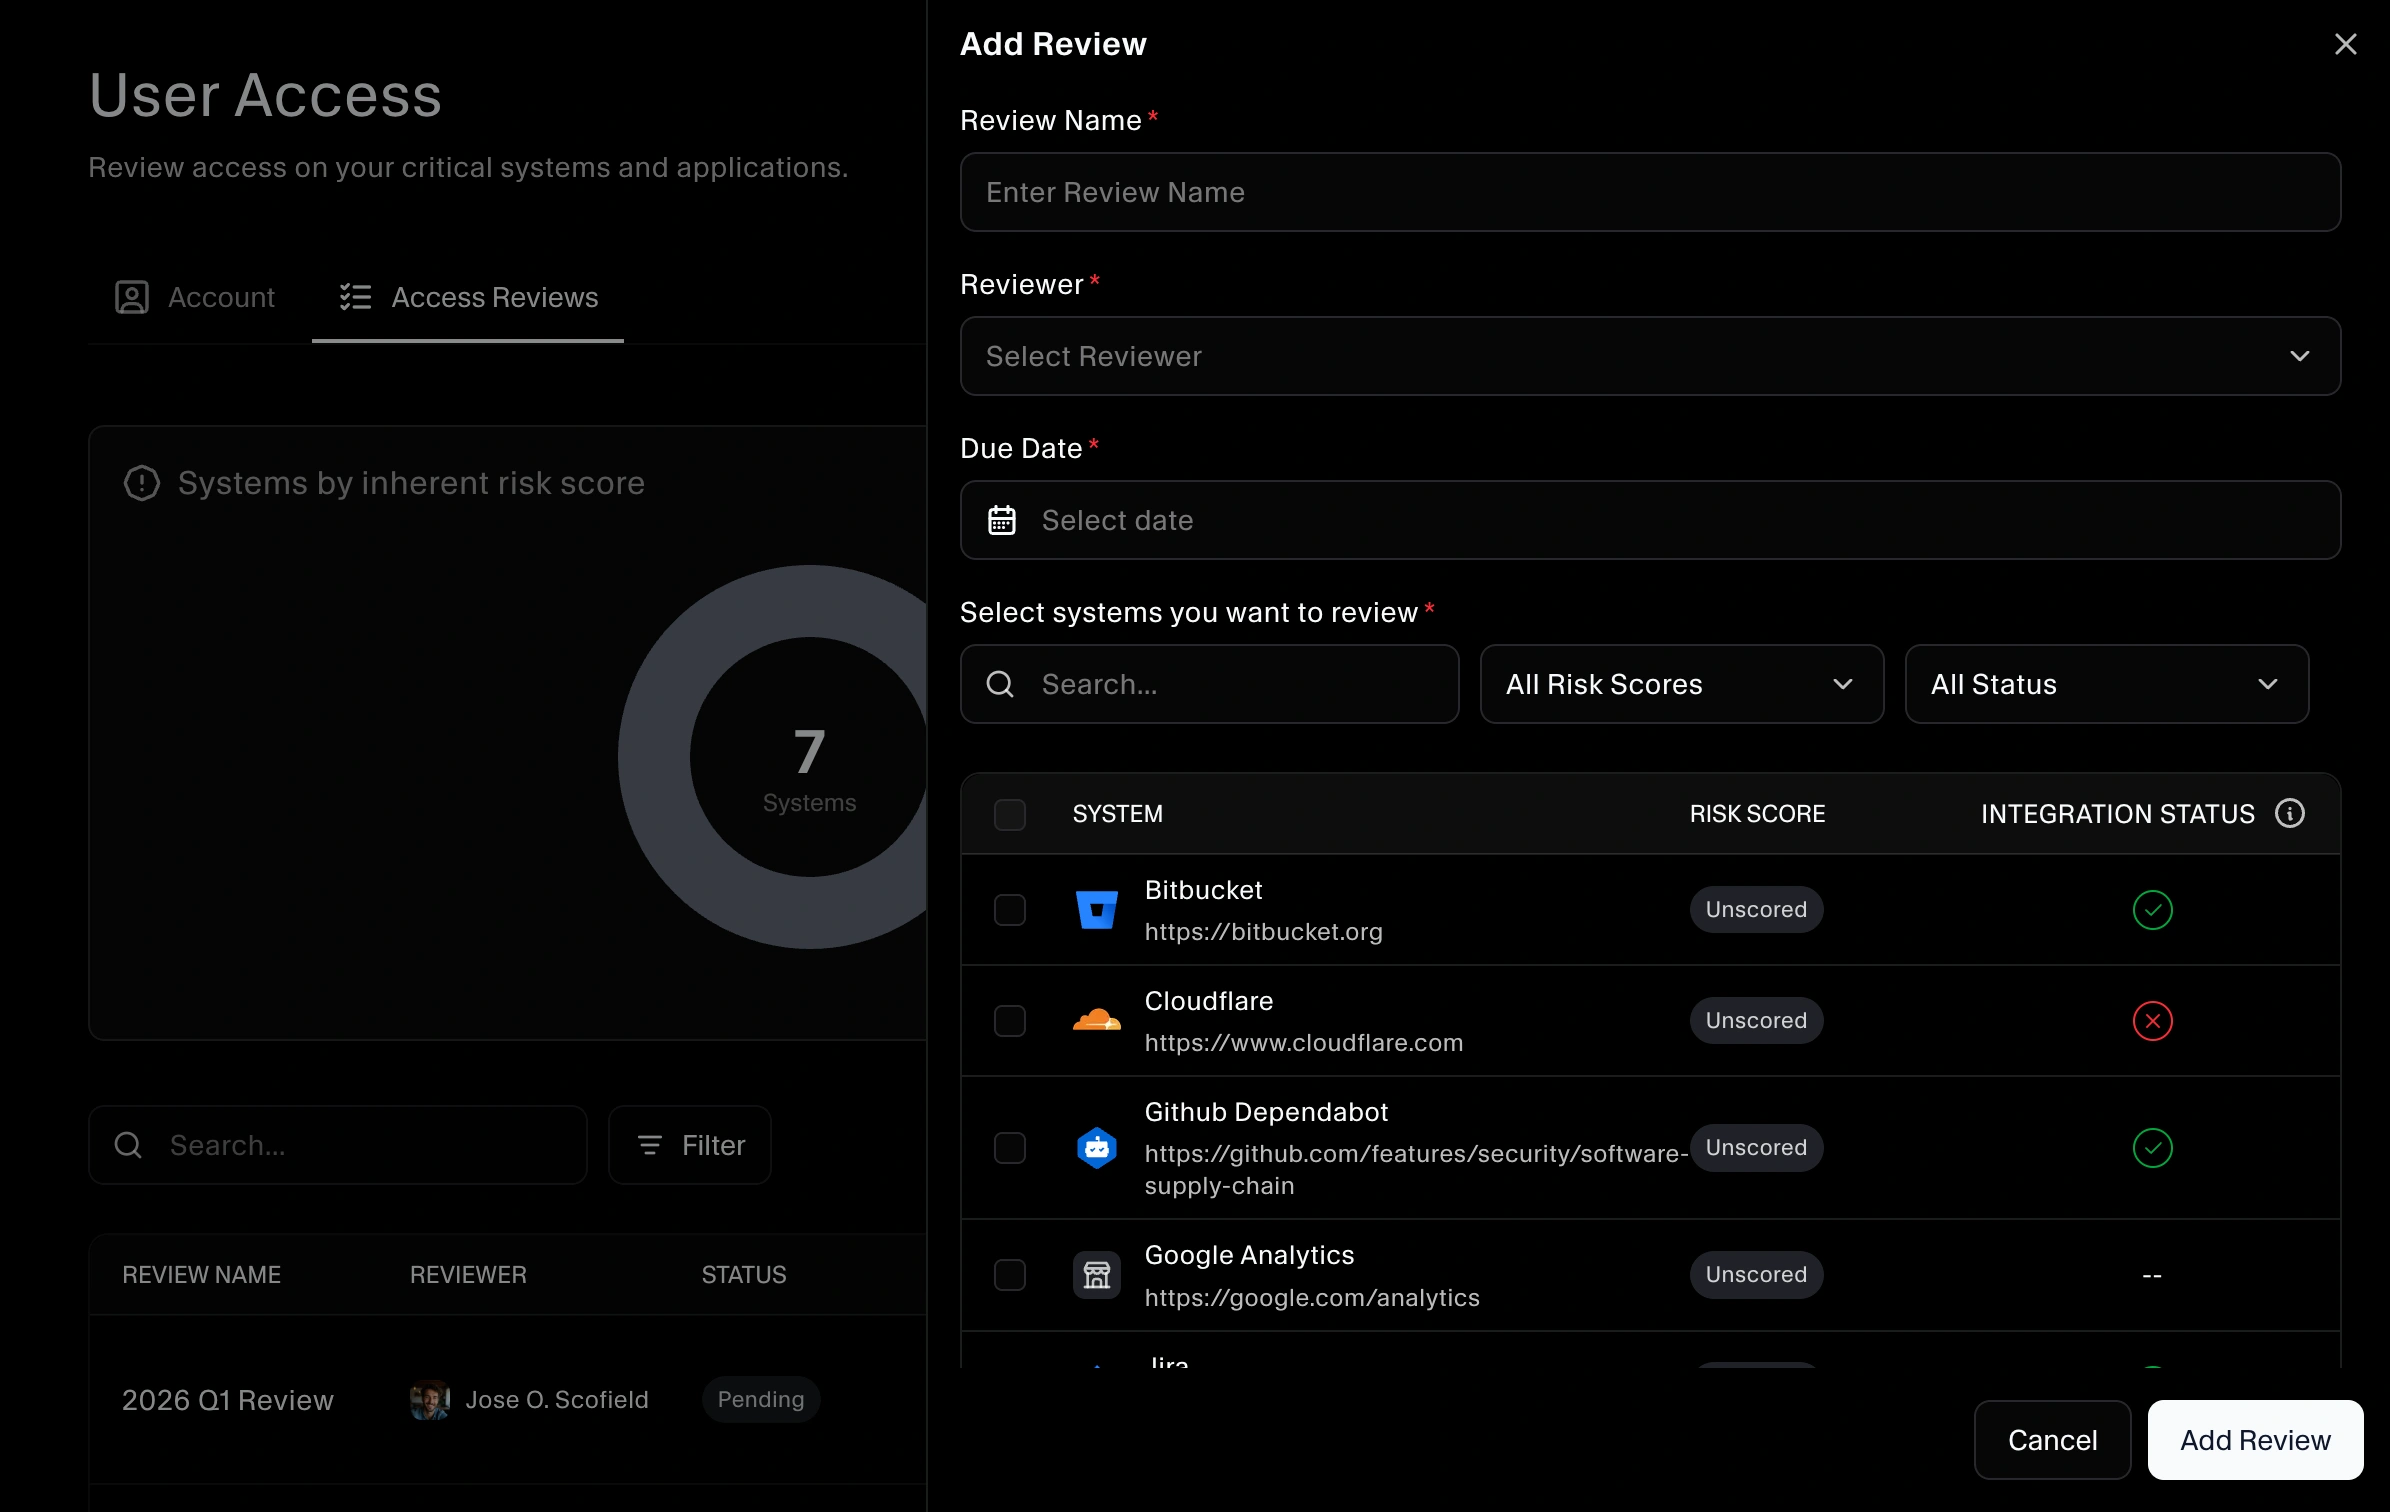
Create a new access review
Use Add Review to start a new review cycle.
- On the Access Reviews tab, click Add Review.
- Give the review a clear name (for example, “Q1 2026 Access Review – Production Systems”).
- Select the systems/vendors that will be in scope for this review.
- Choose a reviewer (the person responsible for making access decisions).
- Set start and due dates.
- Save the review to create it.
Once the review is created and started, the reviewer will see the in-scope systems and related accounts that need to be evaluated.
Reviewing access for each system
For each system included in the review:
- Open the review from the Access Reviews table.
- Click on Start Review to start the review.
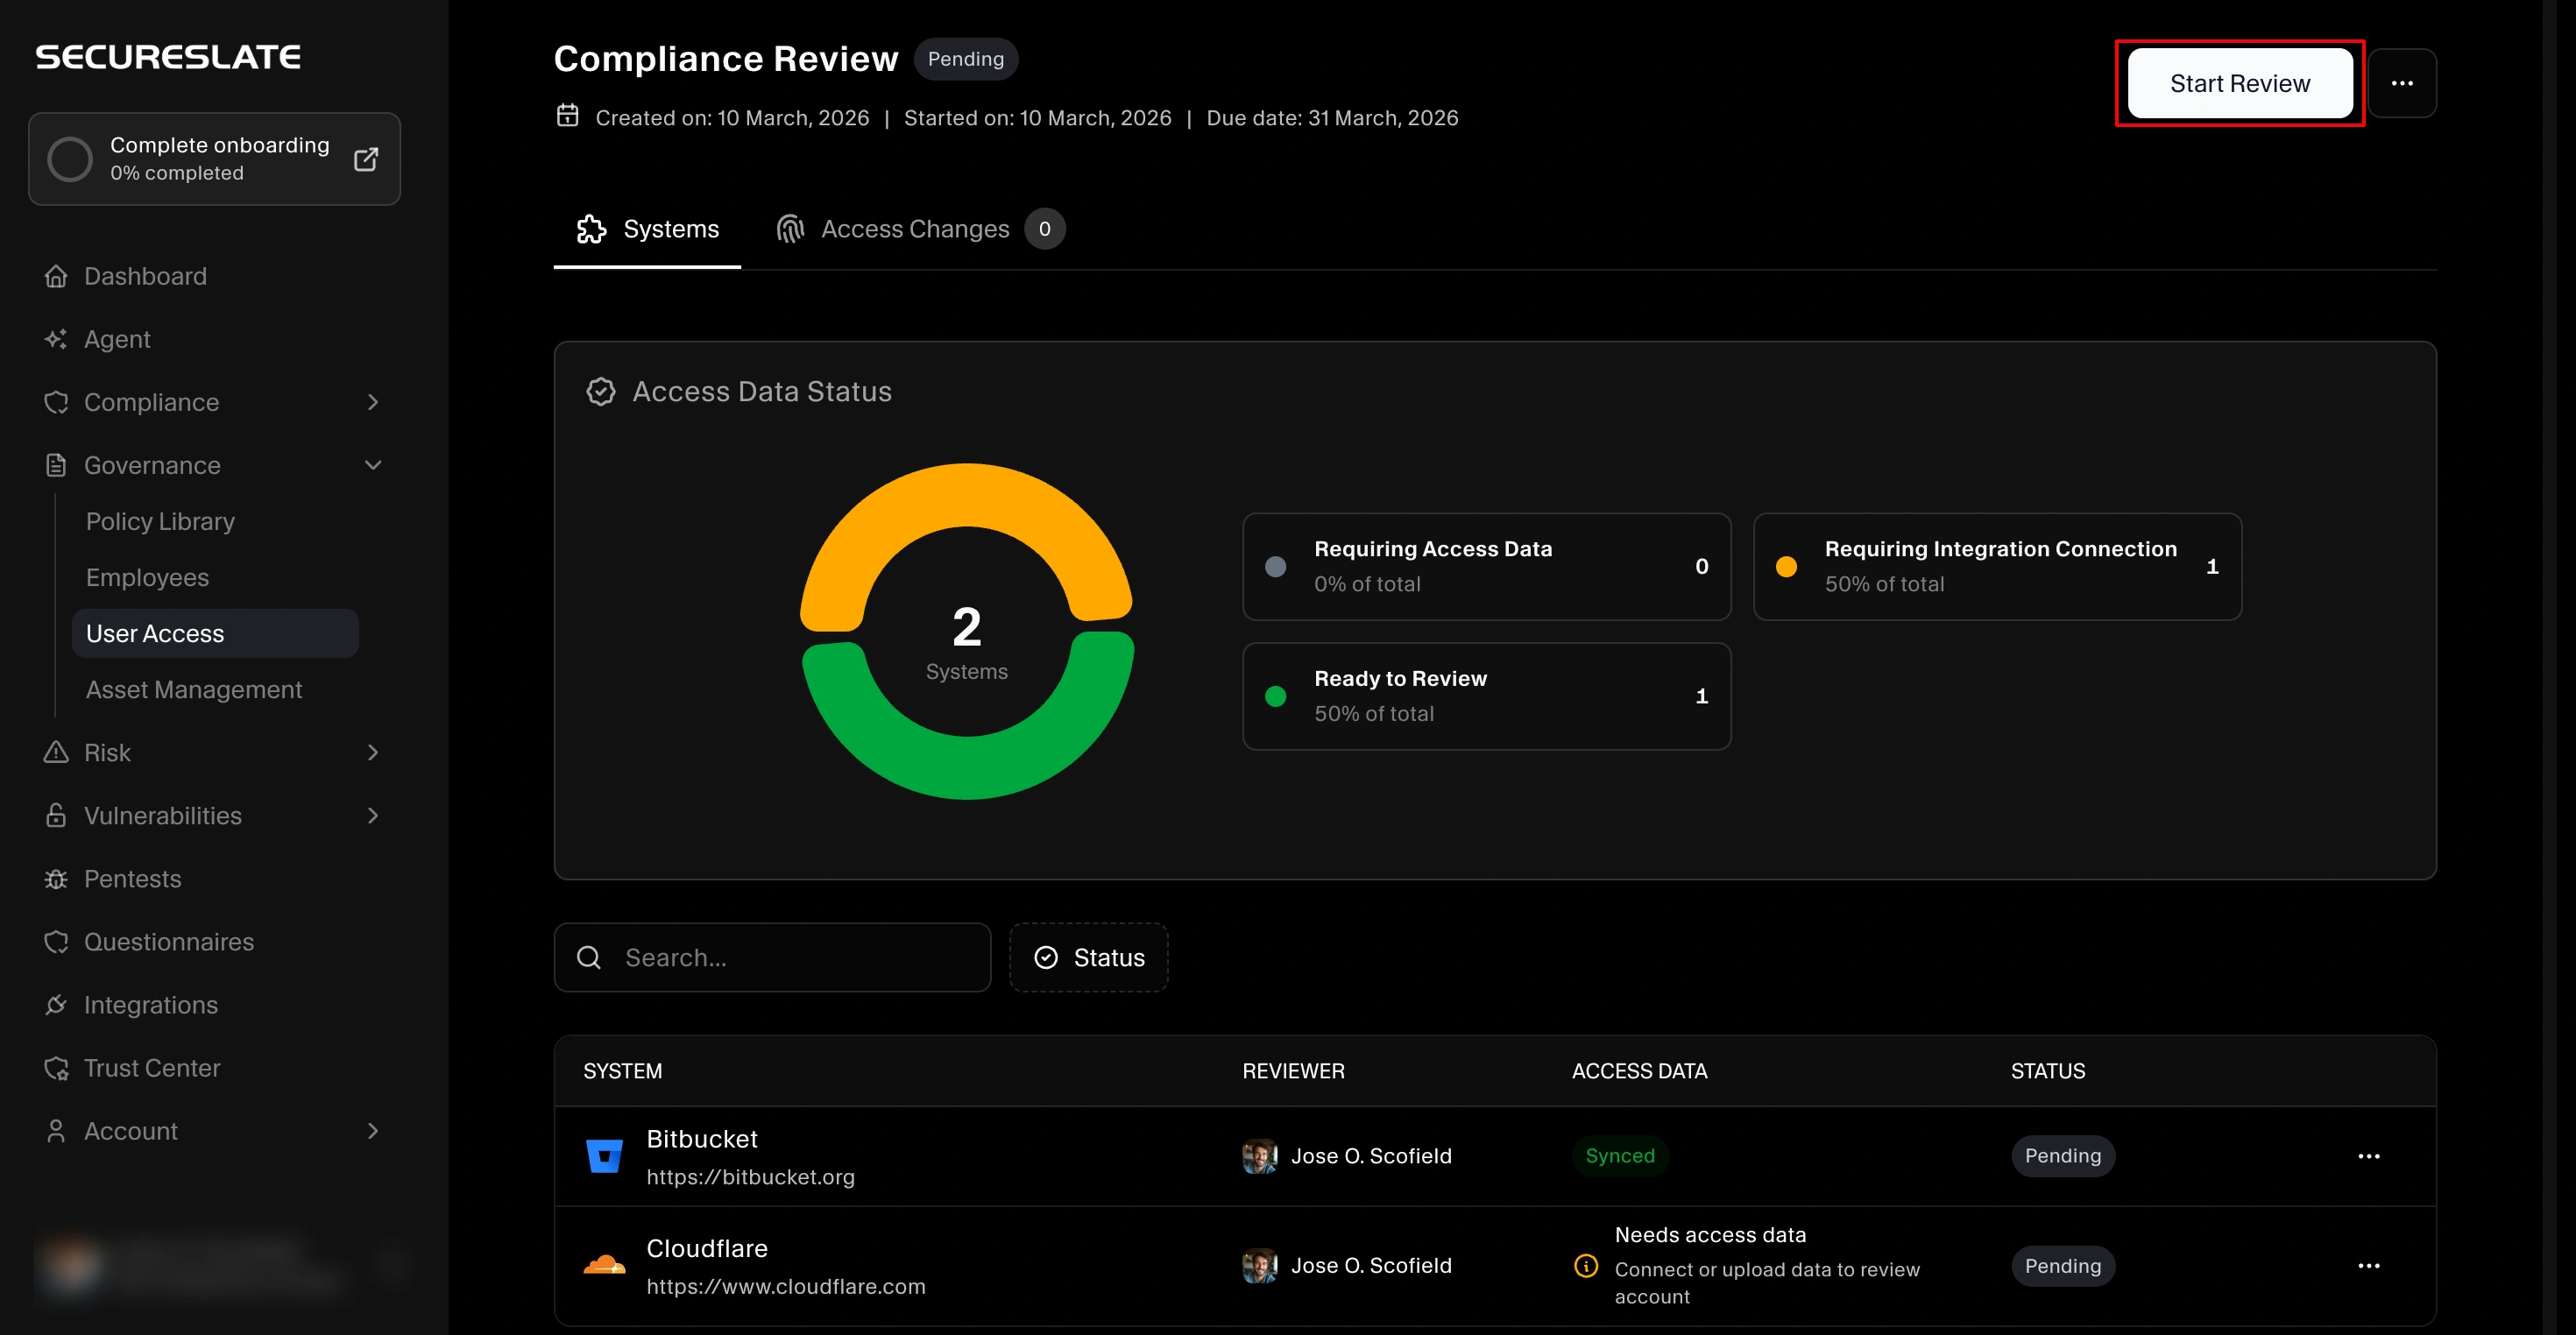
- Click a system/vendor in the review to view its accounts.
- For each account, the reviewer decides whether access is still appropriate, needs to be changed, or should be removed, based on the user’s role and least‑privilege principles.
- Optionally add notes to explain unusual cases or exceptions.
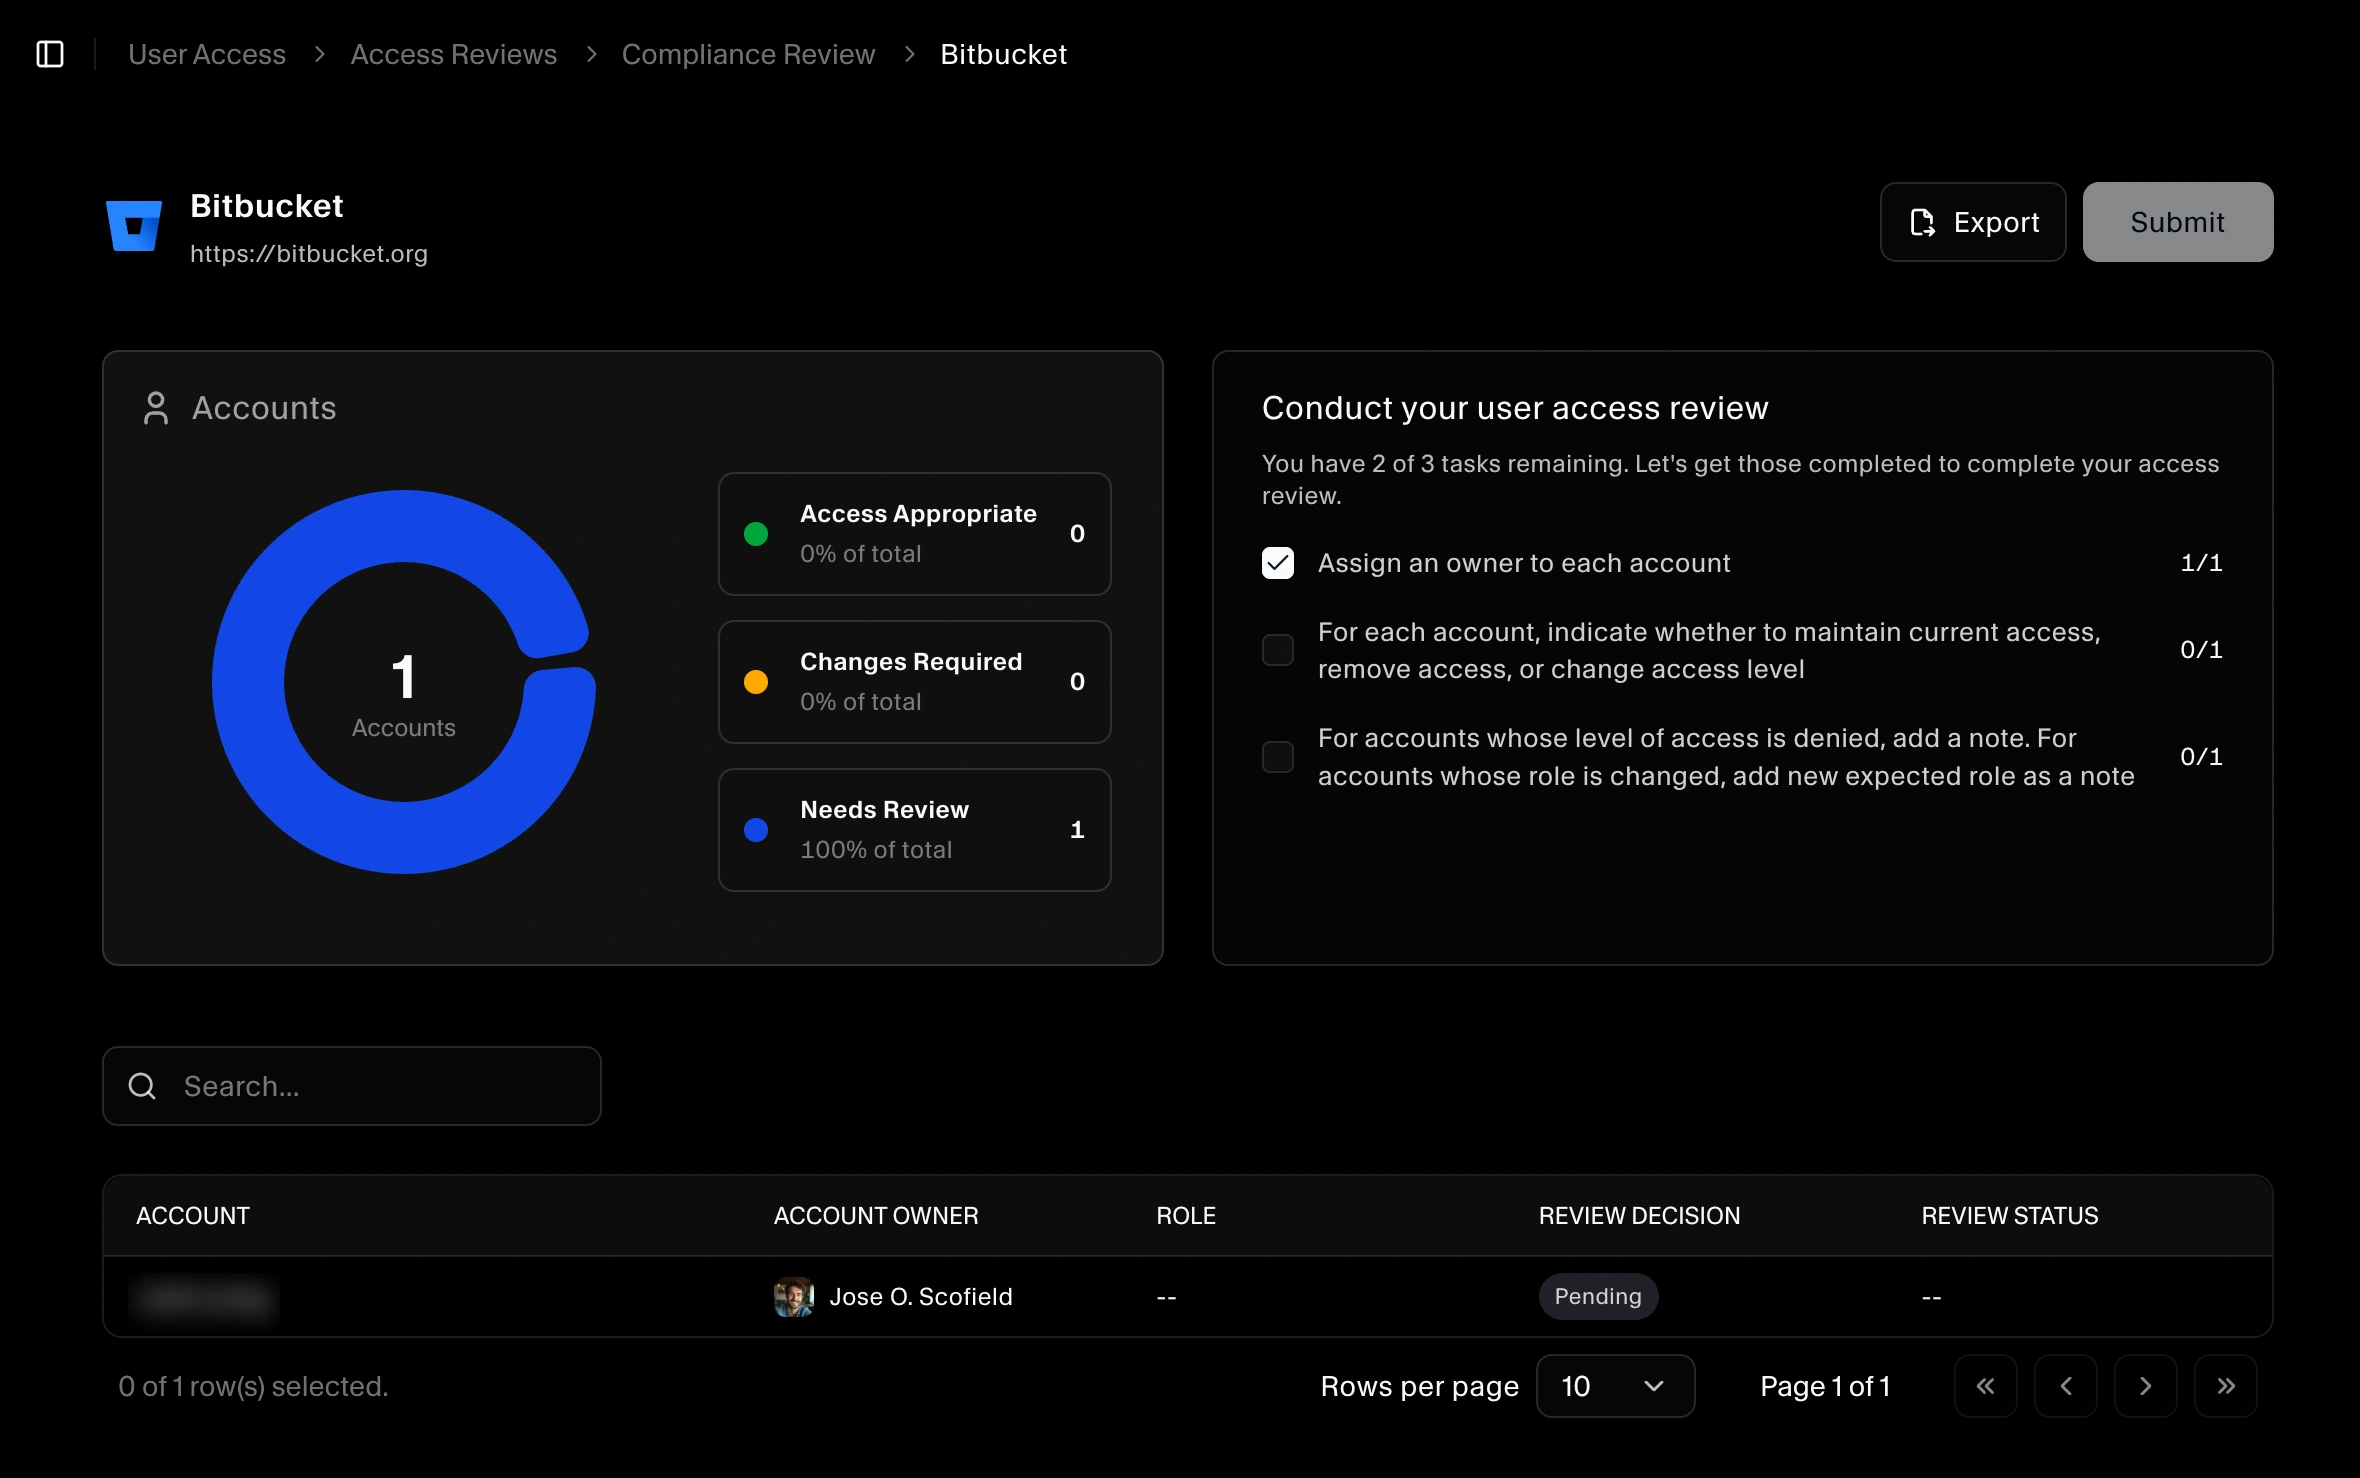
All accounts should have an owner assigned before the review is submitted.
Completing a review
When all accounts for the in-scope systems have been evaluated:
- Confirm that every account has a decision recorded.
- Submit or mark the review as Completed.
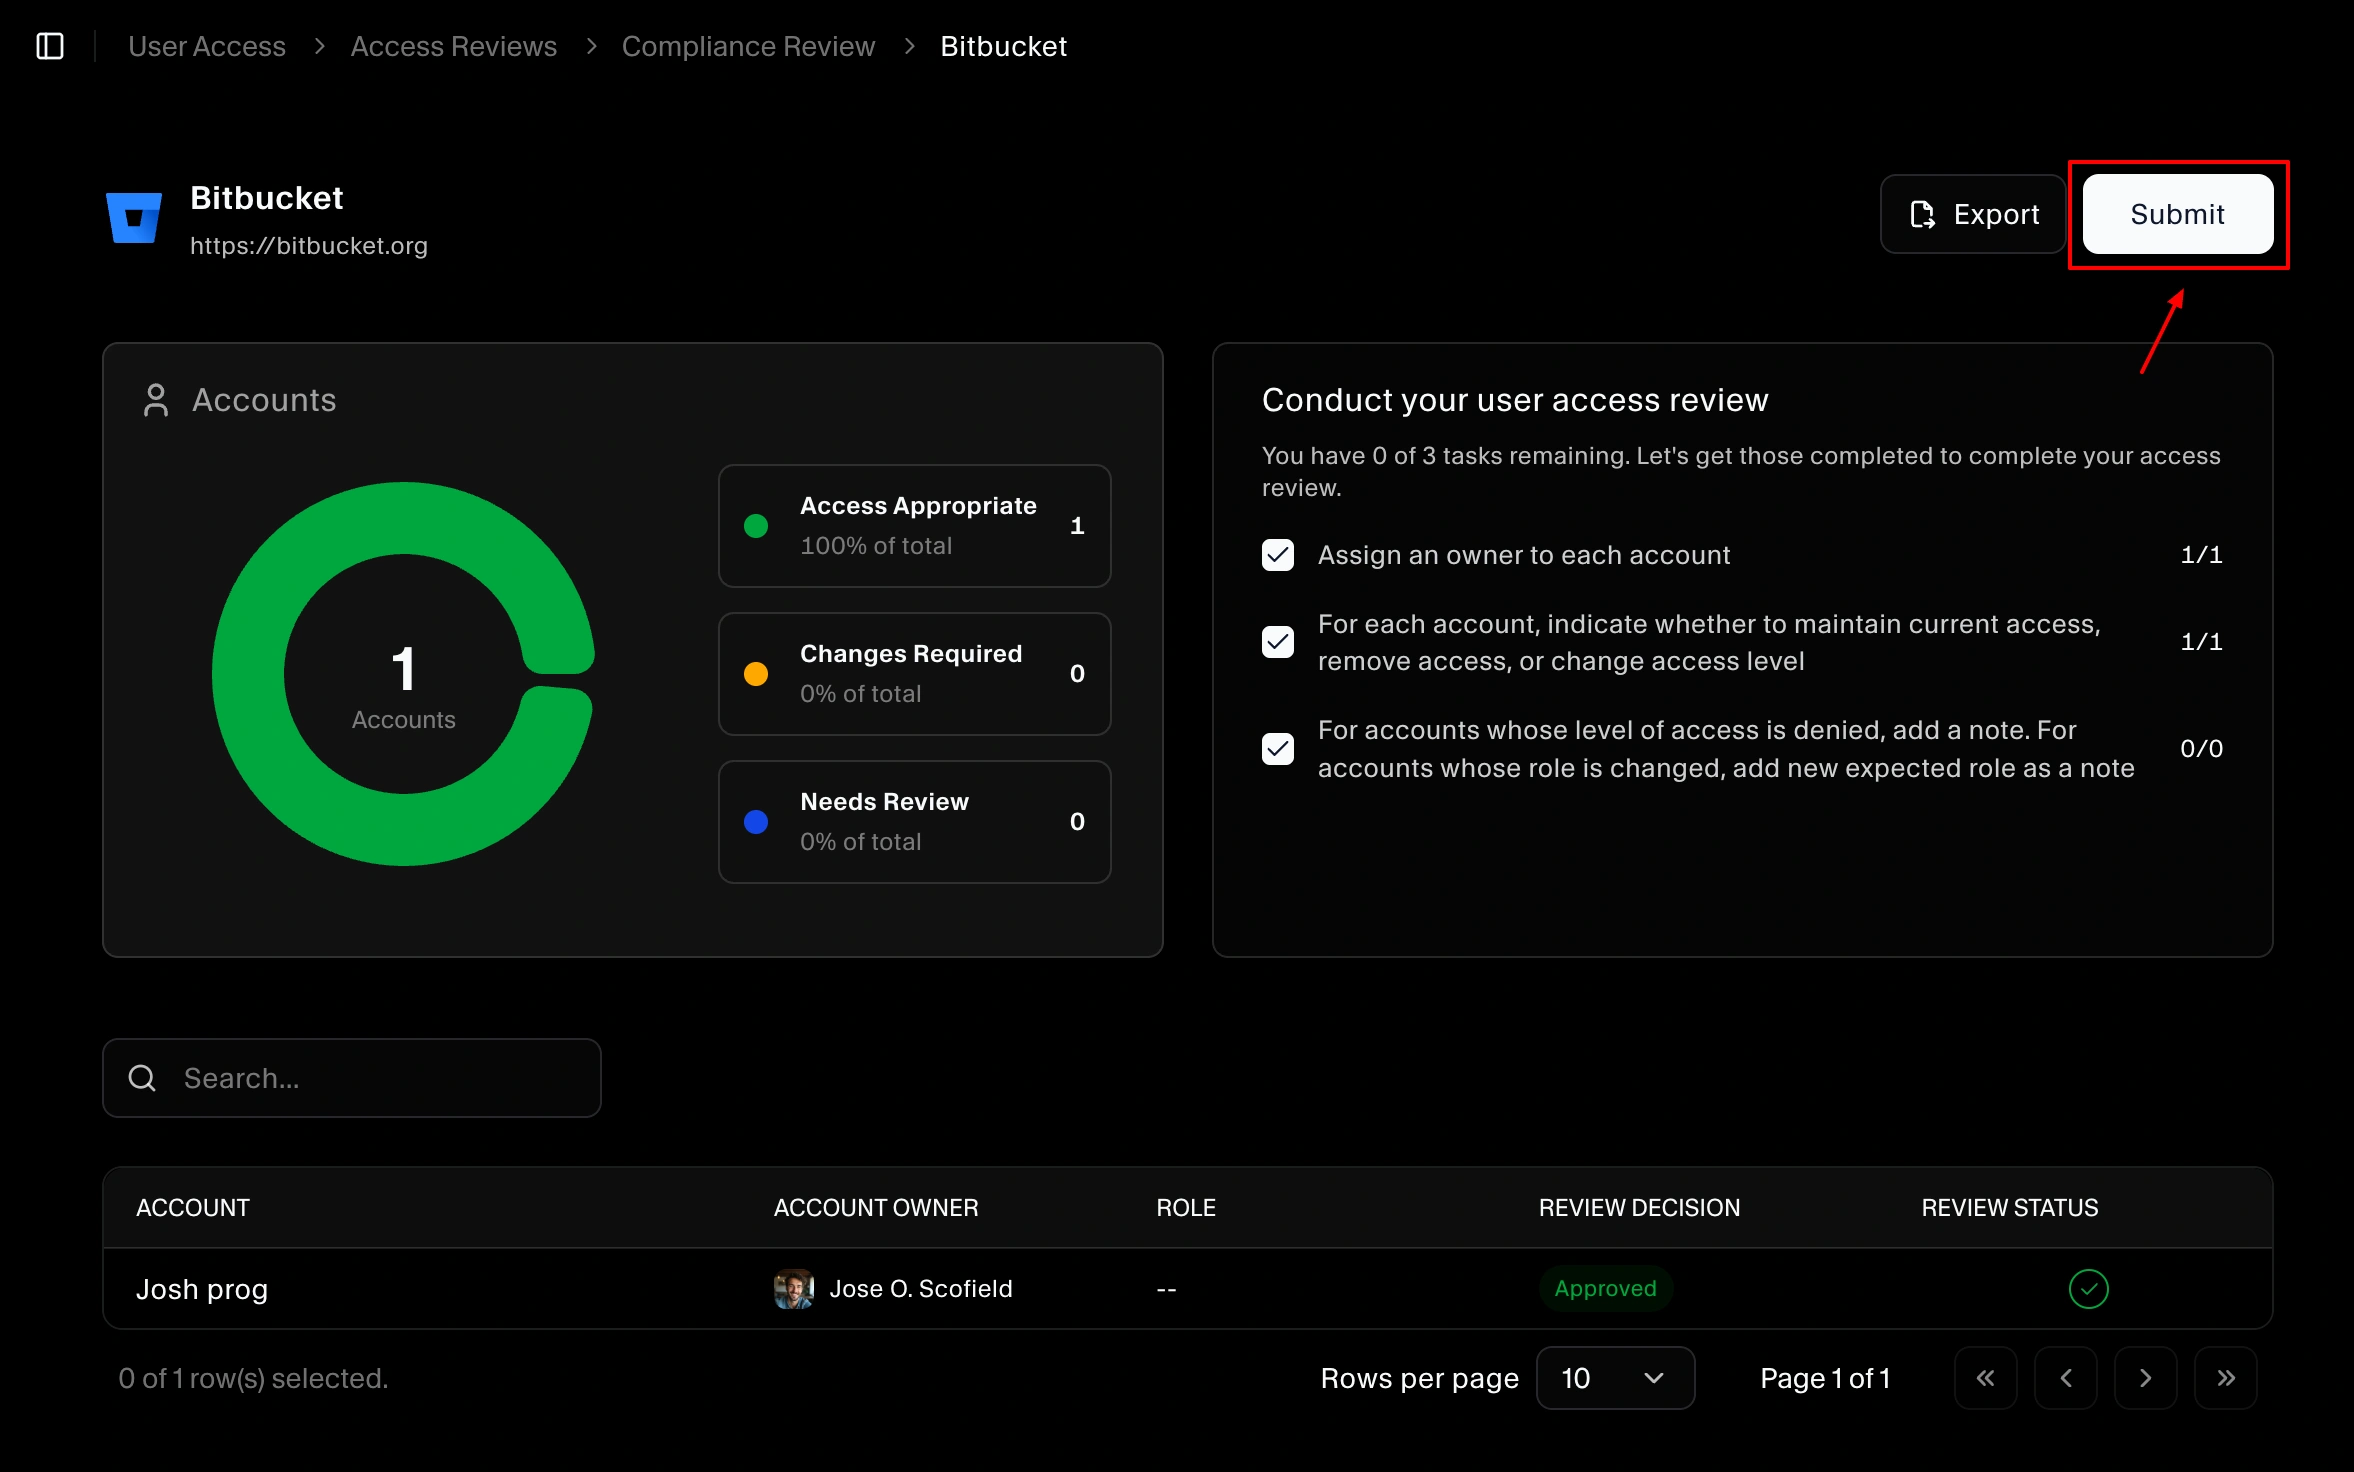
The completed review becomes part of your audit trail, demonstrating that you regularly verify user access across critical systems.
Access Changes tab: denied or changed roles
After a system review is completed, any account where the reviewer chose Denied (remove access) or Change role is listed in the Access Changes tab for that review.
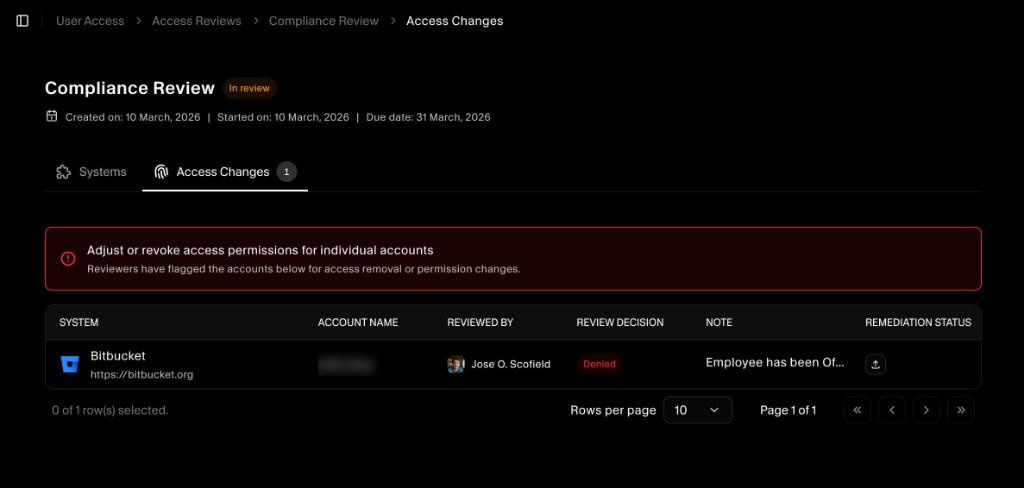
From the review page, open the Access Changes tab to see:
- System: The integrated system (for example, Bitbucket).
- Account name: The account that was denied or had its role changed.
- Reviewed by: Who made the decision.
- Review decision: Denied or the new role.
- Note: Any comment the reviewer left.
- Remediation status: Where you provide evidence that the change was carried out.
A banner at the top reminds you to adjust or revoke access for these accounts in the actual system and to document remediation in SecureSlate.
Providing remediation for access changes
For each account in the Access Changes table, you must provide remediation evidence so auditors can see that access was actually removed or updated.
Auto-remediate with SecureSlate AI (recommended)
When multiple accounts need access revoked or roles updated, use Auto Fix on the Access Changes tab instead of documenting each change by hand:
- Open the completed review → Access Changes tab.
- Click Auto Fix on the SecureSlate AI can fix this banner.
- Review the planned actions per system (revoke access, update role, or open a ticket for manual steps).
- Click Approve to execute remediation and attach evidence to each row automatically.
The agent uses your connected integrations to apply changes where supported and records proof in Remediation status. See Access review auto-remediation for the full workflow.
Add remediation evidence manually
For a single account or when a system does not support automated changes:
- In the Access Changes tab, find the row for the account.
- In the Remediation status column, click the upload icon.
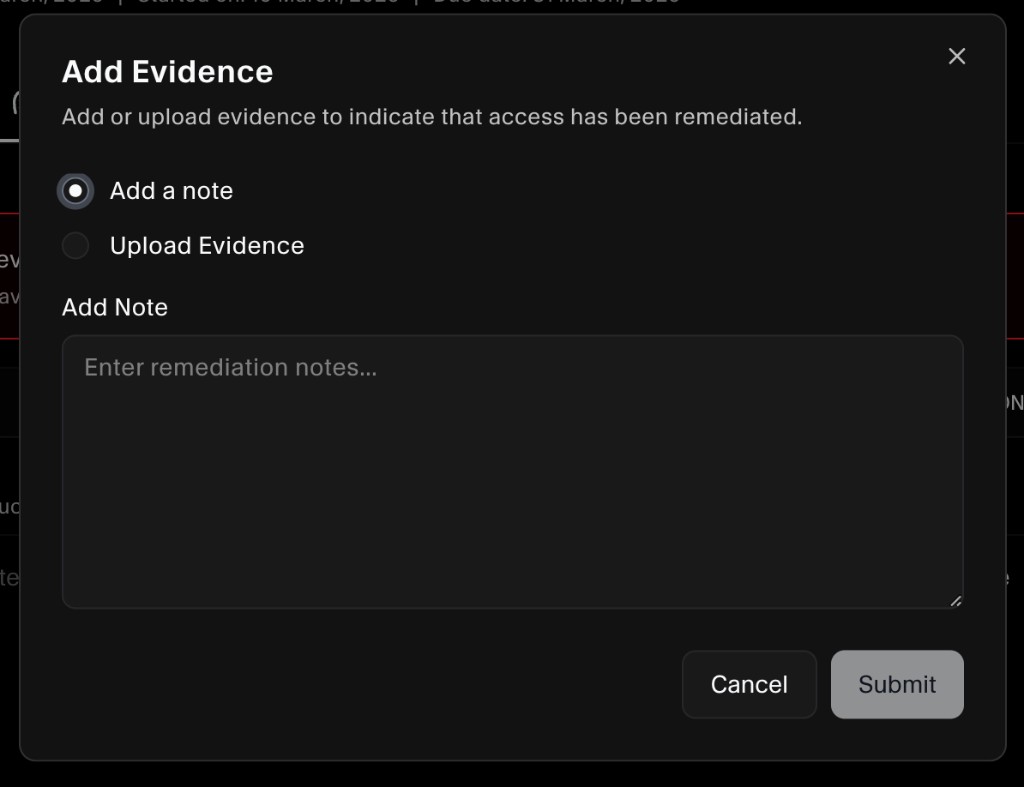
- In the Add Evidence dialog, choose one of:
- Add a note: Enter remediation notes (for example, “Access revoked in Bitbucket on 12 March 2026” or “Role updated to read-only in admin console”).
- Upload evidence: Attach a file (screenshot, export, or ticket) showing that the change was made in the system.
- Click Submit to save the evidence.
Once evidence is added, the remediation status for that account is updated. Repeat for every account in the Access Changes list so the review is fully documented.
Link completed reviews to compliance tests
Completed access reviews feed compliance tests such as Verification of Completed Access Review and Access reviews conducted. These tests appear under Tests and map to ISO 27001 and SOC 2 access controls.
When a test is Failing because no current review evidence exists:
- Open the test (for example, Verification of Completed Access Review) → Evidence tab.
- Confirm Test interval and Owner are set.
- Click Auto Fix on the SecureSlate AI can fix this card.
- Review the evidence package from your latest completed review (or follow the agent’s steps to finish an in-progress review).
- Click Approve to attach evidence and update the test status.
Manual upload is still supported: attach a review export or report on the Evidence tab and click Save Evidence.
See Access review auto-remediation for how test evidence and Access Changes remediation work together.
Using review results
By default, access review decisions are recorded in SecureSlate for audit purposes. Use review outcomes to:
- Auto-remediate denied or changed accounts via Auto Fix on the Access Changes tab (recommended when integrations support write access).
- Create tasks to remove or adjust access manually where automation is not available.
- Update roles or group memberships in your identity provider or application.
- Document remediation for denied or changed accounts via the Access Changes tab (agent evidence, note, or uploaded file).
- Pass linked compliance tests by attaching completed review evidence on the test Evidence tab.
- Document exceptions and compensating controls for audit purposes.
You can export review data (using Export) to share with stakeholders, attach to tickets, or provide directly to auditors.
Best practices
- Schedule reviews at a frequency that matches your frameworks (for example, quarterly for SOC 2, annually for ISO 27001).
- Prioritize high‑risk systems (those with sensitive data or high operational impact).
- Ensure every account has an owner, so remediation is clearly assigned.
- Keep notes concise but specific enough that auditors can understand why access was kept, changed, or removed.
