Controls
Create a Custom Control
Use custom controls when you need to track requirements that are unique to your organization or not covered by built-in framework mappings. Once created, the custom control appears in the Controls table with a Custom badge and can be connected to tests and risks like any other control.
Step 1: Open the Controls page
- In the left sidebar, go to Compliance → Controls
- Click Add Controls → Add Manually
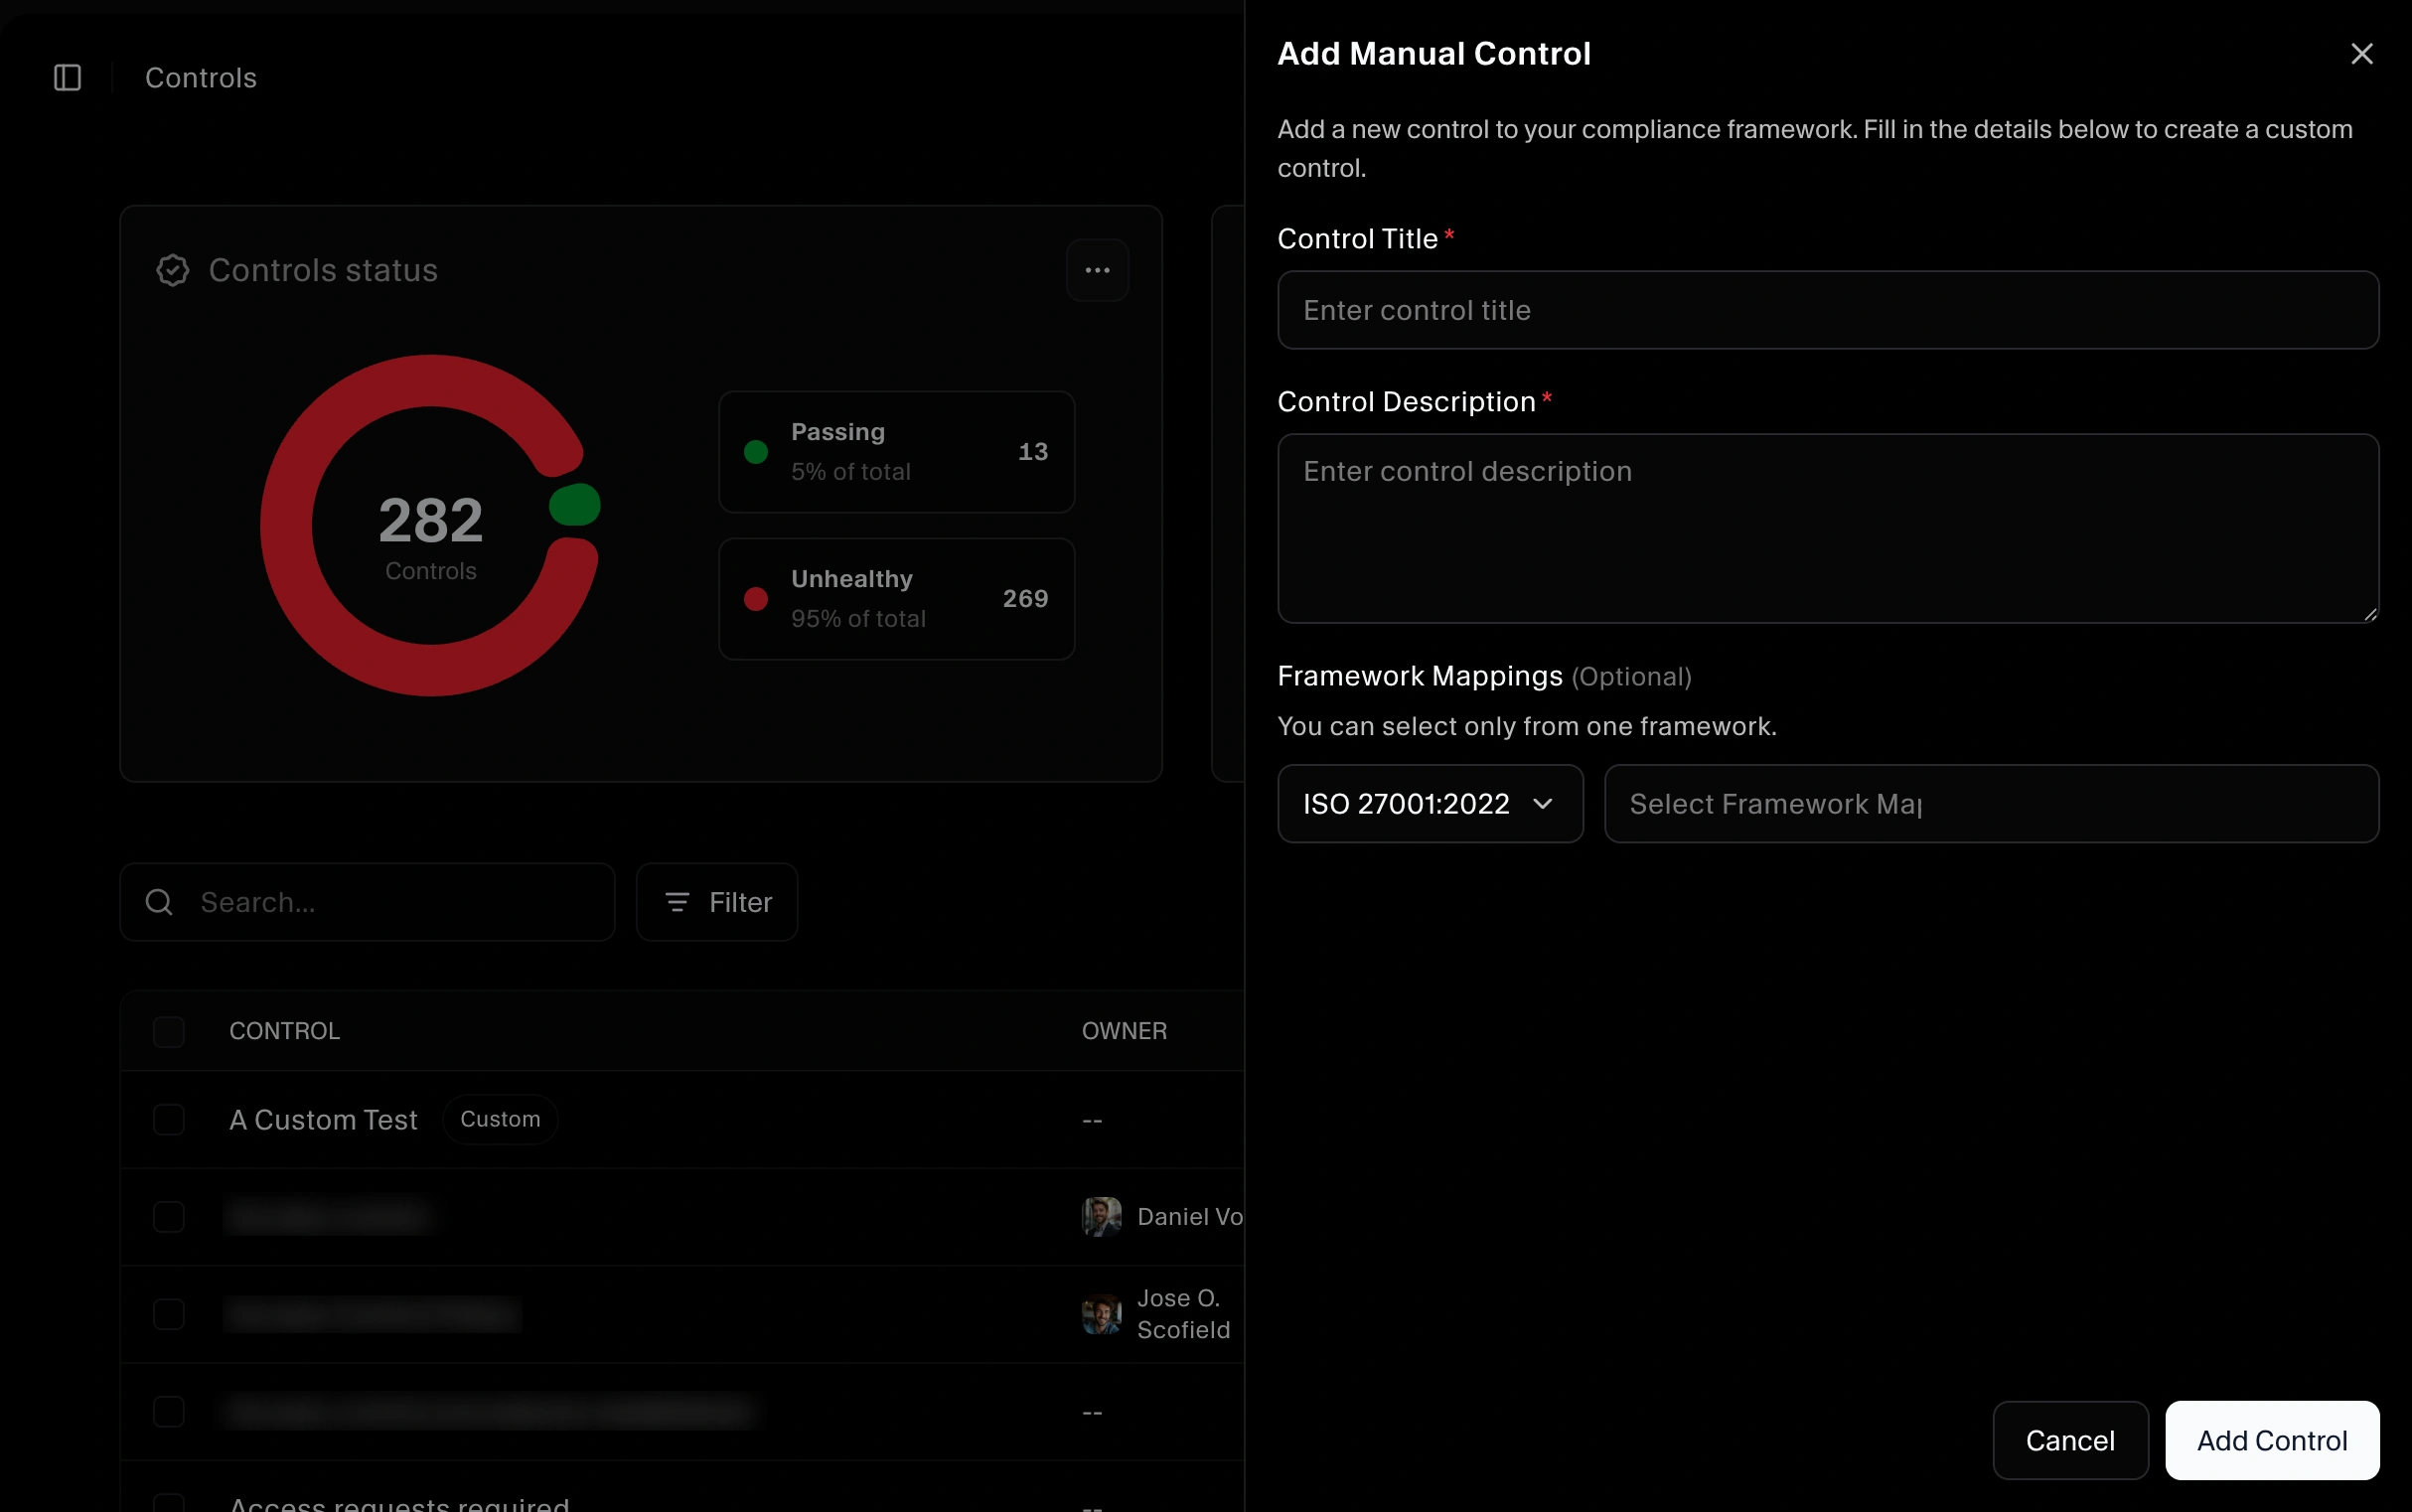
Step 2: Enter control details
In the Add Control form, provide:
- Control title
- Control description
- Frameworks you want to map this control to
Click Add control to create the custom control.
What happens next
After creation:
- The control appears in the Controls table
- The control shows a Custom badge
- Clicking the control name opens the control drawer

Using the custom control drawer
When you open the control, you can manage mappings and relationships directly from the drawer.
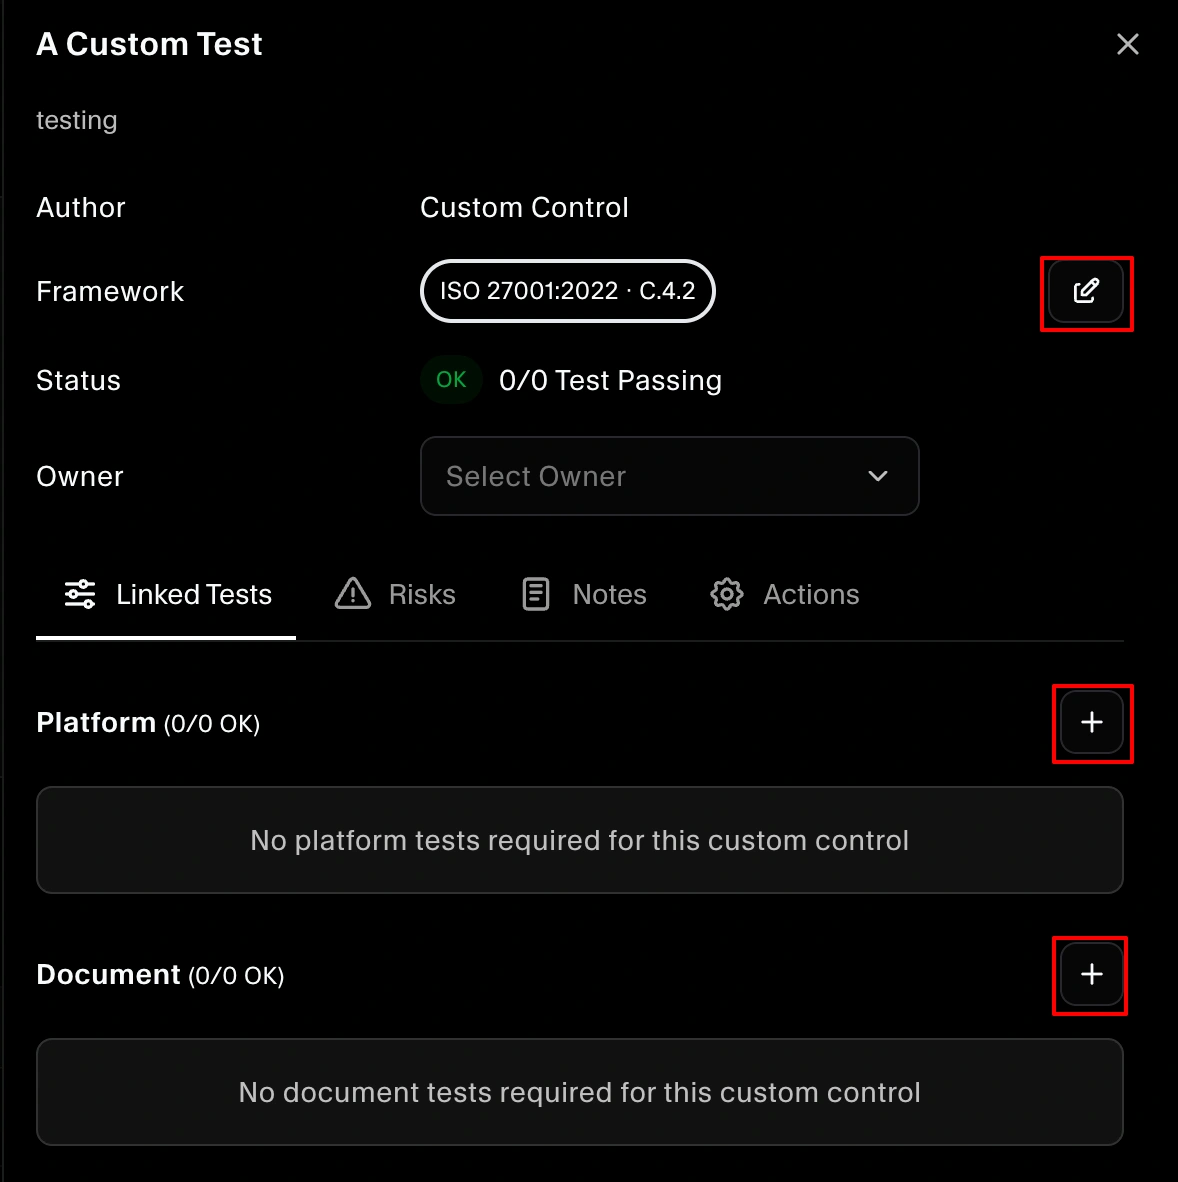
Edit framework mappings
In the control drawer, you can adjust which frameworks the control is mapped to:
- Use the edit button next to the framework area to update or change the mapped frameworks.
Linked Tests tab (map tests to the control)
To connect tests to this custom control:
- Open the Linked Tests tab
- Click the plus (+) icon
- Select any relevant platform or document tests to map to this control
Mapping tests ensures that evidence from those tests contributes to the control’s health.
Risk tab (map risks)
In the Risk tab, you can associate approved risks with this control:
- Click Add Risk
- Choose one or more approved risks to link
Linking risks helps show how this control mitigates specific risks in your risk register.
Notes tab
Use the Notes tab to leave internal or auditor-facing context, such as:
- Why the control exists
- How it is implemented
- Any exceptions or compensating controls
Actions tab (remove or deactivate)
From the Actions tab you can:
- Deactivate the control if it is no longer in use but you want to keep history
- Remove/Delete the control entirely if it is no longer needed
