Policies
Link Your Custom Policy to a Control
SecureSlate allows you to replace template policies with your own internal policies. To do this, you add your custom policy first, then map its test to the relevant control.
This ensures your custom policy reflects your real documentation while maintaining compliance tracking.
Before You Start
Make sure:
- Your custom policy document is ready
- You have access to the Policy Library
- You know which control the policy should support
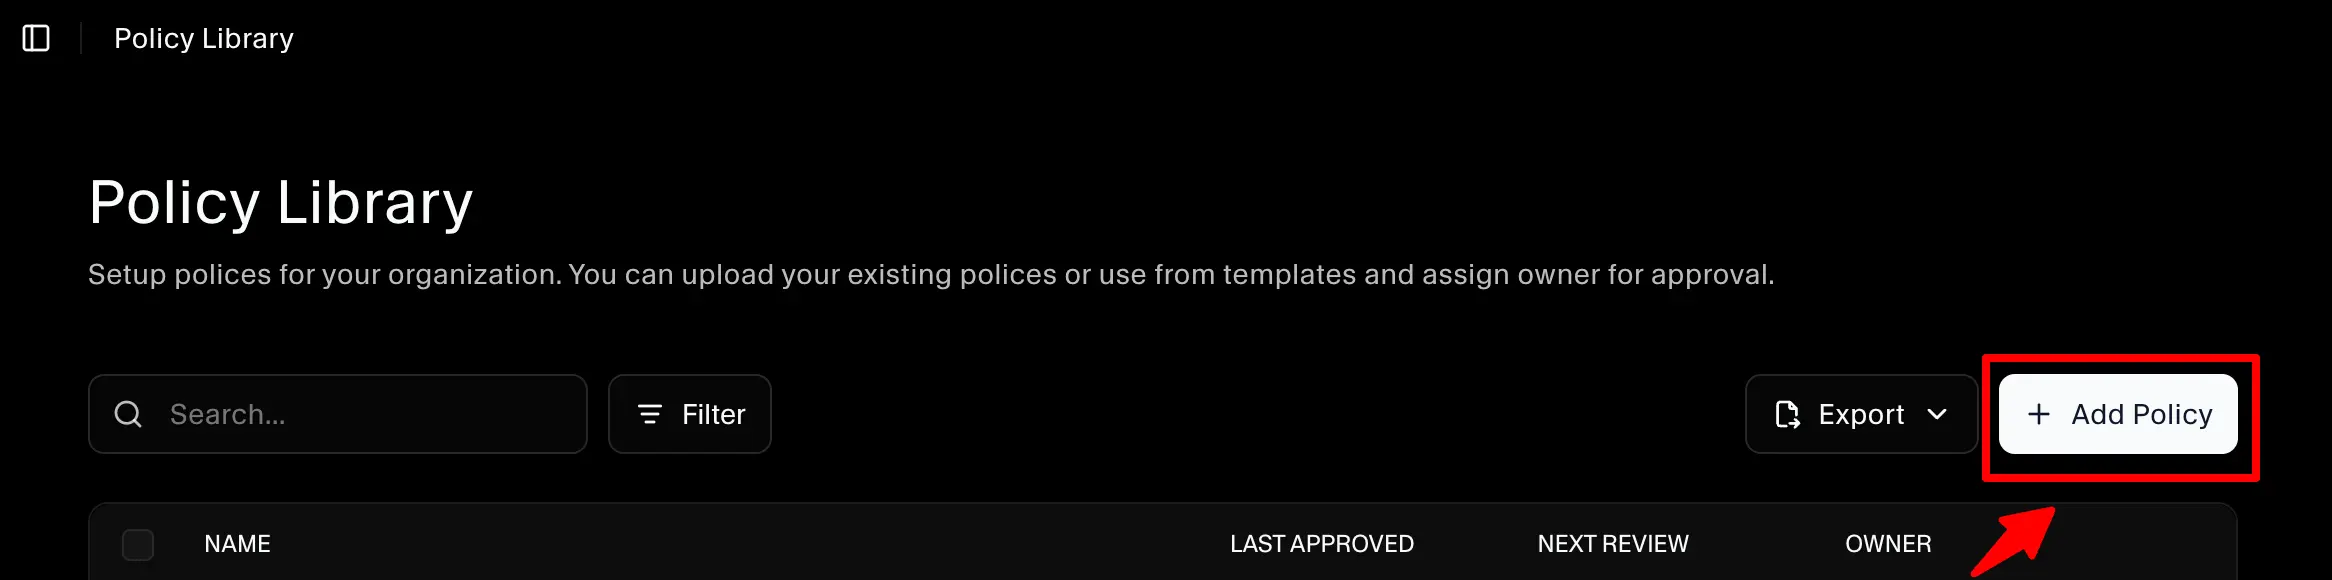
Step 1: Add Your Custom Policy
- Navigate to Policy Library
- Click Add Policy
- Upload or create your custom policy
- Save the policy
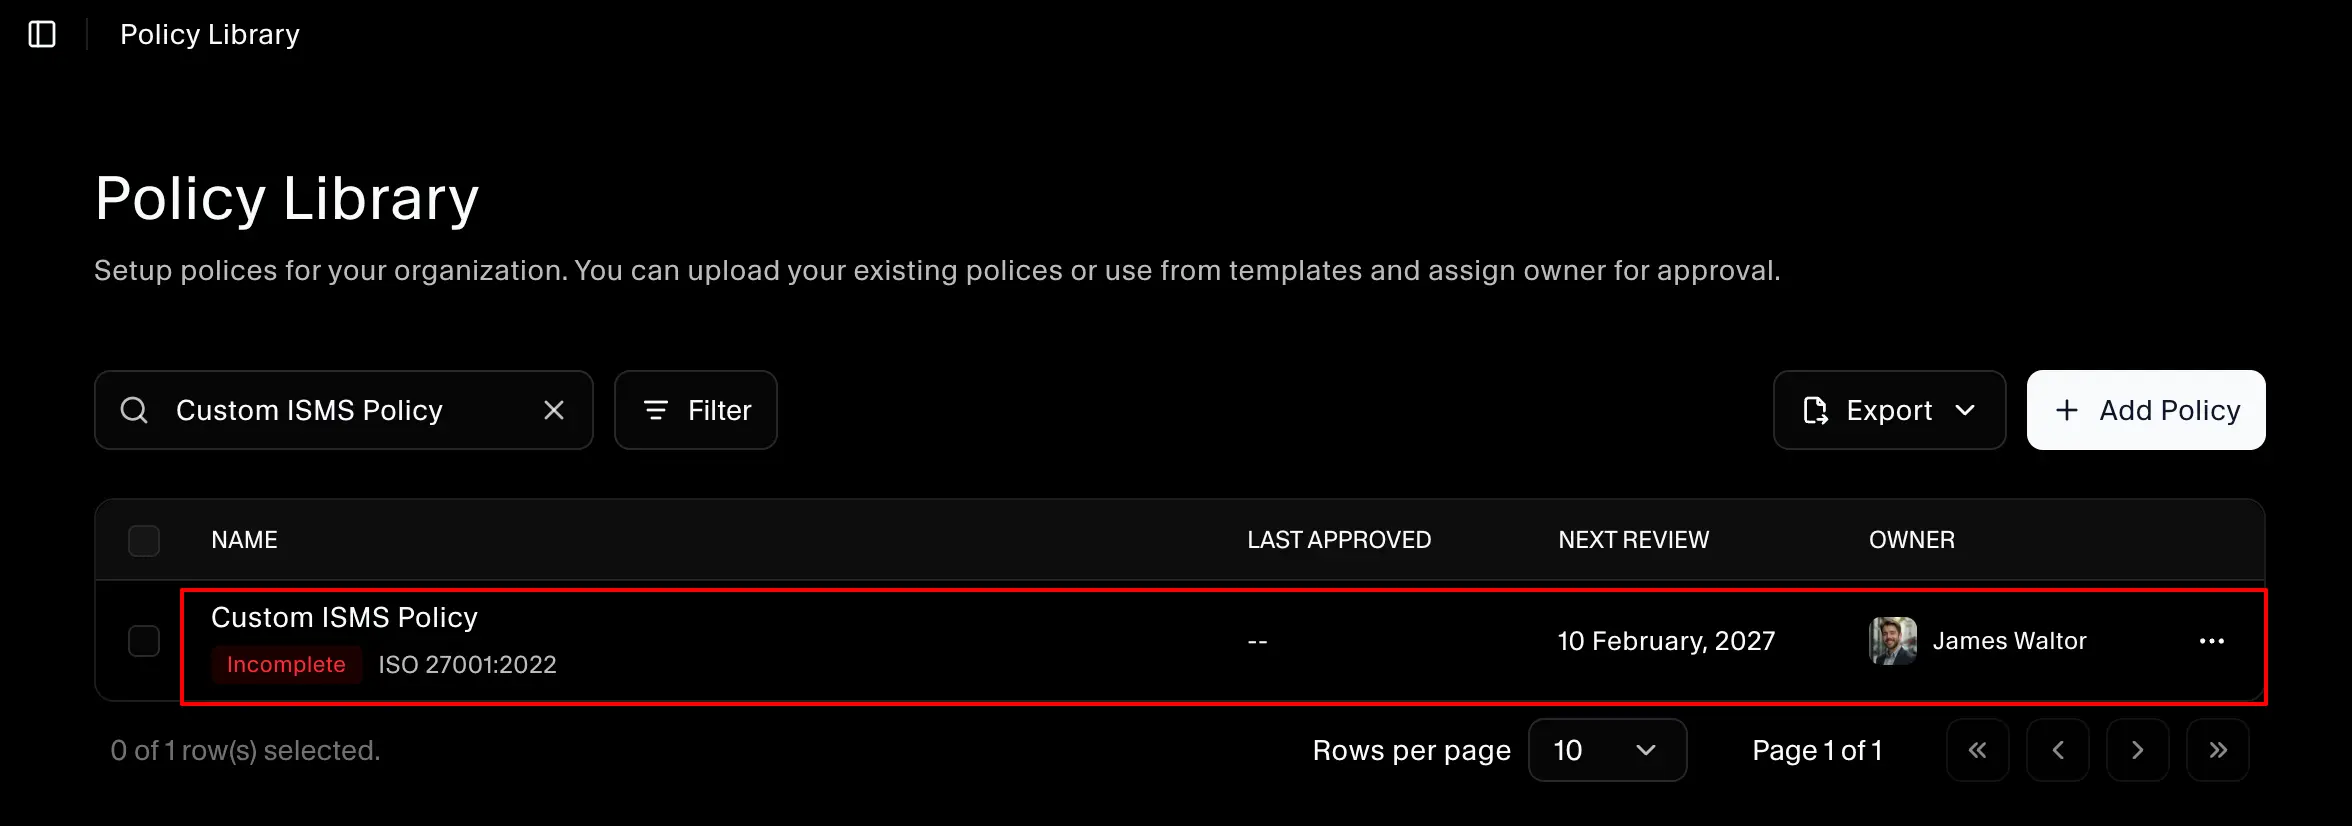
Once saved, SecureSlate automatically creates a test linked to this policy. This test is what gets mapped to controls.
After clicking Add Policy, the Add Custom Policy drawer opens. Create and upload your custom policy template (optional) here.

Step 2: Locate the Automatically Created Test
- Open the newly added policy
- Confirm that a test has been generated
- Note the test name for mapping
In policy page:
In Test page:

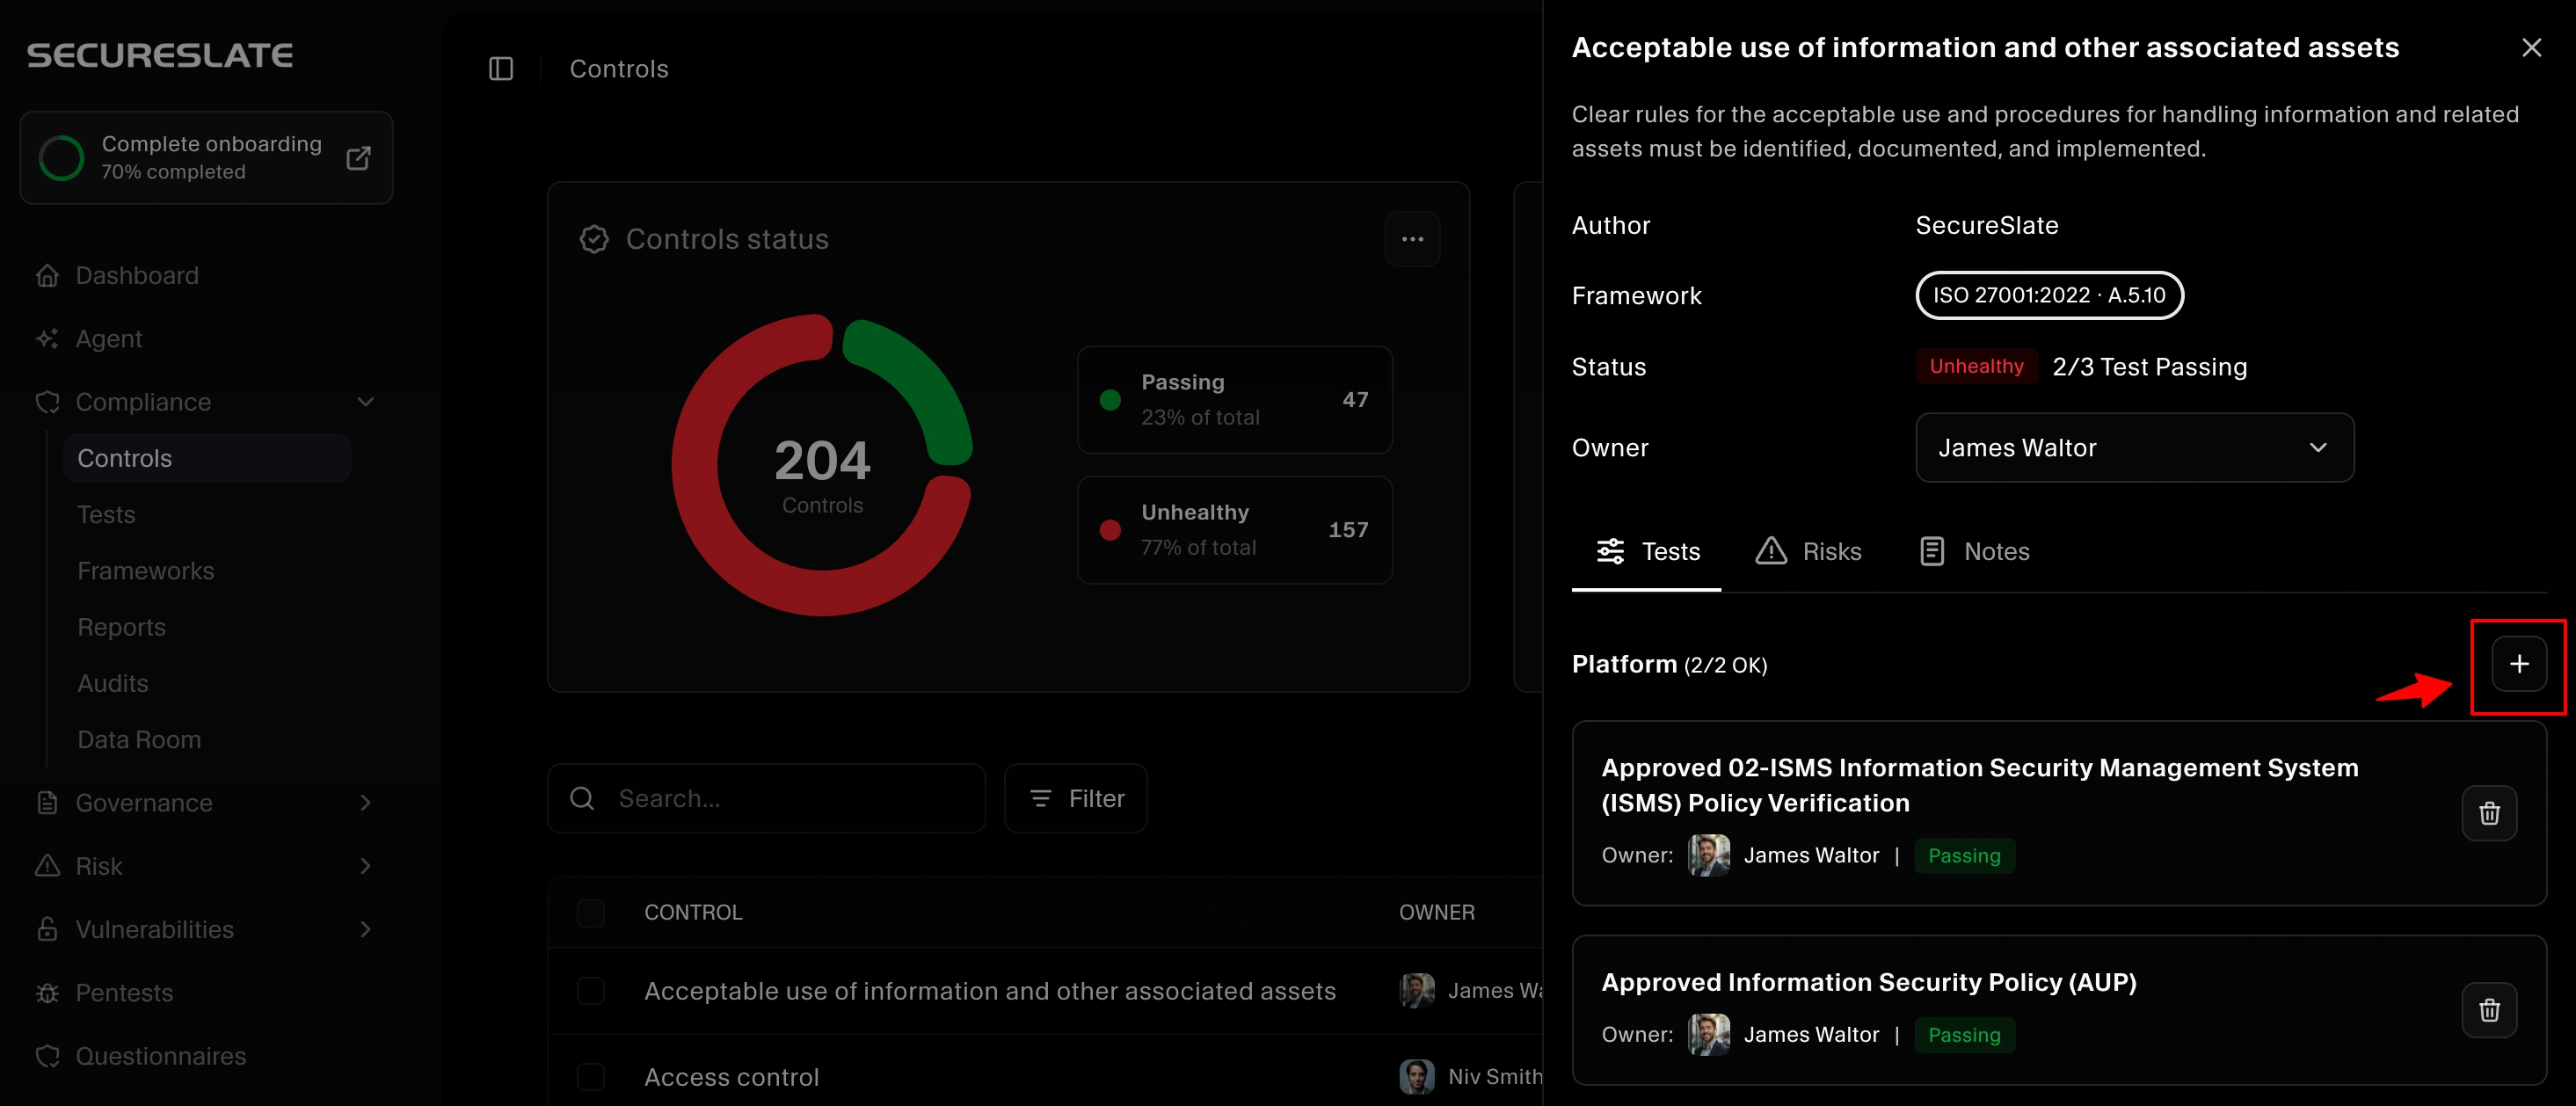
Step 3: Map the Policy Test to a Control
- Navigate to Controls
- Open the control you want to update
- Click Add Test
- Select the test created for your custom policy and click Add
This links your policy evidence directly to the control.
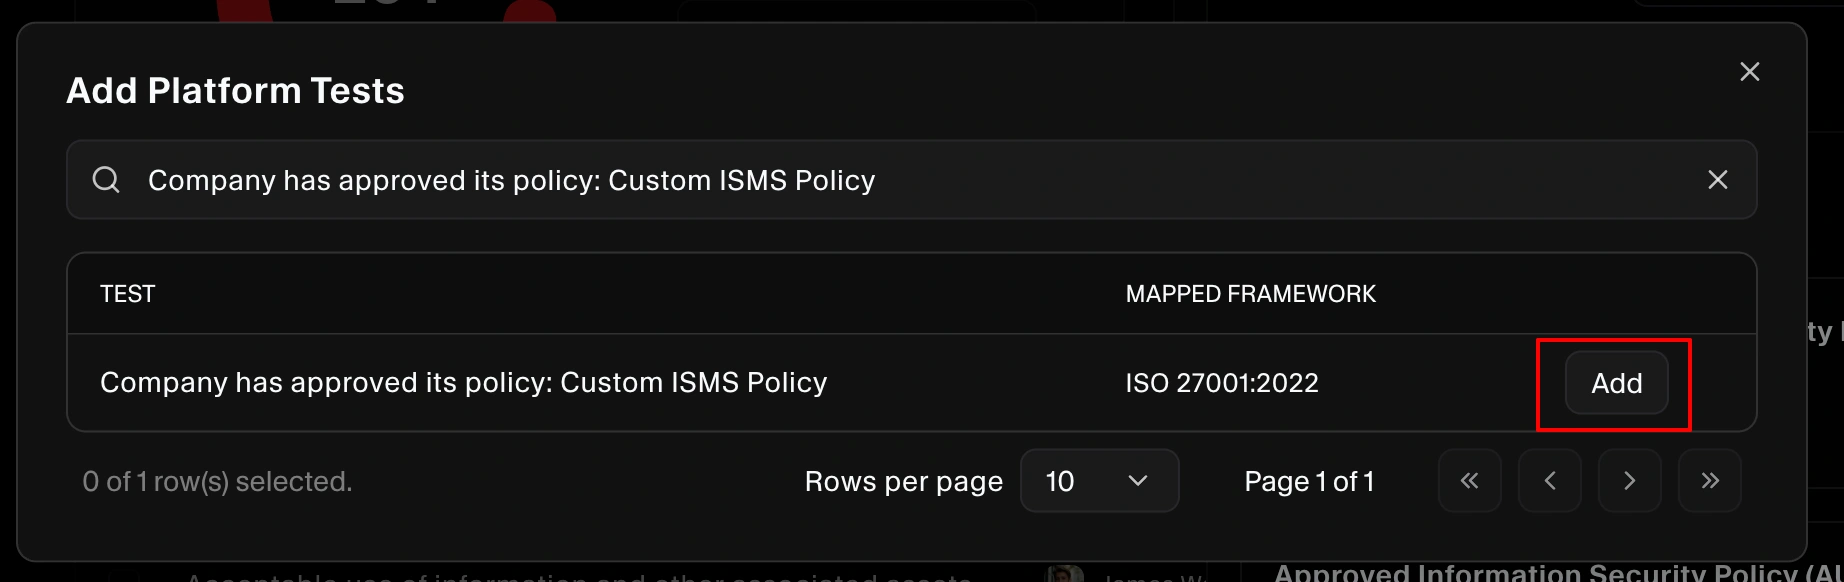
After adding, the custom policy is successfully mapped to the control.
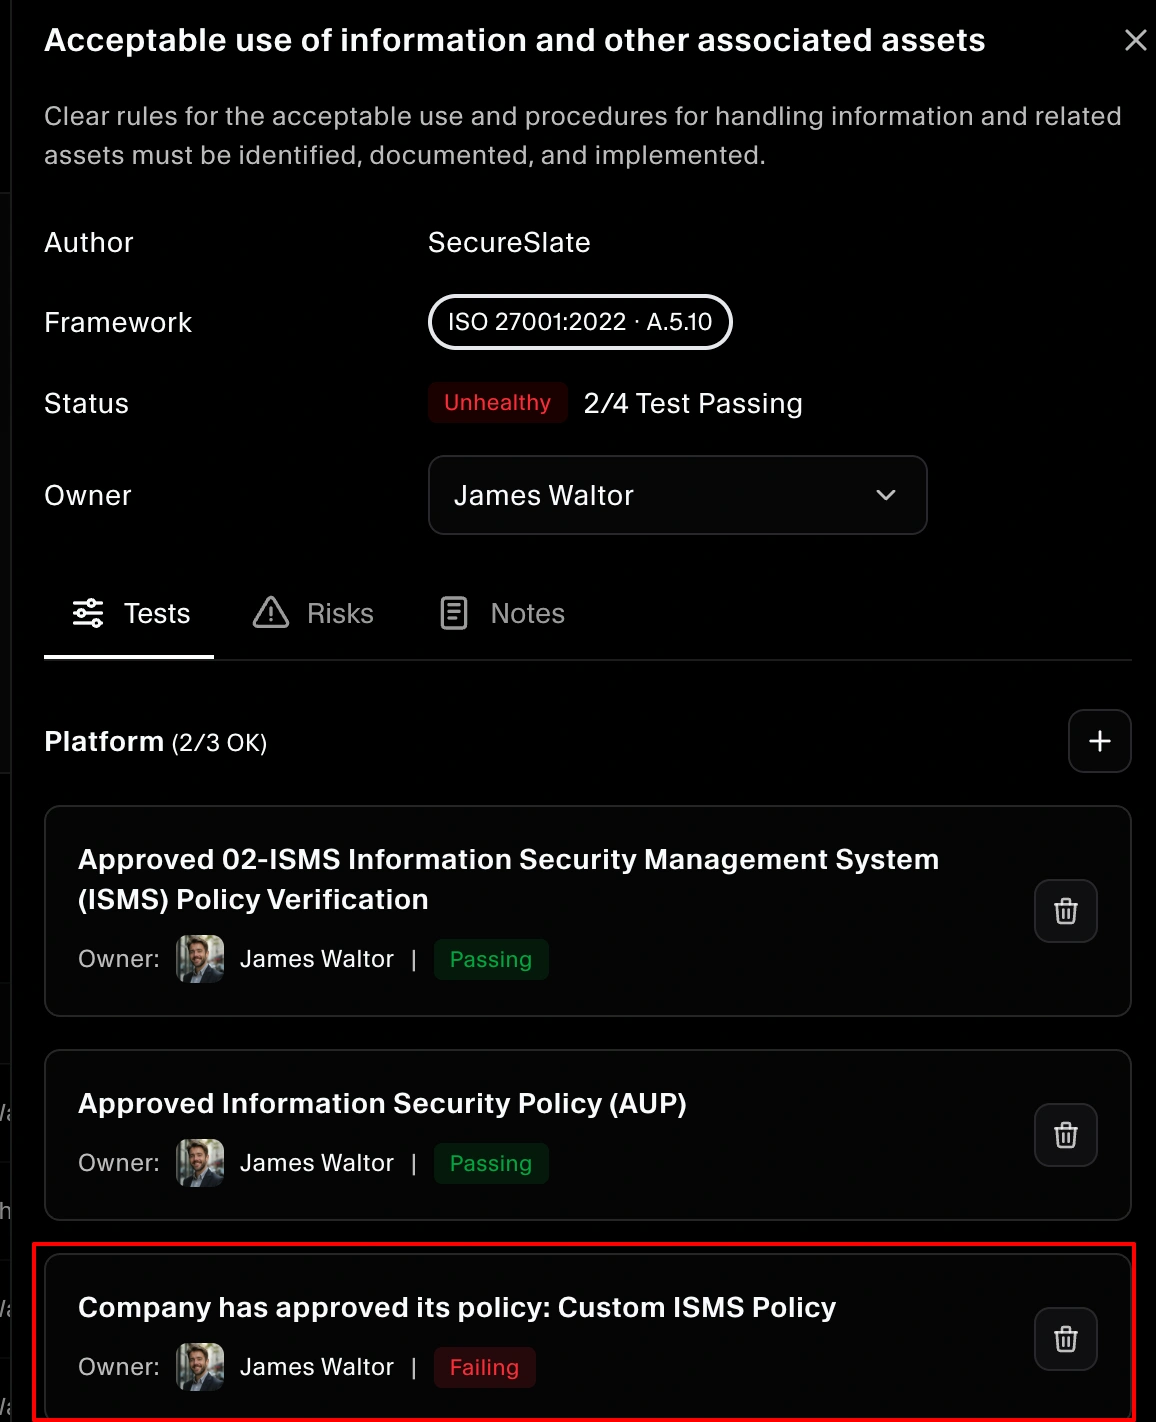
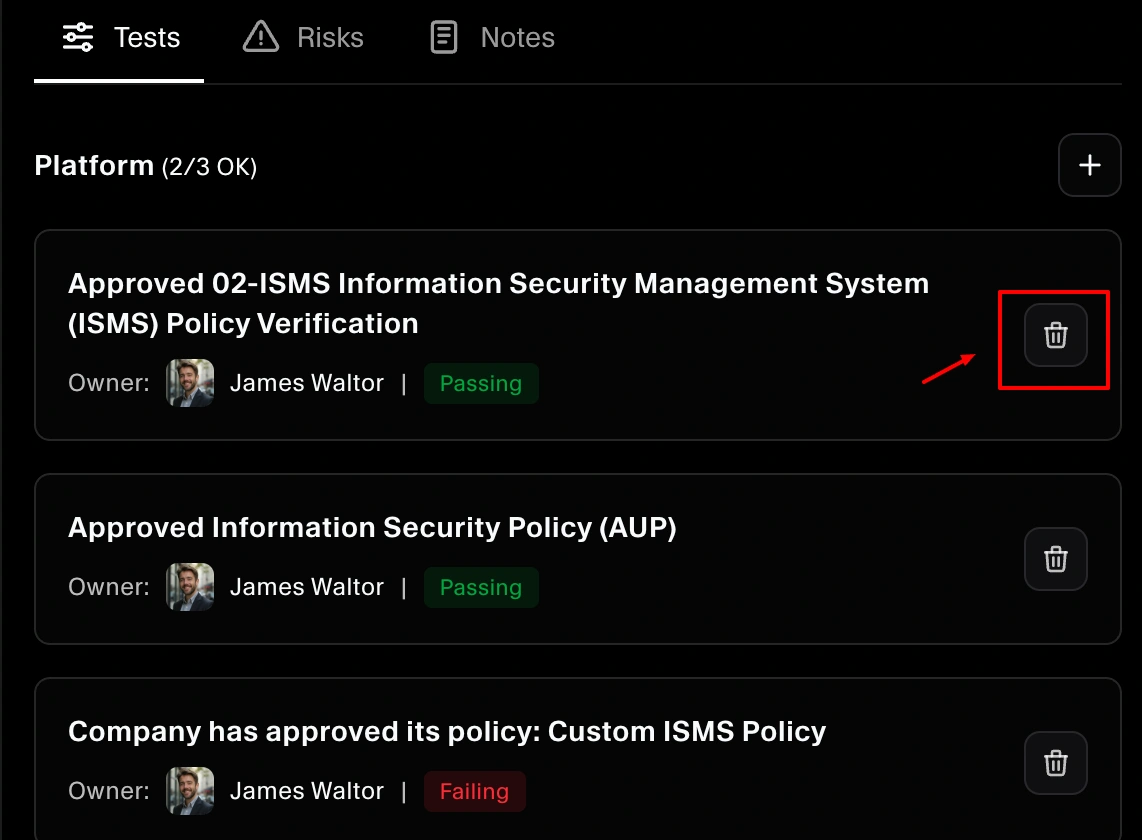
Step 4: Remove Template Policy Mapping (Optional)
If a template policy is already mapped and no longer needed:
- Open the control
- Locate the mapped test
- Remove or unmap the test
- Save changes
Your custom policy will now be the active evidence source.
Result
Your custom policy is now:
- Stored in the Policy Library
- Automatically tracked through a test
- Linked to the correct control
This keeps compliance aligned with your actual documentation.
Need Help?
If you cannot see your policy when mapping, confirm the policy was added successfully and the test was created. If the issue continues, contact SecureSlate support.
