Integrations
Connect Google Cloud Platform (GCP) to SecureSlate
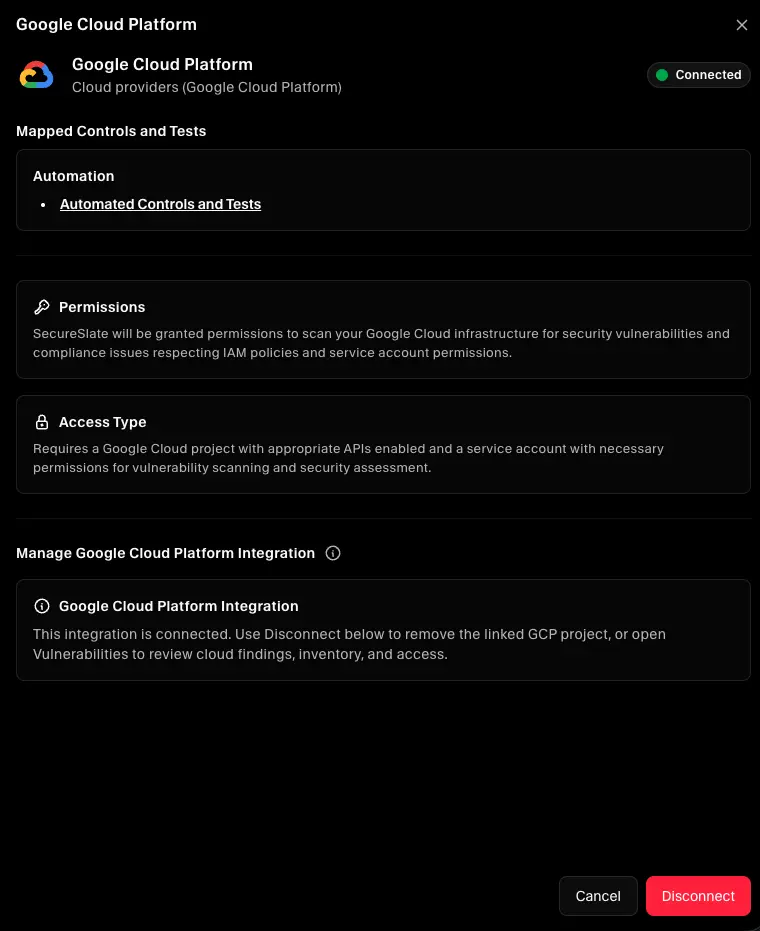
This guide walks through the GCP integration in SecureSlate so you can connect a GCP project from Integrations using a read-only service account and a service account JSON key. After setup, SecureSlate scans the project for misconfigurations, syncs cloud inventory, and imports IAM access data for review. Findings appear under Vulnerabilities for the connected cloud, including Checks, Inventory, and Access.
The setup wizard has five steps: add your GCP project ID, enable APIs, create the service account, upload the key file, and name the connection.
Prerequisites
Before you start, make sure you have:
- SecureSlate permissions: access to create and manage integrations (typically Admin).
- GCP permissions: access to the target Project ID, permission to enable APIs, and permission to create a service account, assign roles, and download a JSON key.
Step 1: Sign in and connect project ID
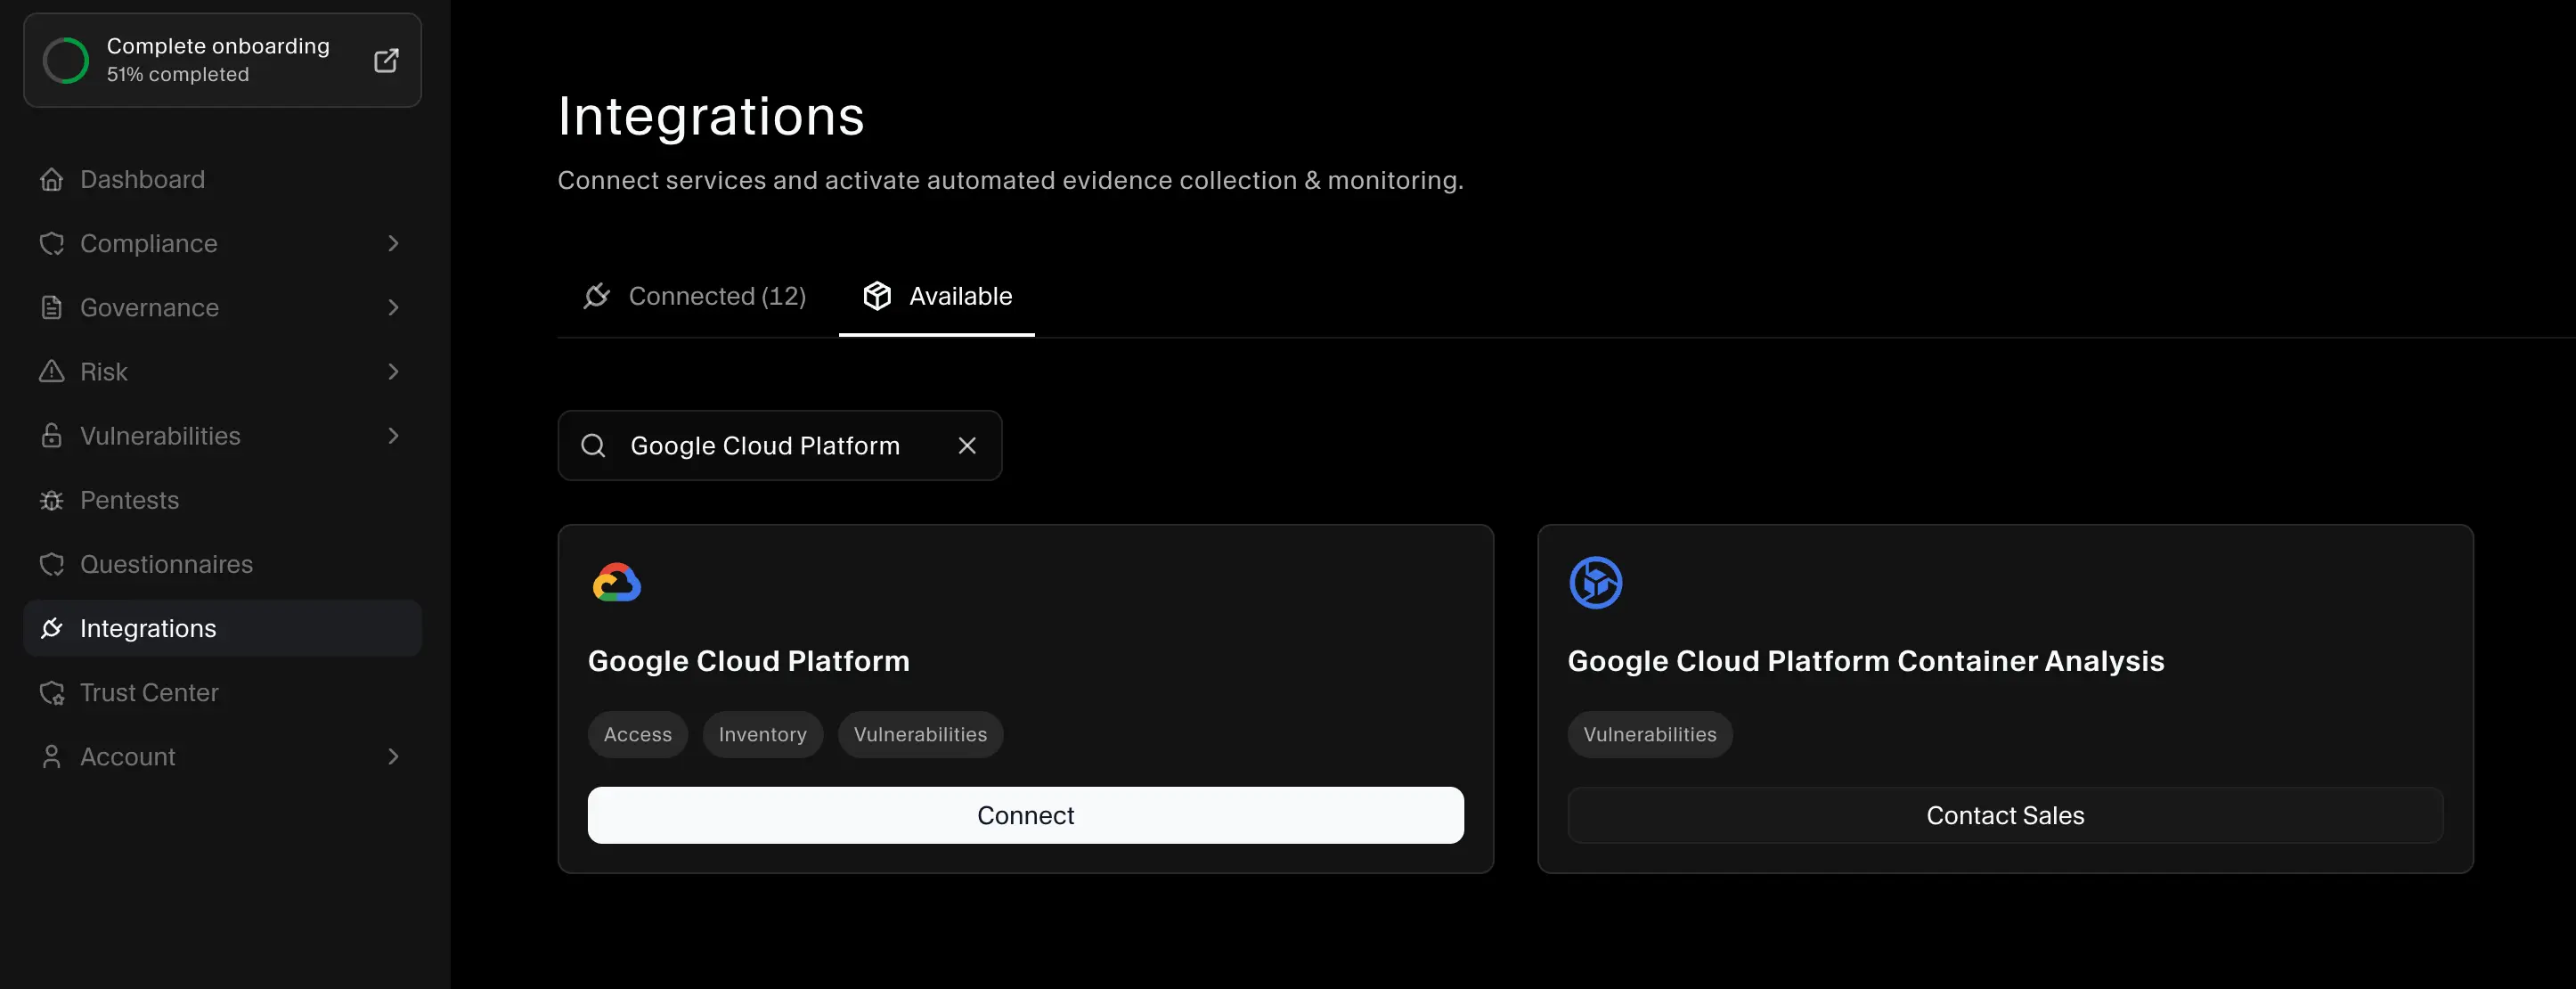
- In SecureSlate, open Integrations.
- Find Google Cloud Platform and click Connect to open the GCP Integration Setup wizard.
- In the Google Cloud Console, open the project selector in the top left and copy the Project ID for the project you want SecureSlate to monitor.
- Paste the project ID into SecureSlate and click Continue.
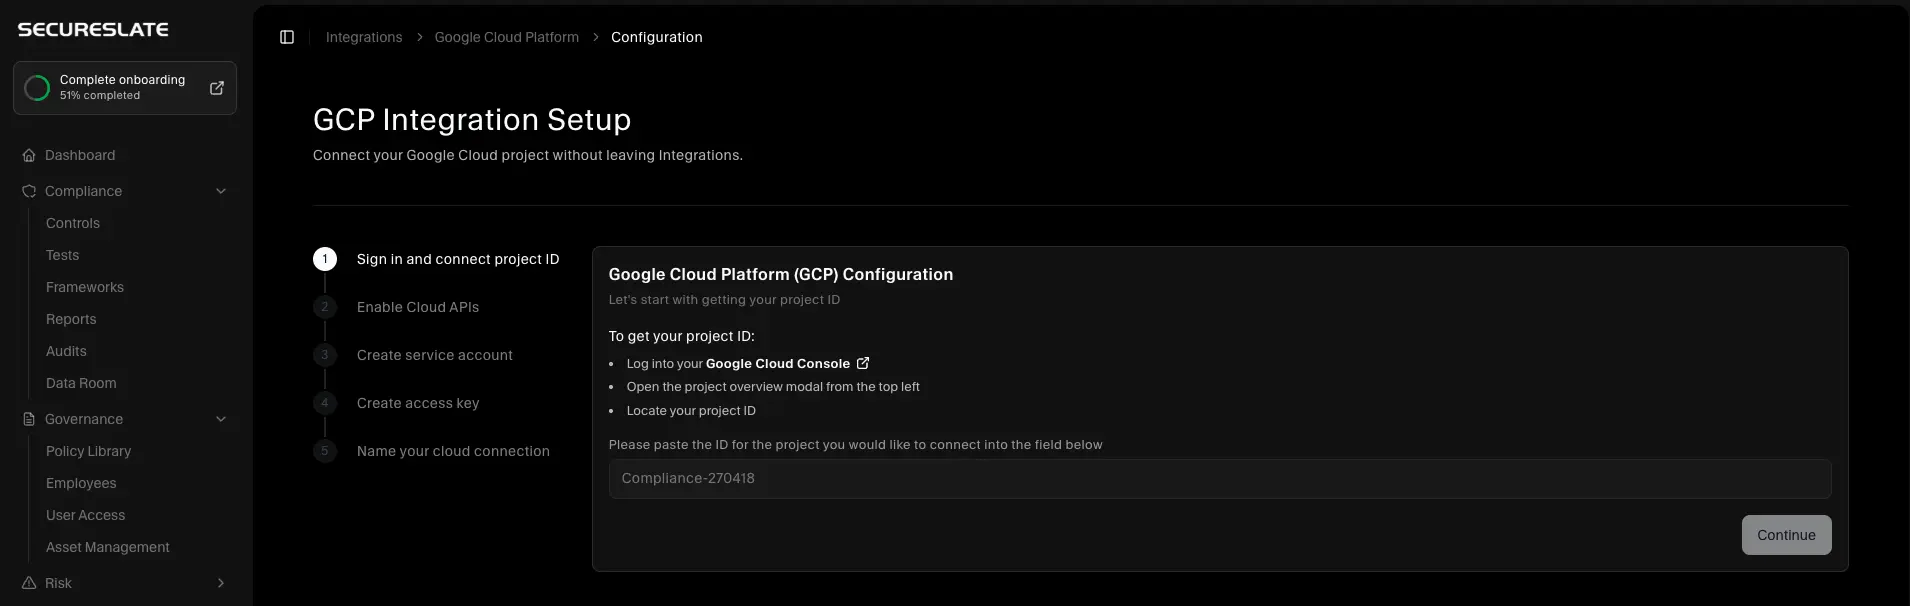
Tip: Use the exact project ID, not the project name or project number.
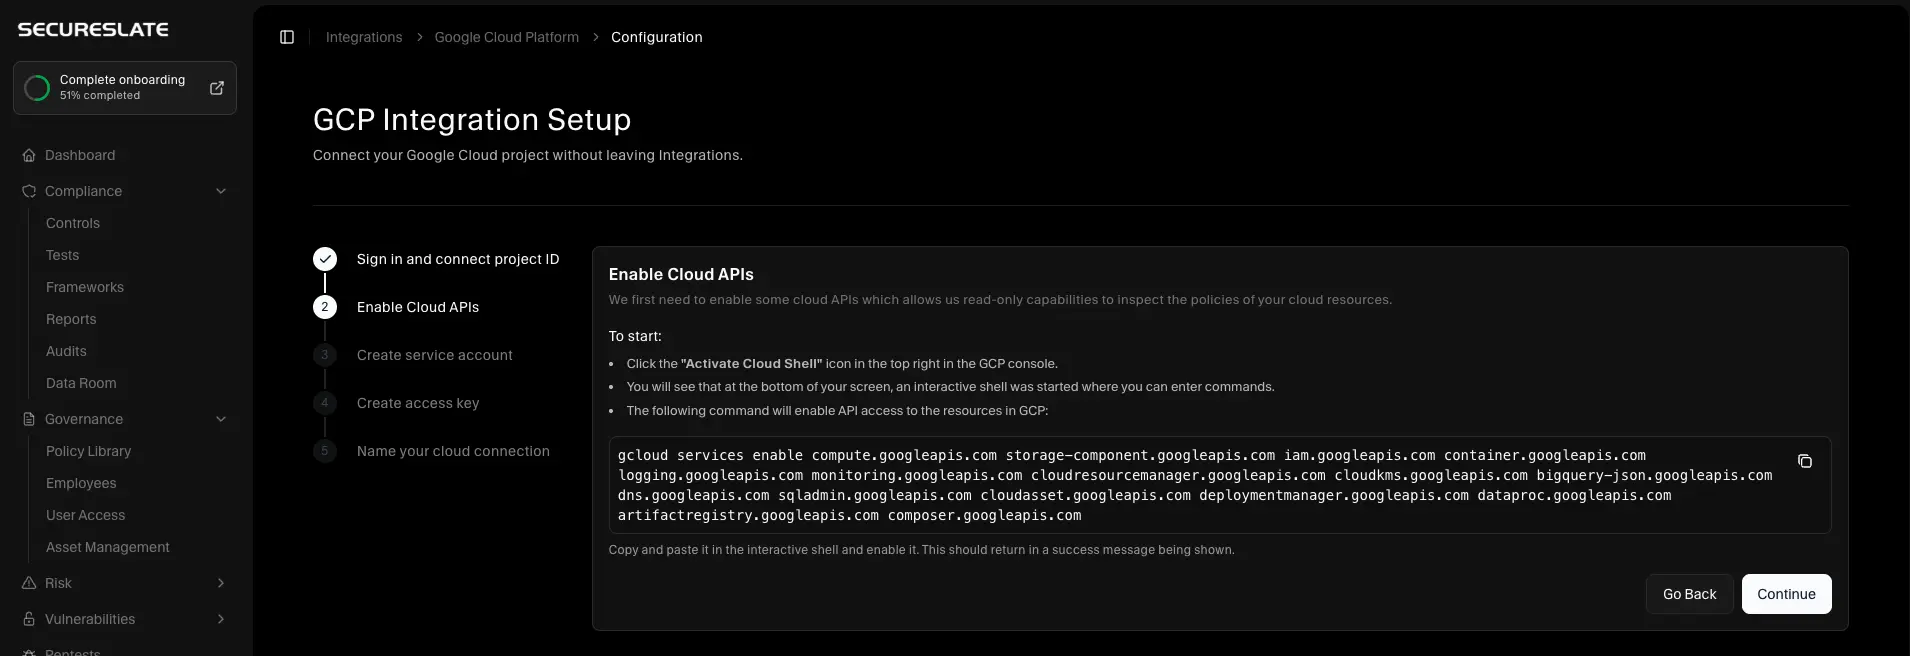
Step 2: Enable Cloud APIs
SecureSlate needs read-only access to several GCP services. Enable the required APIs in the project you are connecting.
- In the Google Cloud Console, click Activate Cloud Shell in the top right.
- Copy the command below and run it in Cloud Shell.
- Wait for the command to finish successfully, then return to SecureSlate and click Continue.
gcloud services enable compute.googleapis.com storage-component.googleapis.com iam.googleapis.com container.googleapis.com logging.googleapis.com monitoring.googleapis.com cloudresourcemanager.googleapis.com cloudkms.googleapis.com bigquery-json.googleapis.com dns.googleapis.com sqladmin.googleapis.com cloudasset.googleapis.com deploymentmanager.googleapis.com dataproc.googleapis.com artifactregistry.googleapis.com composer.googleapis.com
Step 3: Create service account
- In the SecureSlate wizard, open Create service account.
- In GCP, go to IAM & Admin → Service Accounts and create a service account. Include SecureSlate in the name so it is easy to identify later.
- On the target project, grant the service account these roles:
- Cloud Asset Viewer and Service Usage Consumer so inventory sync can list assets.
- Security Reviewer and Viewer so SecureSlate can collect security findings and IAM access data.
- Finish creating the service account, then return to SecureSlate and click Continue.
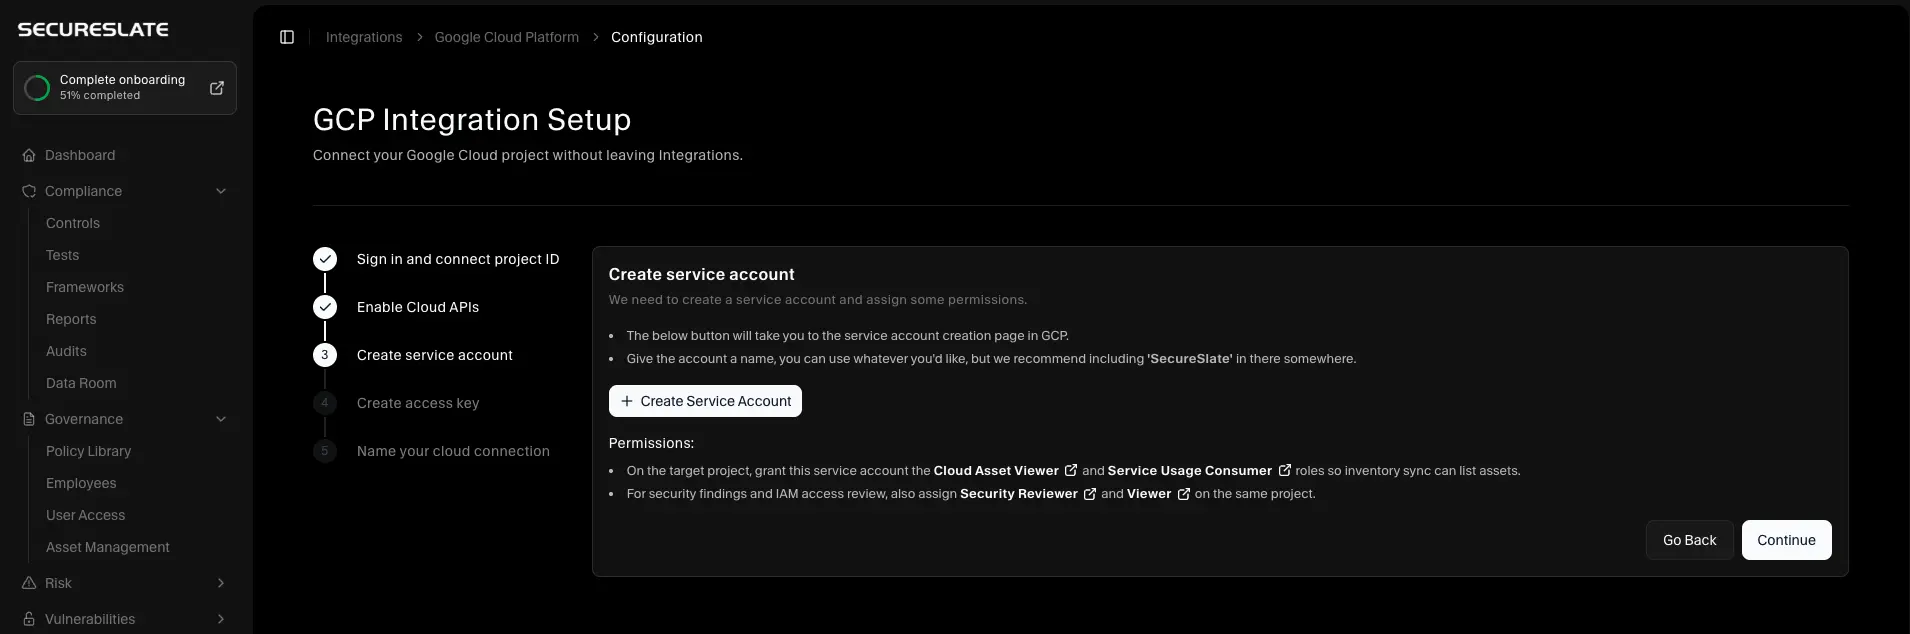
Note: SecureSlate only needs read-only permissions. It inspects configuration and access metadata and does not modify your resources.
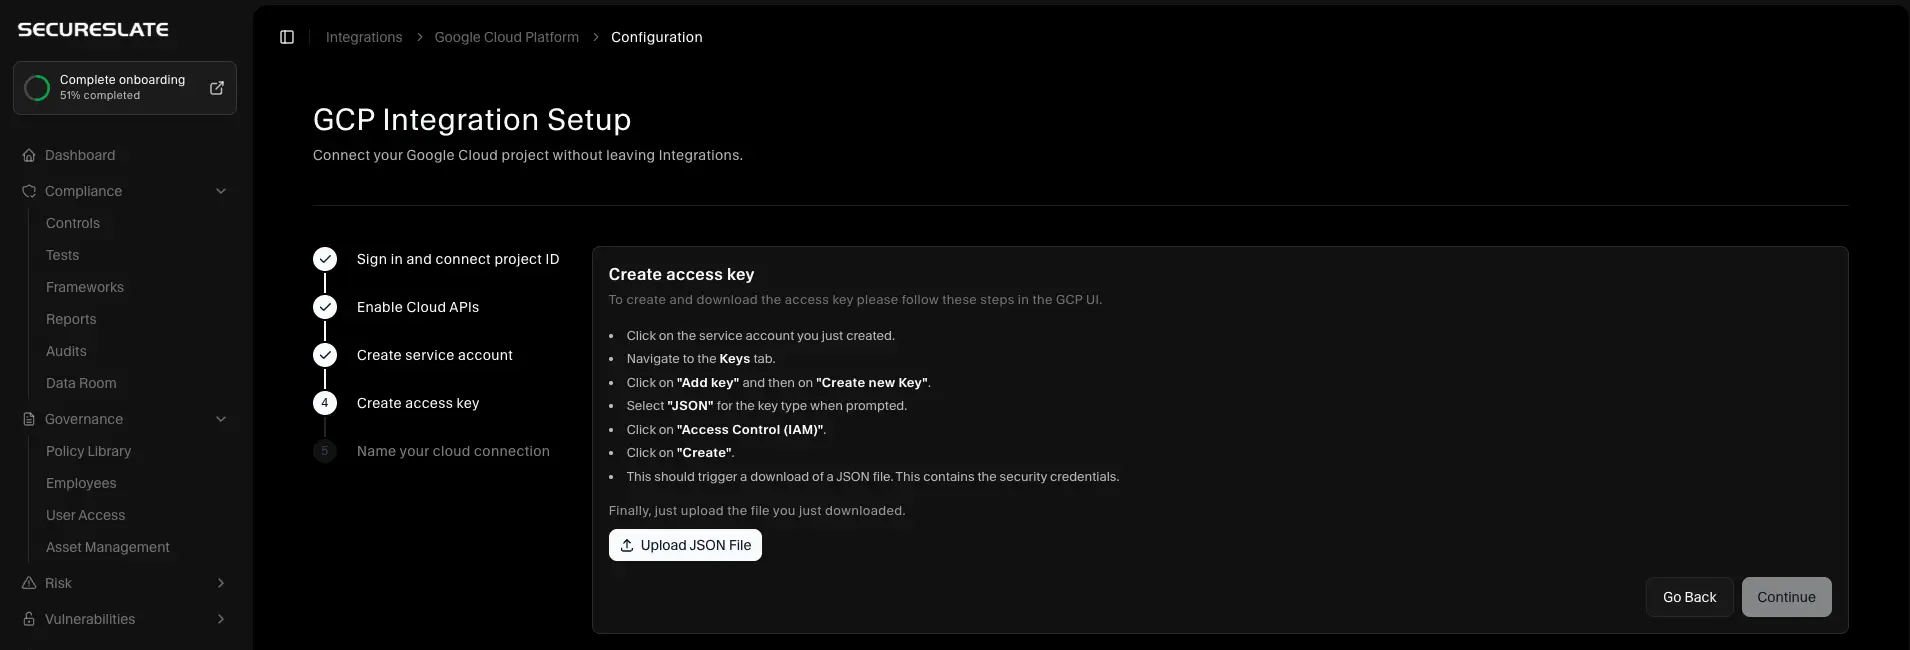
Step 4: Create access key
- In GCP, open the service account you created.
- Go to the Keys tab.
- Click Add key → Create new key.
- Choose JSON and click Create. GCP downloads a JSON key file.
- In SecureSlate, upload that JSON file and click Continue.
SecureSlate verifies the credentials before you finish setup. Keep the JSON key private and store it only in SecureSlate.
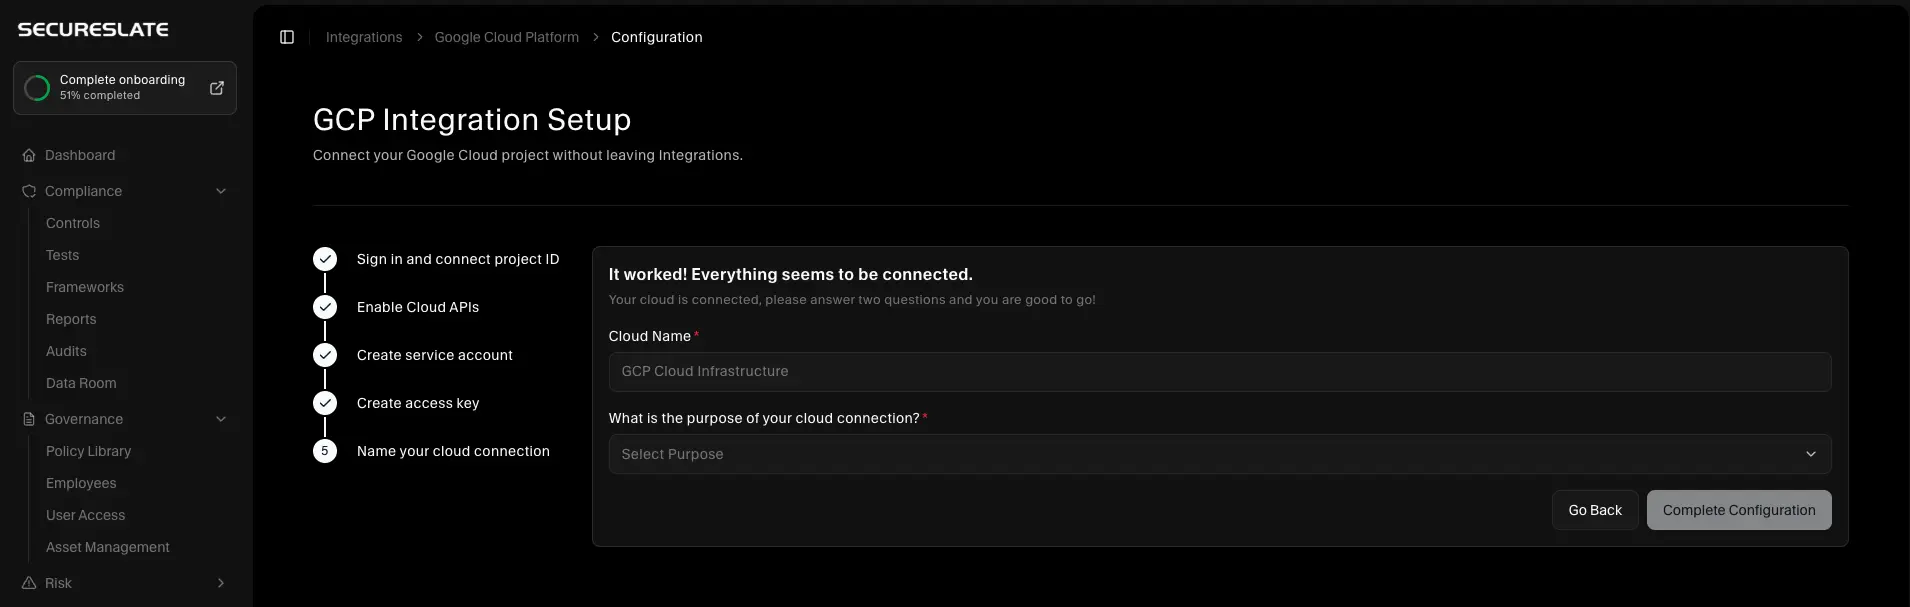
Step 5: Name your cloud connection
- Enter a Cloud name (for example,
GCP Production). - Select the purpose of the connection (Production, Staging, Development, Testing, or Mixed).
- Click Complete Configuration.
After setup, SecureSlate runs the initial security scan and starts inventory and access sync. Most connections report findings within a few minutes.
Verify the integration
To confirm the connection is working:
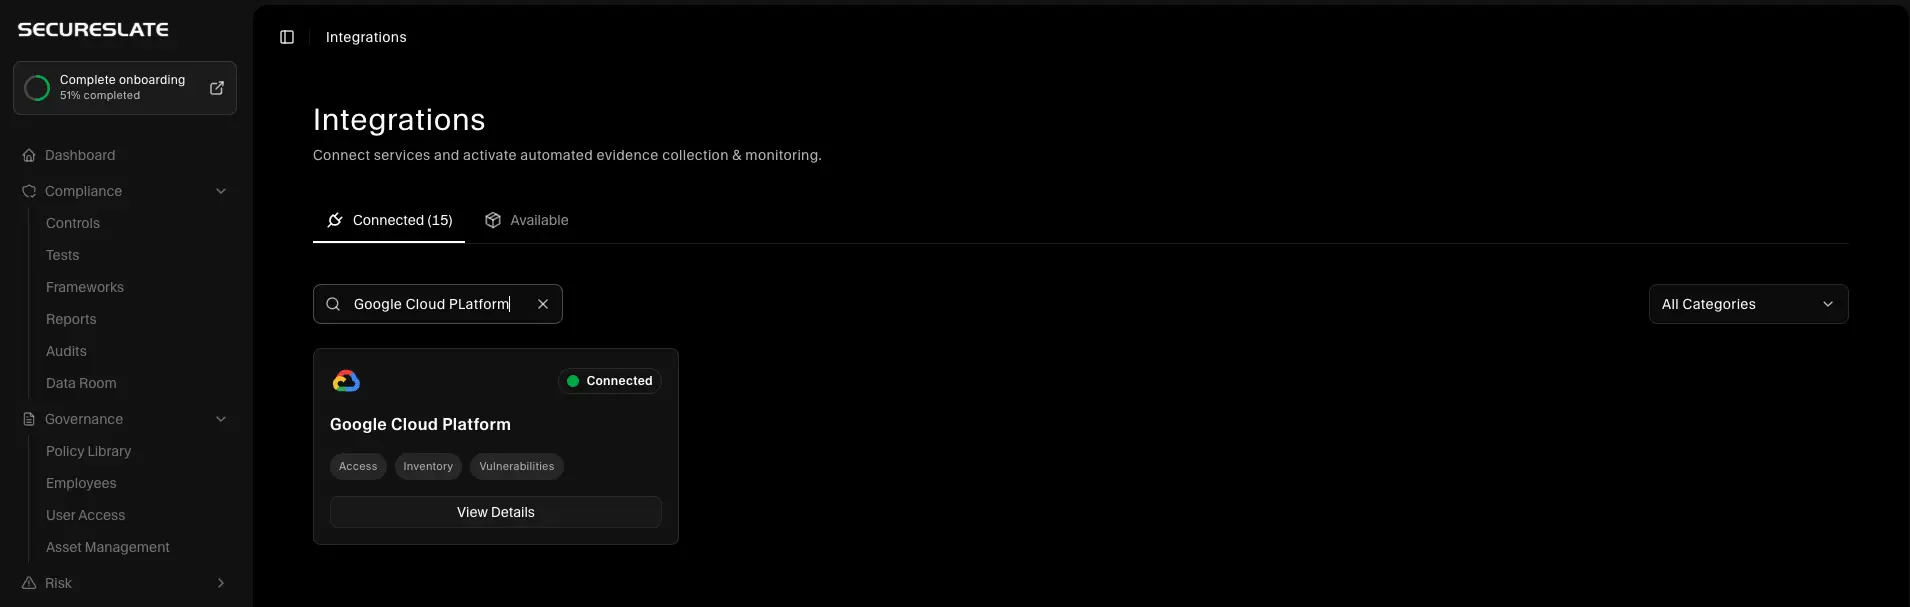
- Confirm Google Cloud Platform appears under Active connections on the Integrations page.
- Open Vulnerabilities and select the connected GCP cloud.
- Review Checks for misconfigurations, Inventory for synced resources, and Access for IAM data.
Related guides
- Getting started with Integrations — how Active connections and the integration catalog work.
- Scan your GCP account — alternate path if you connect GCP from the Cloud overview instead of Integrations.
Troubleshooting
If setup fails or data does not appear:
- Confirm the project ID matches the project where the service account and APIs were configured.
- Confirm all required APIs are enabled and Cloud Shell reported success.
- Confirm the service account has Cloud Asset Viewer, Service Usage Consumer, Security Reviewer, and Viewer on the same project.
- Upload the JSON key for the service account you configured, not an older or unrelated key.
- If the scan completes but inventory or access data is missing, open the cloud results tabs in Vulnerabilities and retry sync from there.
