Trust Management
SecureSlate Trust Center
The SecureSlate Trust Center is a branded security portal where you share compliance information, policies, controls, and subprocessors with customers.
From the app, go to Trust Center to open the editor. Use the tabs along the top to switch between Security Profile, Requests, Updates, and Settings.
Preview your Trust Center
You can preview how visitors will see your Trust Center using the Preview button in the top-right corner.
Important: You must set a hostname in Trust Center → Settings first. Until a hostname is configured, Preview may not work or may not show the correct public URL. After you enter and save the hostname segment (see Settings below), use Preview to open the public Trust Center in a new view.
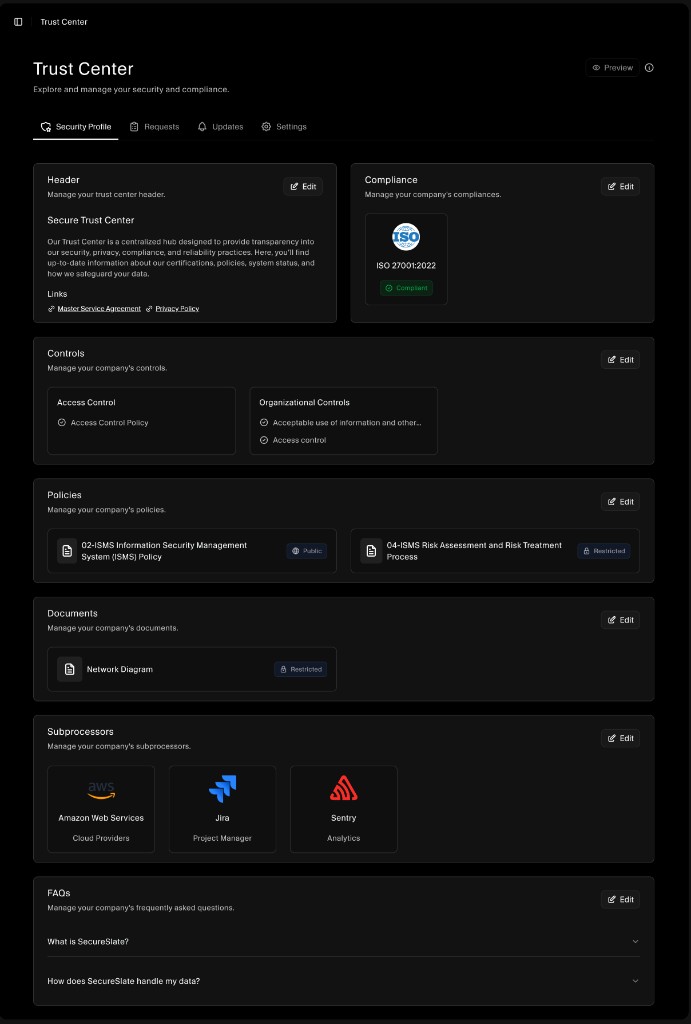
Security Profile tab
The Security Profile tab is where you build the main content visitors see: header, compliance badges, controls, policies, documents, subprocessors, and FAQs. Each block has an Edit button so you can customize what appears.
Header
- Purpose: Introduce your Trust Center and link to legal pages (for example, Master Service Agreement, Privacy Policy).
- Edit: Click Edit next to Header to change the title, description, and Links shown at the top.
Compliance
- Purpose: Show which frameworks or certifications you have achieved (for example, ISO 27001:2022 with a Compliant badge).
- Edit: Use Edit next to Compliance to add or reorder frameworks and their status.
Controls
- Purpose: Display selected controls grouped by category (for example, Access Control, Organizational Controls). Visitors see control names and related policy titles where you choose to expose them.
- Edit: Click Edit next to Controls to choose categories and which controls appear in the Trust Center.
Policies
- Purpose: List approved policies with visibility such as Public or Restricted, so you control what is self-serve vs. request-only.
- Edit: Use Edit next to Policies to select which policies are published and their visibility.
Documents
- Purpose: Share documents (for example, network diagrams) with Public or Restricted access.
- Edit: Click Edit next to Documents to add or remove documents from the portal.
Subprocessors
- Purpose: Disclose third parties that process data (for example, AWS, Jira, Sentry) with short descriptions and categories.
- Edit: Use Edit next to Subprocessors to add vendors from your vendor list and order how they appear.
FAQs
- Purpose: Answer common questions (for example, “What is SecureSlate?”, “How does SecureSlate handle my data?”) so prospects get answers without emailing sales.
- Edit: Click Edit next to FAQs to add questions and answers and reorder them.
Requests tab
The Requests tab is where you manage access requests from visitors who want restricted documents or deeper access.
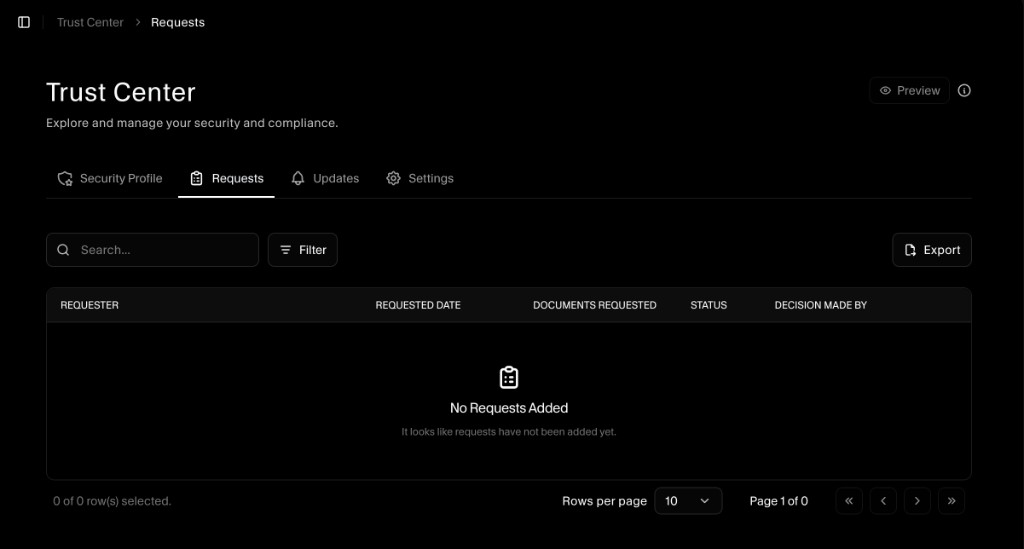
- Columns: Requester, Requested date, Documents requested, Status, Decision made by.
- Actions: Use Search and Filter to find requests; Export to download the list.
- Processing requests: When someone requests access, review the row and approve or deny according to your process. You can align this with internal approval and NDA requirements if you use them.
If there are no requests yet, the table shows an empty state until the first request is submitted from the public Trust Center.
Updates tab
Use the Updates tab to publish announcements (for example, new certifications, audit completions, or product security improvements).
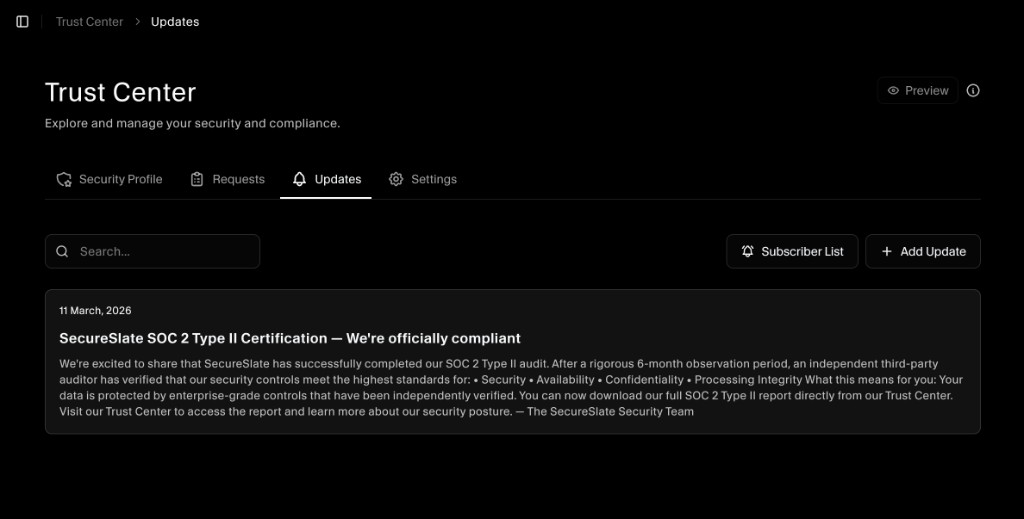
- Add Update: Click Add Update to create a dated post with a title and body (for example, announcing SOC 2 Type II completion).
- Subscriber List: Use Subscriber List to see or manage who receives notifications about new updates, if that feature is enabled for your plan.
- Search: Filter existing updates with the search bar.
Visitors typically see updates on the public Trust Center so customers stay informed without manual emails for every milestone.
Settings: Trust Center URL and custom domain
Open the Settings tab to configure how your Trust Center is reached on the web.
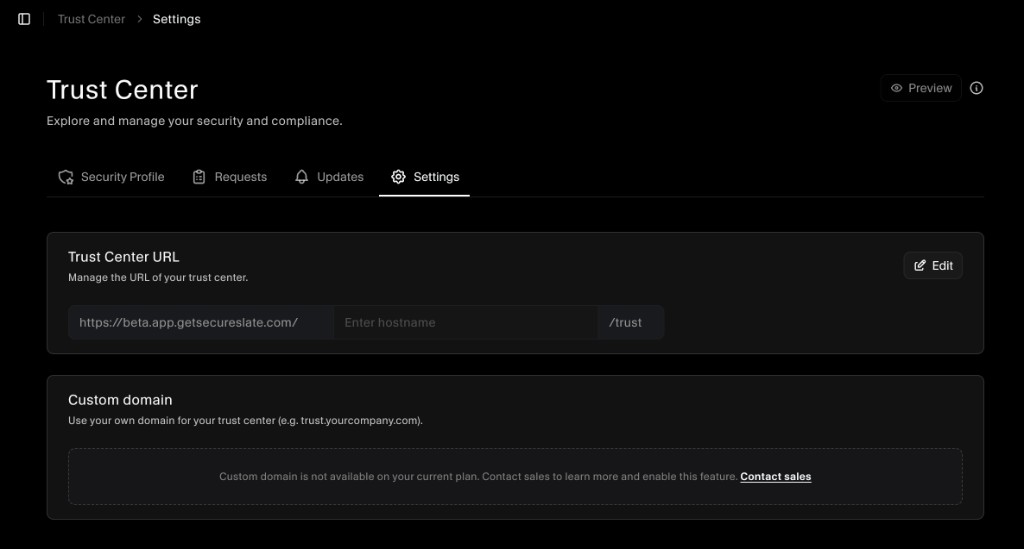
Trust Center URL (hostname)
The URL is built from a base path plus a hostname segment you choose, ending in /trust.
- Go to Trust Center → Settings.
- In Trust Center URL, enter your hostname in the editable field (between the base URL and
/trust). - Save or confirm so the URL is reserved for your organization.
You must set this hostname before using Preview. After the hostname is saved, Preview opens the Trust Center at the correct public URL so you can review branding and content as visitors will see it.
Custom domain
If your plan includes it, you can map a custom domain (for example, trust.yourcompany.com). On plans where custom domain is not included, the UI shows that the feature is not available and may prompt you to contact sales to enable it.
Summary
| Tab | Purpose |
|---|---|
| Security Profile | Edit header, compliance, controls, policies, documents, subprocessors, FAQs. |
| Requests | Review and decide on access requests for restricted resources. |
| Updates | Publish announcements; manage subscribers if enabled. |
| Settings | Set hostname (required before Preview), optional custom domain. |
For a phased rollout and implementation ideas, see Getting Started with SecureSlate Trust Center.
