
Integrations
Syncing Policies from Microsoft SharePoint
Once you have connected Microsoft SharePoint to SecureSlate, you can pull documents directly from your SharePoint folders into policies and trust center documents without leaving SecureSlate.
How It Works
SecureSlate reads from two dedicated folders in the SharePoint site you selected during setup:
| SharePoint Folder | Used In |
|---|---|
SecureSlate Policies |
Policy Library |
SecureSlate Documents |
Trust Center documents |
When you sync a document, SecureSlate fetches the file from SharePoint and links it to the policy or document record. The integration is read-only. SecureSlate imports your files but never writes back to SharePoint.
Only
.docx,.xlsx, and
Syncing a Policy Document
Prerequisites
- SharePoint must be connected and a site must be selected. See Connecting SecureSlate & Microsoft SharePoint.
- Your
.docx,.xlsx, or.pdffile must be in theSecureSlate Policiesfolder at the root of your selected SharePoint site's Documents library.
Steps
- From the sidebar, navigate to Policy Library.
- Open an existing policy or create a new custom policy.
- In the policy editor, click Sync from SharePoint.
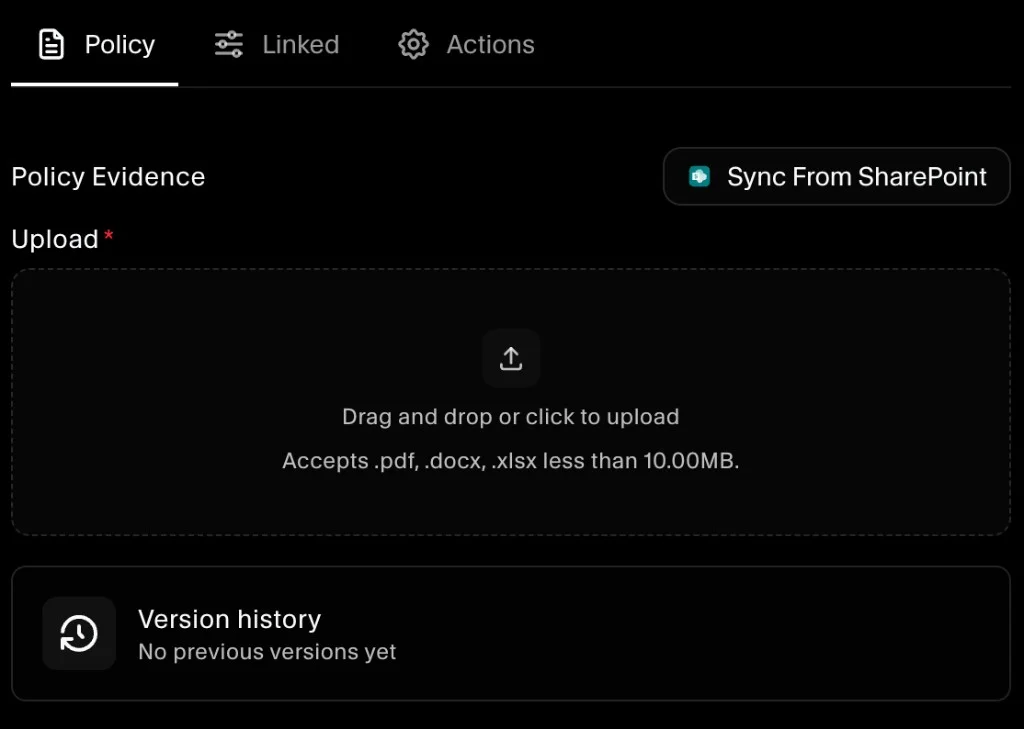
- The Sync from SharePoint dialog opens, listing all files found in your
SecureSlate Policiesfolder. - Use the search bar to filter documents by name if needed.
- Click a document row to select it. A green checkmark confirms your selection.
- Click Sync to import the document into the policy.
The policy will now display the synced file as its attached document, showing the file name, size, and the date it was last modified in SharePoint.
Syncing a Trust Center Document
Supporting compliance documents, such as certifications, audit reports, or third-party assessments, can be synced from the SecureSlate Documents folder.
- Navigate to Trust Center in the sidebar.
- Open or create a document entry.
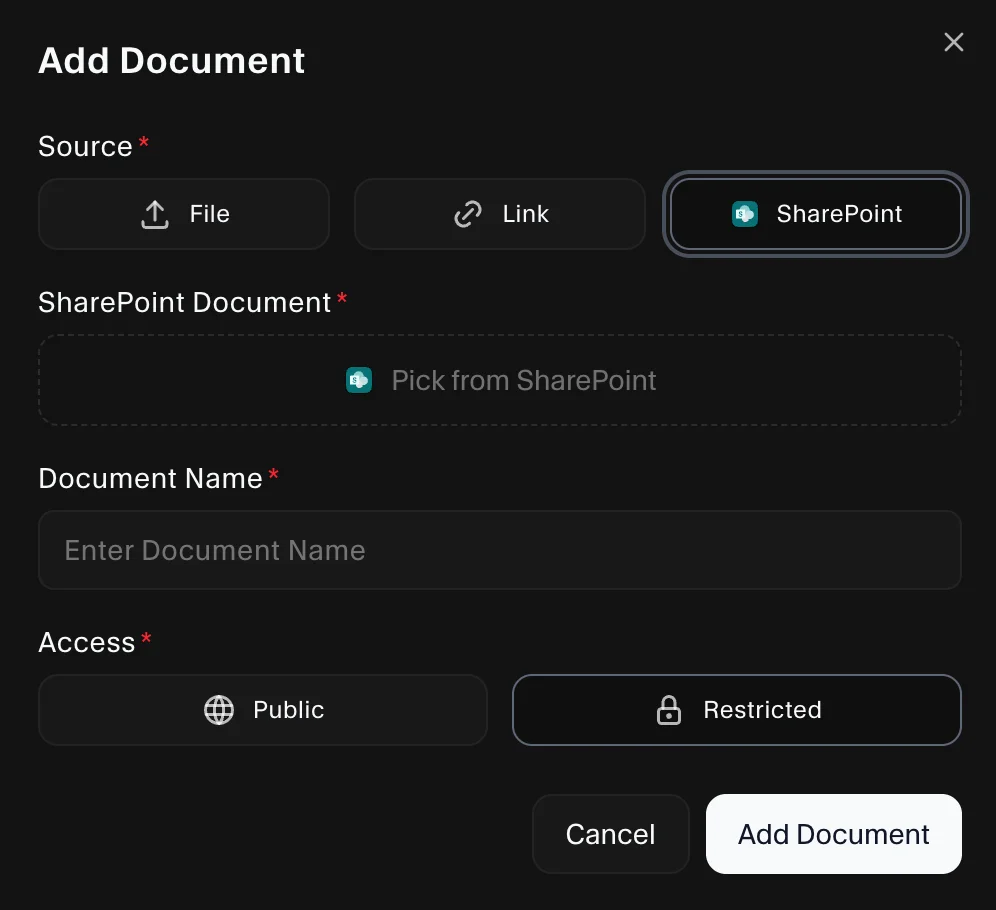
- Choose SharePoint as the source, then click Pick from SharePoint.
- The dialog will show files from your
SecureSlate Documentsfolder. - Select the file and click Add Document.
Refreshing the Document List
If you've recently added files to SharePoint and they don't appear in the dialog, click the Refresh button in the bottom-left corner of the sync dialog. This re-fetches the current contents of your SharePoint folder.
Automatic Change Detection
SecureSlate checks your SharePoint folders every hour for file changes. When a synced document is updated in SharePoint, SecureSlate will:
- Show a "Document updated" warning badge next to the policy in the Policy Library table.
- Display a "SharePoint document updated" card inside the policy drawer showing when the file was modified.
When you open the affected policy, a Re-sync button appears. Clicking it opens a dialog asking how to handle the update:
| Option | What happens |
|---|---|
| Needs approval in SecureSlate | Policy status is set to Needs Approval and linked tests are set to Fail |
| Already approved externally | Policy is recorded as Approved and linked tests are set to Pass |
This keeps your approval records accurate regardless of where the review happened.
Note: Re-syncing acknowledges the file change and updates the policy status. The document link always points to the live file in SharePoint, so no download or re-upload is needed.
Replacing a Synced Document
To replace a previously synced file with a newer version:
- Update the file in your SharePoint folder (same filename or a new one).
- Open the policy or trust center document in SecureSlate.
- Click Sync from SharePoint again.
- Select the updated file and click Sync.
The old file is moved to Version history and the newly selected document becomes the current evidence.
Auditor Access
When a document is synced, SecureSlate automatically generates a read-only public link for the file. This link:
- Does not require a Microsoft account to open
- Is view-only, with no editing permissions
- Is used in audit exports so auditors can access evidence without SharePoint credentials
This requires anonymous sharing to be enabled in your Microsoft 365 admin settings. See Connecting SecureSlate & Microsoft SharePoint for setup details.
File Requirements
| Requirement | Detail |
|---|---|
| Supported formats | .docx, .xlsx, .pdf |
| Folder location | Root of your selected SharePoint site's Documents library (not in subfolders) |
| Folder name (policies) | SecureSlate Policies (exact spelling, case-sensitive) |
| Folder name (documents) | SecureSlate Documents (exact spelling, case-sensitive) |
| Write access | None. SecureSlate never modifies file content |
| Change detection | Automatic. SecureSlate checks for updates every hour |
| Auditor access | Public read-only link generated automatically (requires anonymous sharing enabled) |
Troubleshooting
- "No documents found" in the dialog: Check that the folder name is spelled exactly as
SecureSlate PoliciesorSecureSlate Documents, files are.docx,.xlsx, or.pdf, files are not inside a subfolder, and they are in the correct SharePoint site selected during setup. - "SharePoint is not connected" error: Go to Integrations, find SharePoint, and reconnect.
- Files from a different SharePoint site are appearing (or not appearing): SecureSlate syncs from the site selected when you first connected. To use a different site, disconnect and reconnect the integration.
- Dialog shows a stale file list: Click Refresh in the dialog to reload the latest files from SharePoint.
- File synced but policy still pending approval: Syncing a file does not auto-approve a policy. You still need to go through the standard approval workflow.
- "Document updated" badge appears on a policy: SecureSlate detected that the file was changed in SharePoint. Open the policy and click Re-sync to handle the update.
- Auditors see a login prompt when opening document links: Anonymous sharing is not enabled on your SharePoint tenant. See Connecting SecureSlate & Microsoft SharePoint for the admin setting required.
For further help, contact support@getsecureslate.com.
