Integrations
Connecting SecureSlate & AWS Accounts
Connecting Amazon Web Services (AWS) to SecureSlate enables continuous cloud scanning and misconfiguration checks. SecureSlate connects with read-only permissions and uses an IAM role that SecureSlate can assume to evaluate your environment without making changes to your AWS resources.
After connecting, findings appear on the Checks tab of the Cloud overview page, filtered by AWS.
Prerequisites
Before you start, make sure you have:
- SecureSlate permissions: access to create/manage integrations (typically Admin).
- AWS permissions: permission to create IAM roles and customer-managed policies, and to attach AWS managed policies.
- An AWS account owner/admin (or equivalent) available to complete the IAM steps in the AWS console.
Connect an AWS account (role-based)
SecureSlate guides you through a short setup wizard. You’ll select what you want to monitor, create the required IAM policy and role in AWS, then link the role back in SecureSlate with a Role ARN and region scope.
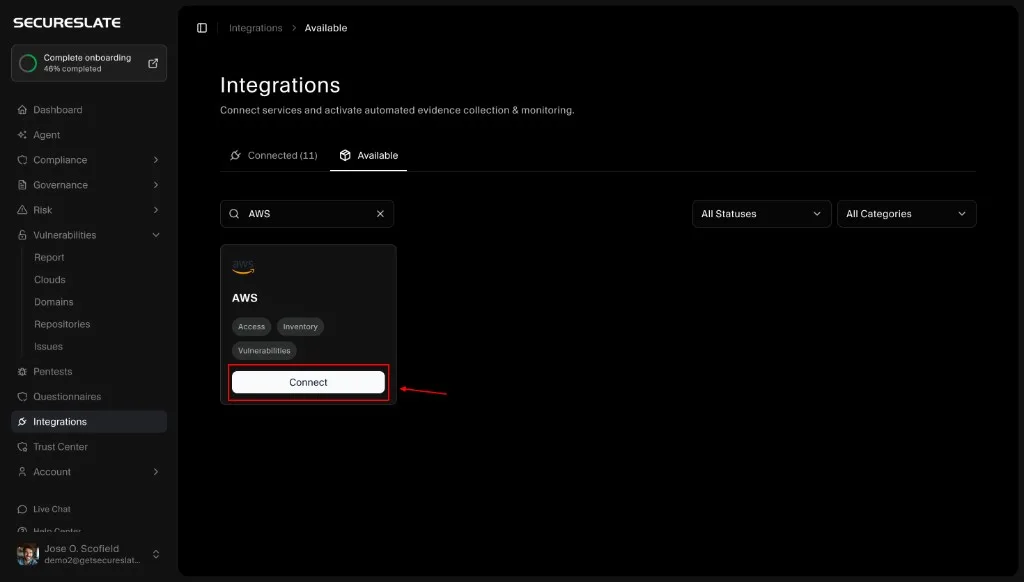
Step 1: Start the AWS integration setup
- In SecureSlate, go to Integrations.
- Open the Available tab.
- Search for AWS.
- Click Connect on the AWS card.
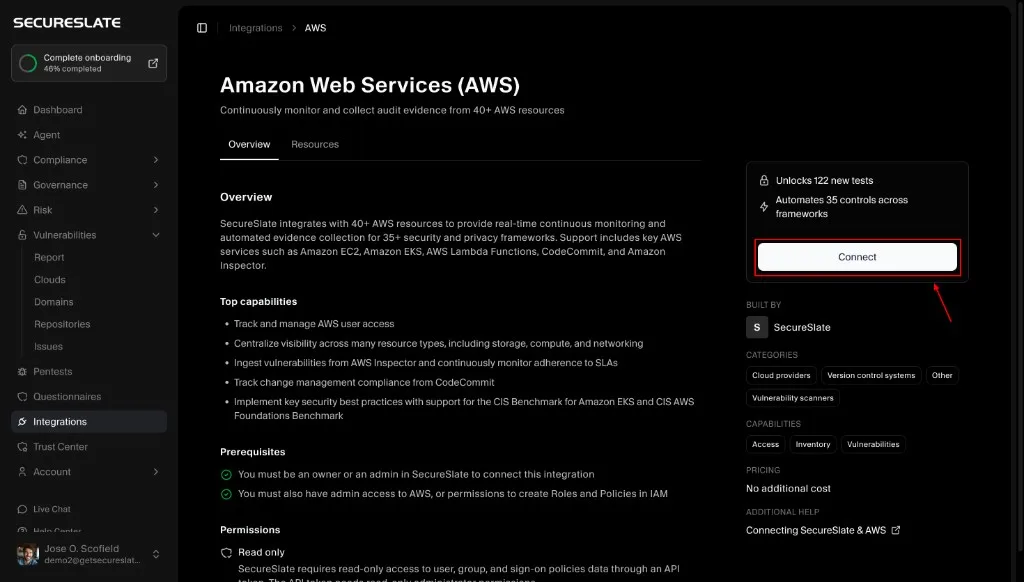
You’ll land on the AWS integration details page where you can review what SecureSlate monitors, confirm prerequisites and permissions (read-only), and explore supported AWS resources before continuing.
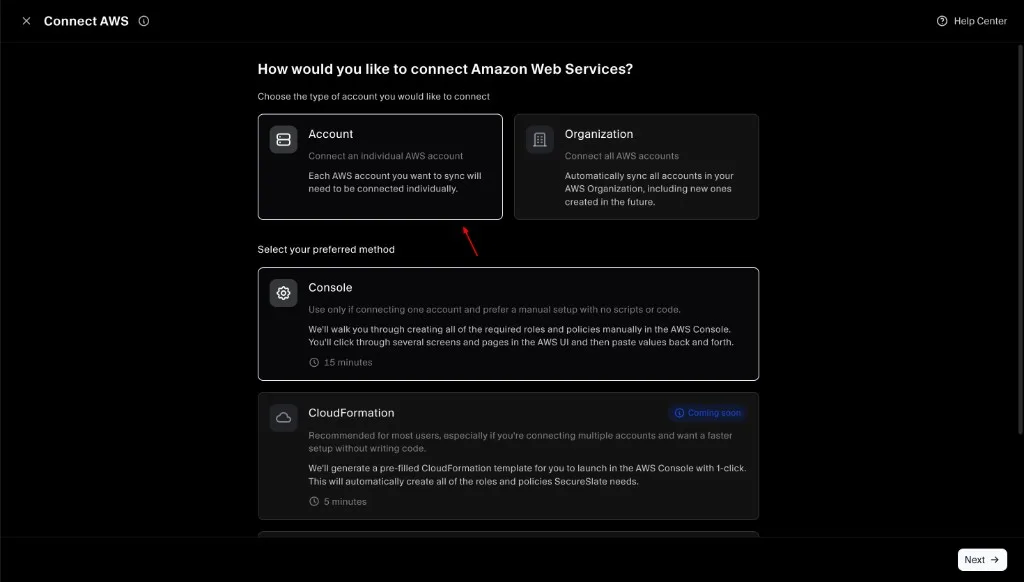
Step 2: Choose account type and setup method
- Select Account to connect a single AWS account.
- Select your preferred method:
- Console: manual setup in the AWS console (recommended for a quick, no-code setup).
- CloudFormation: faster setup (if available in your environment).
- Click Next.
If you want to connect multiple AWS accounts under an AWS Organization (including optional AWS Control Tower monitoring), use the Organization flow instead:
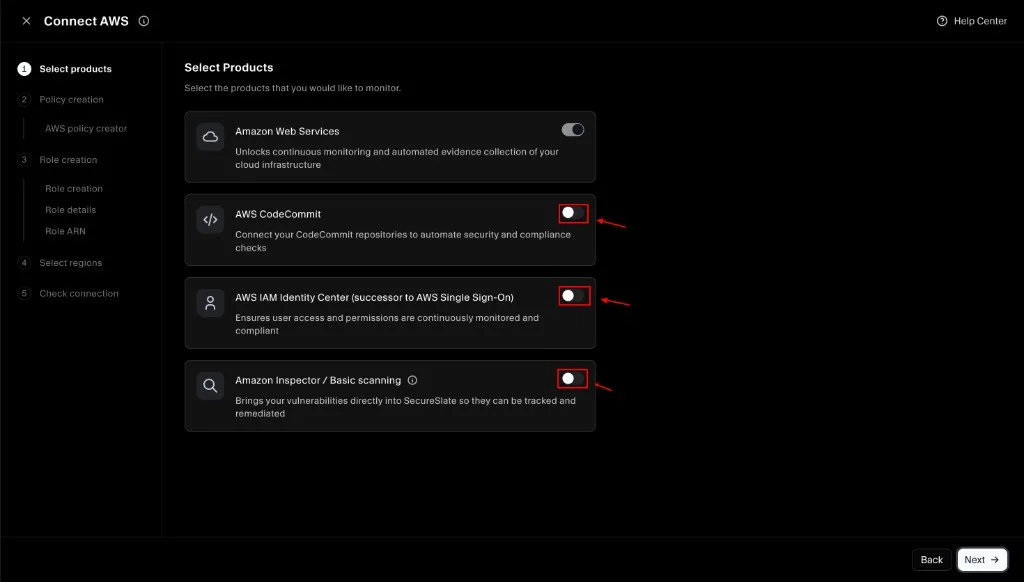
Step 3: Select products to monitor
Toggle on any additional products you want SecureSlate to monitor. Your selection determines what permissions SecureSlate will include in the IAM policy you create in the next step.
- Amazon Web Services: enabled by default (core cloud monitoring)
- AWS CodeCommit: repository monitoring (optional)
- AWS IAM Identity Center: access monitoring (optional)
- Amazon Inspector / Basic scanning: vulnerability signals (optional)
Click Next when you’re done.
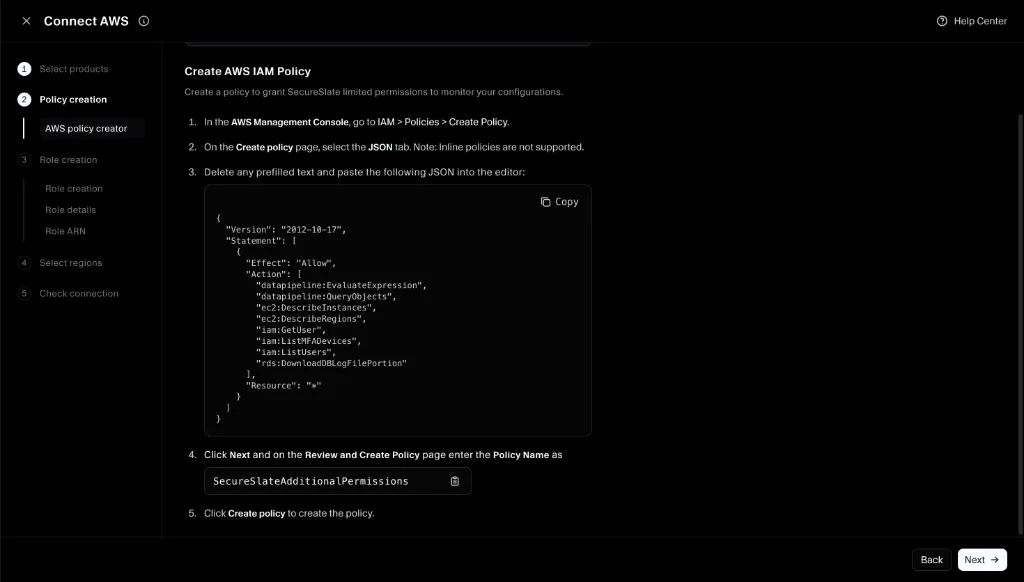
Step 4: Create the IAM policy in AWS (SecureSlateAdditionalPermissions)
SecureSlate will show a JSON policy based on the products you selected. Create this as a customer-managed policy in AWS.
- In the SecureSlate wizard, copy the policy JSON.
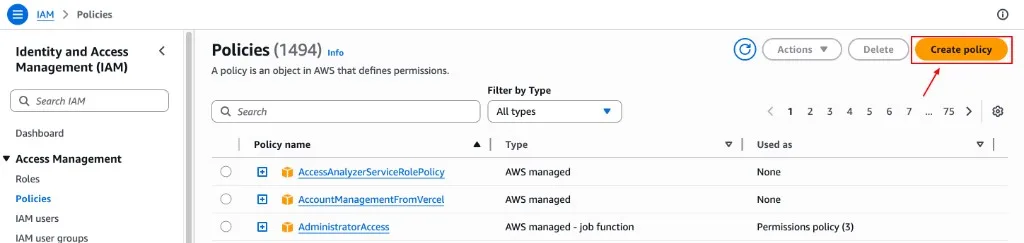
- In the AWS Management Console, go to IAM → Policies → Create policy.
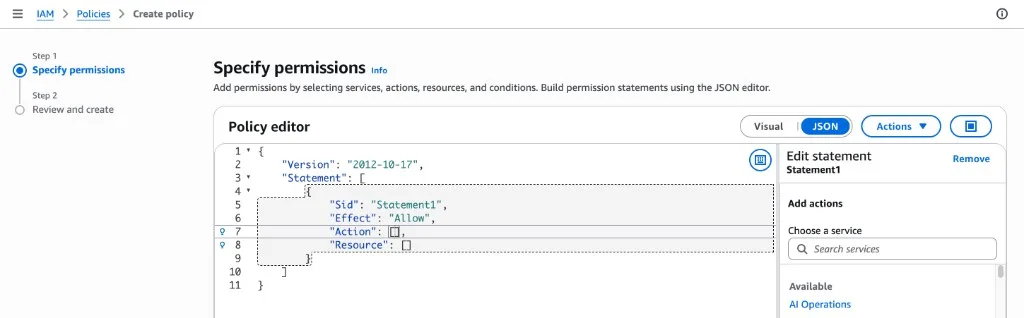
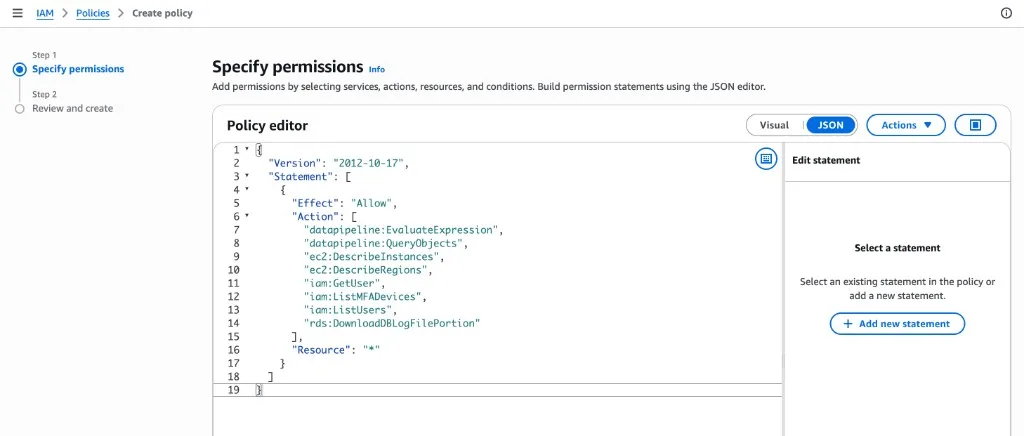
- Open the JSON editor, delete any prefilled text, and paste the policy JSON from SecureSlate.
- Click Next, then name the policy SecureSlateAdditionalPermissions.
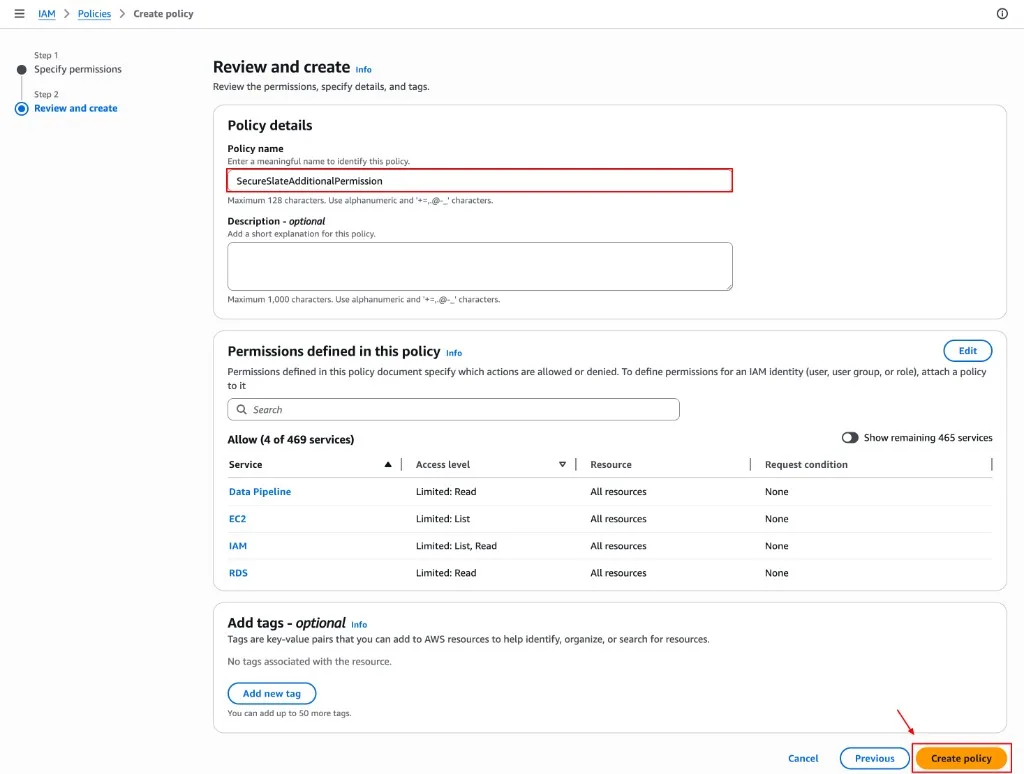
- Click Create policy.
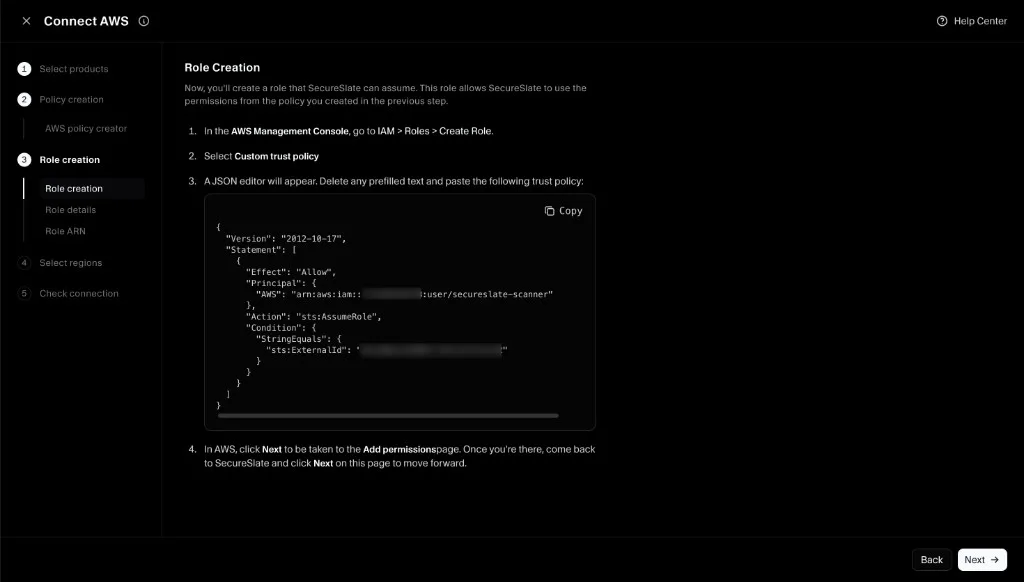
Step 5: Create the IAM role (trust policy)
Now you’ll create the IAM role that SecureSlate can assume.
- In the AWS Management Console, go to IAM → Roles → Create role.

- Select Custom trust policy.
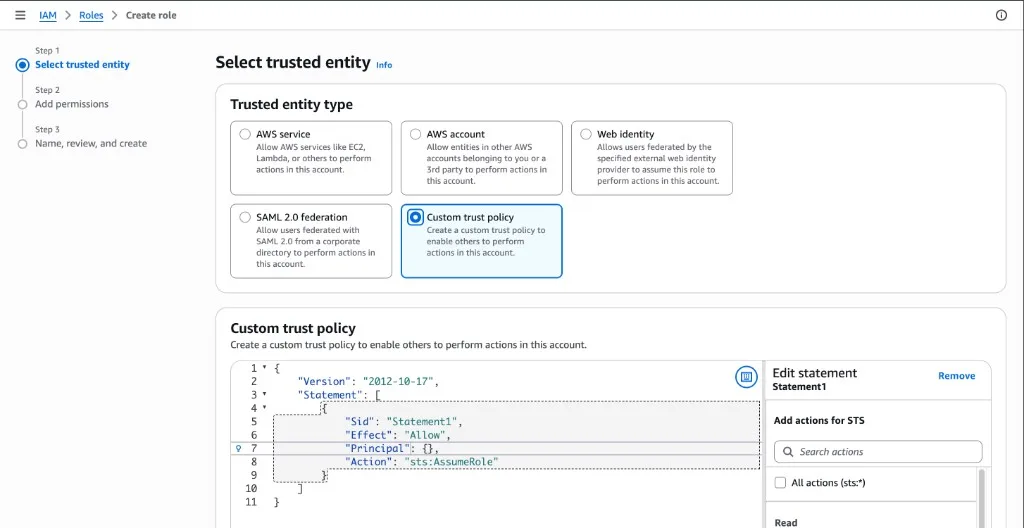
- In the JSON editor, delete any prefilled text and paste the trust policy shown in SecureSlate (it includes a required External ID).
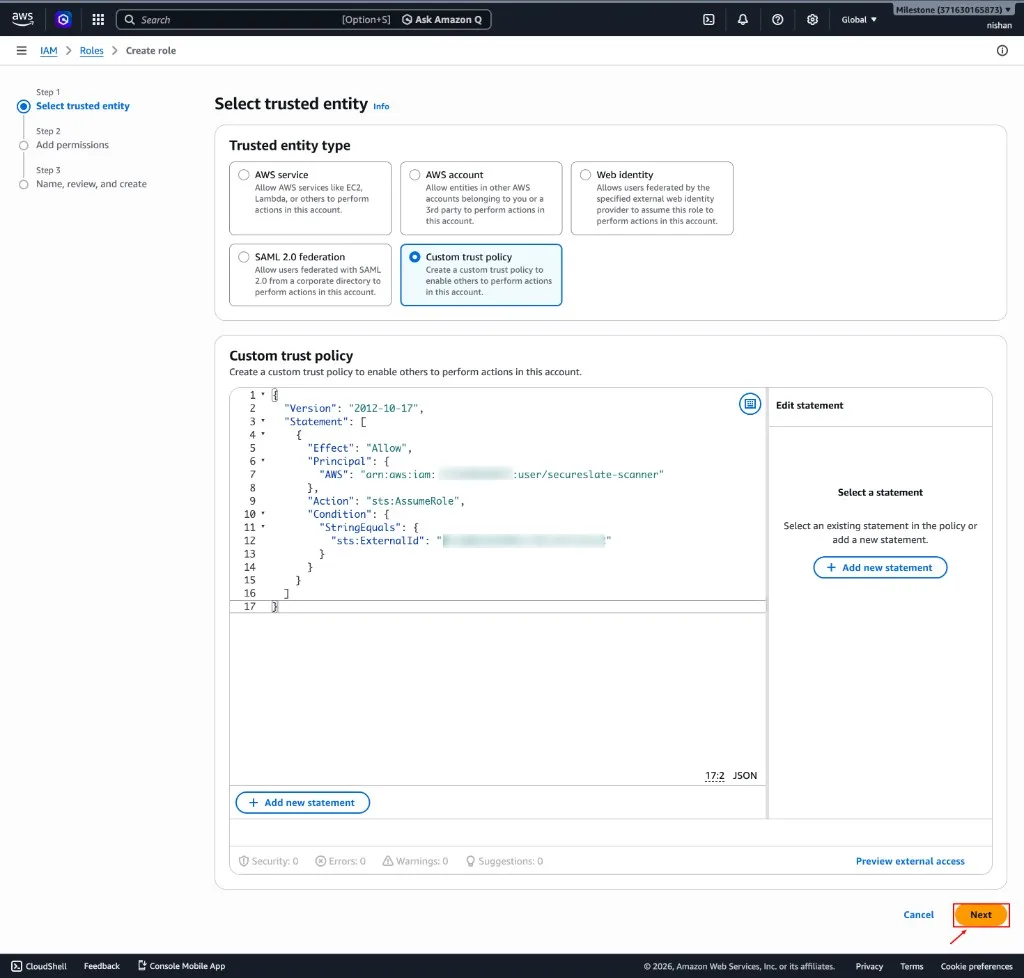
- Click Next.
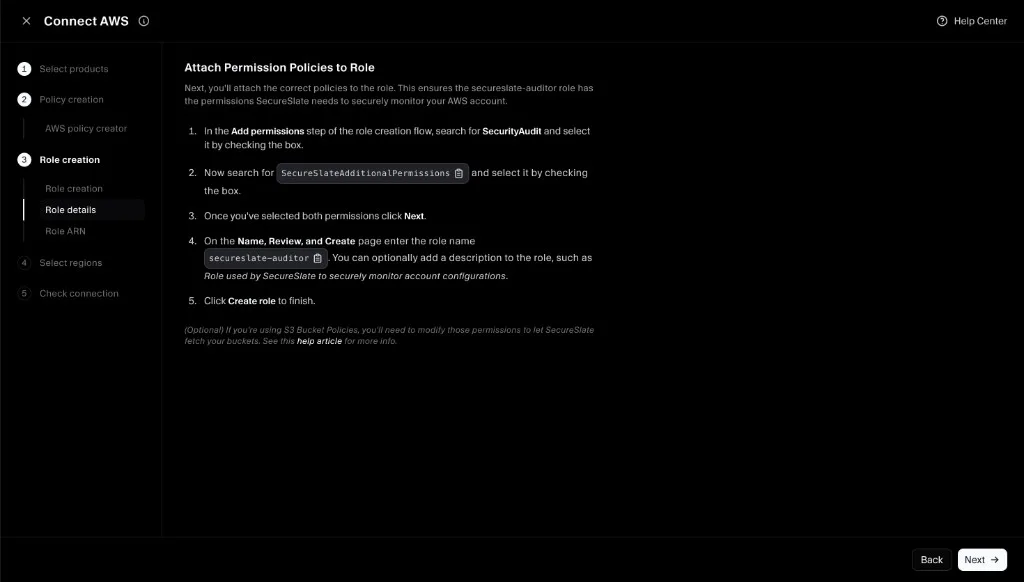
Step 6: Attach permission policies to the role
Attach both required policies:
- AWS managed policy: SecurityAudit
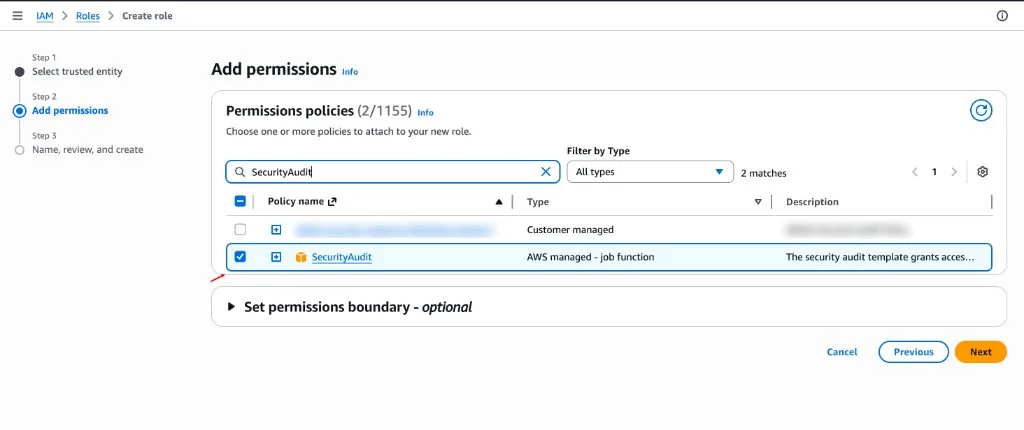
- Customer-managed policy: SecureSlateAdditionalPermissions
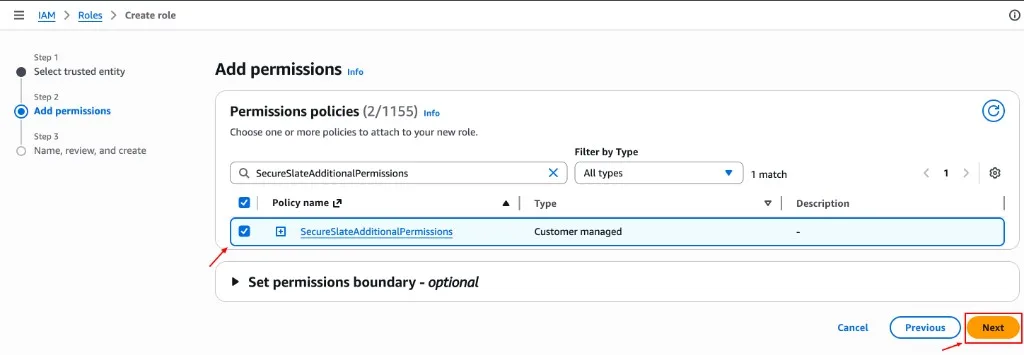
Then complete role creation:
- On the Name, review, and create screen, set the role name to secureslate-auditor.
- Click Create role.
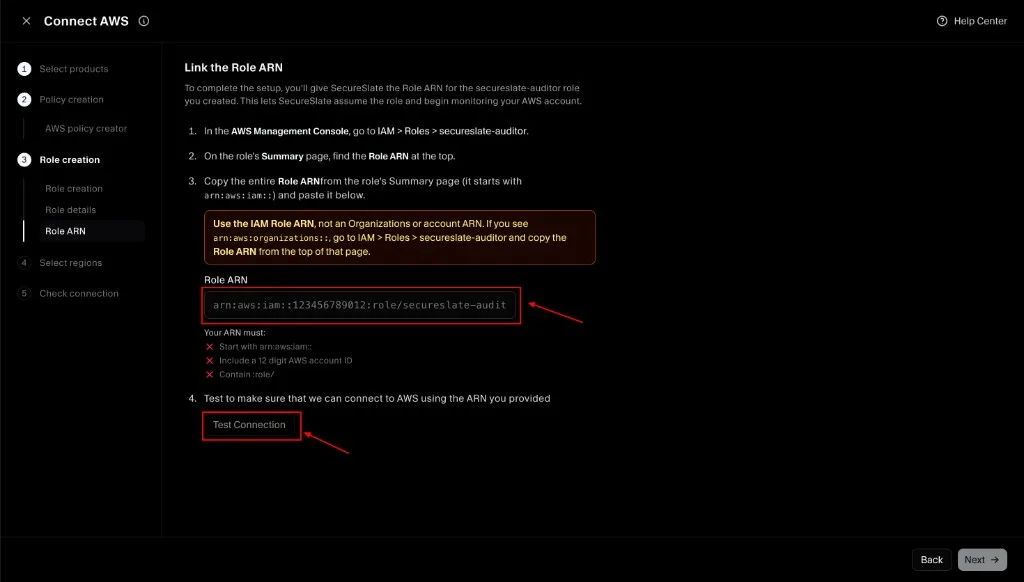
Step 7: Link the Role ARN in SecureSlate (and test connection)
- In AWS, open IAM → Roles → secureslate-auditor.
- Copy the Role ARN from the role’s summary page.
- Paste the Role ARN into SecureSlate.
- Click Test Connection to verify SecureSlate can assume the role successfully.
- Click Next.
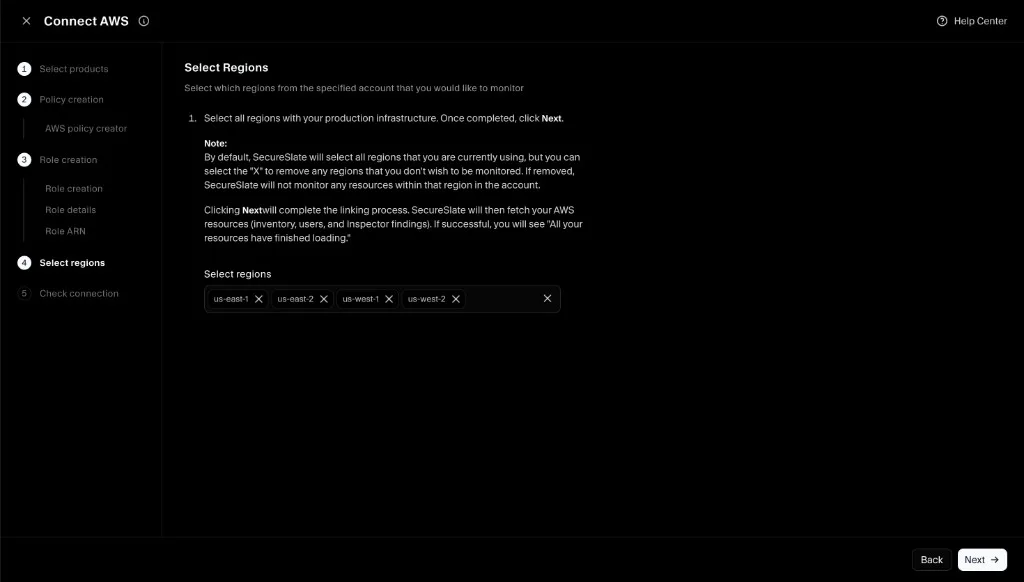
Step 8: Select regions (scope)
Select which AWS regions you want SecureSlate to monitor:
- Keep regions where you run production infrastructure.
- Remove regions you don’t want monitored (SecureSlate won’t scan resources in removed regions).
Click Next to complete linking.
Step 9: Complete connection
Once you finish the wizard, SecureSlate will begin fetching and scanning your AWS resources. Larger environments can take a few minutes for the initial sync.
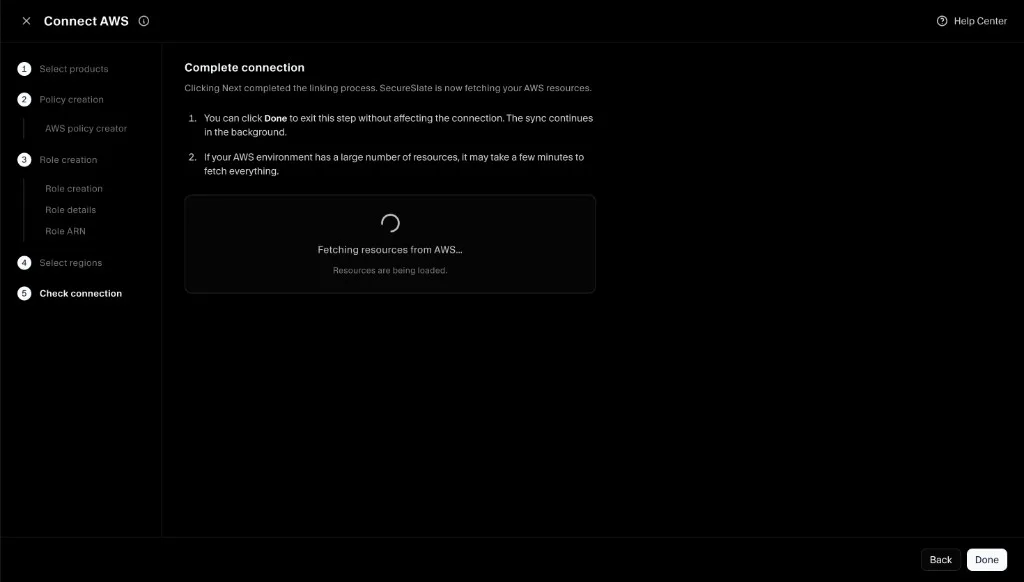
After you complete the flow, SecureSlate will begin scanning. In most environments, initial findings appear within a few minutes.
Verify the integration
To confirm everything is working:
- Open Cloud overview and confirm the AWS connection appears.
- Open Checks and filter to AWS to see results populate.
- If you recently connected, wait a few minutes and refresh. Larger AWS environments can take longer on the initial pass.
Troubleshooting
If the connection fails or findings don’t appear:
- Confirm the
secureslate-auditorrole has both policies attached:- AWS managed SecurityAudit
- Customer-managed SecureSlateAdditionalPermissions
- Confirm the trust policy matches what SecureSlate provided (including the External ID).
- If Test Connection fails, re-copy the Role ARN from AWS and try again.
Using an IAM role instead (assume role)
This connection flow uses role-based access. If you need the deeper role configuration reference, see:
(Optional) Add permissions to S3 bucket policies
If your account uses S3 bucket policies, those policies can restrict access even when the IAM role has the correct permissions. If SecureSlate can’t read bucket configuration, update the bucket policy to allow access for the secureslate-auditor role.
Use the read-only actions from SecurityAudit and scope them to the relevant bucket resources.
