Evidence Collection
Creating Custom Test
Add a Custom Test
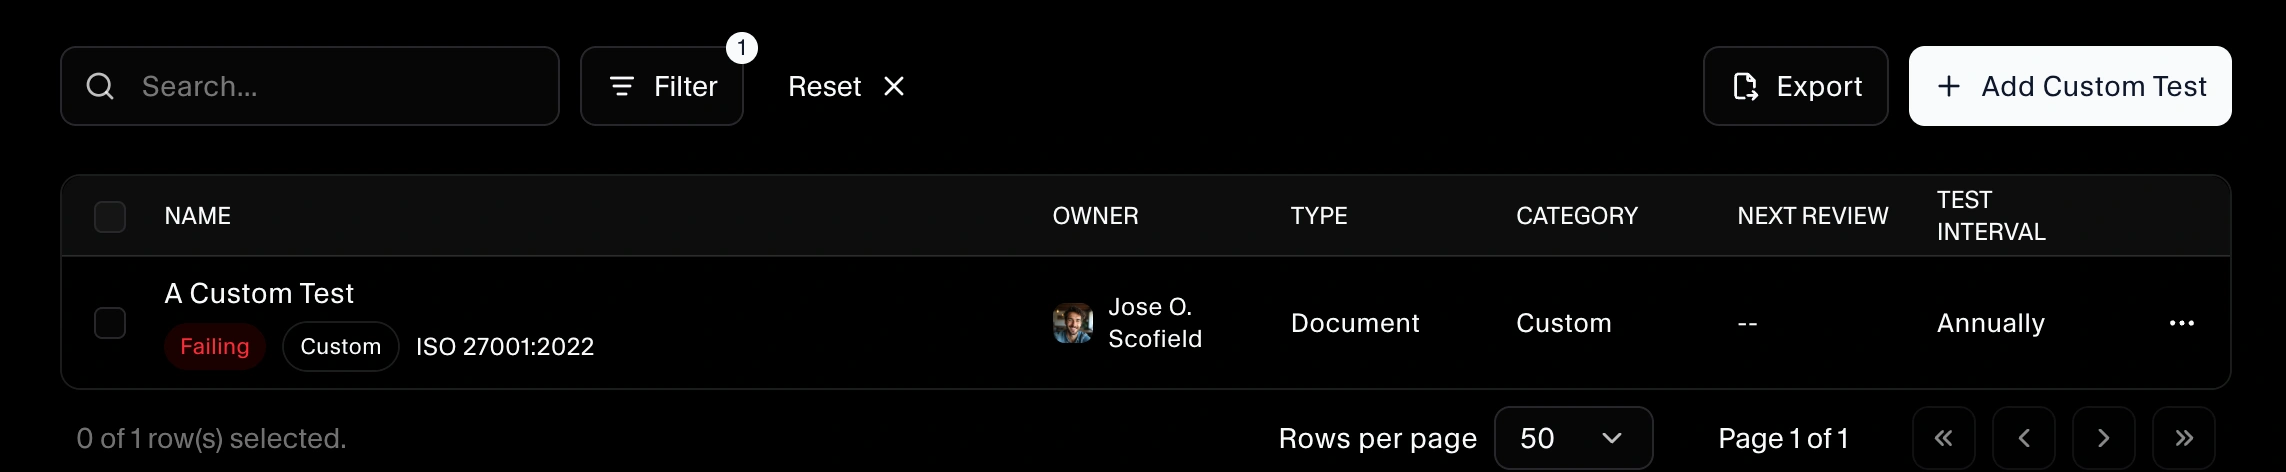
Custom tests are useful when you need to track evidence that isn’t covered by an existing integration or built-in SecureSlate test. After you create one, it appears in the Tests table with a Custom badge, and you can upload evidence, link it to controls, and leave notes for auditors.
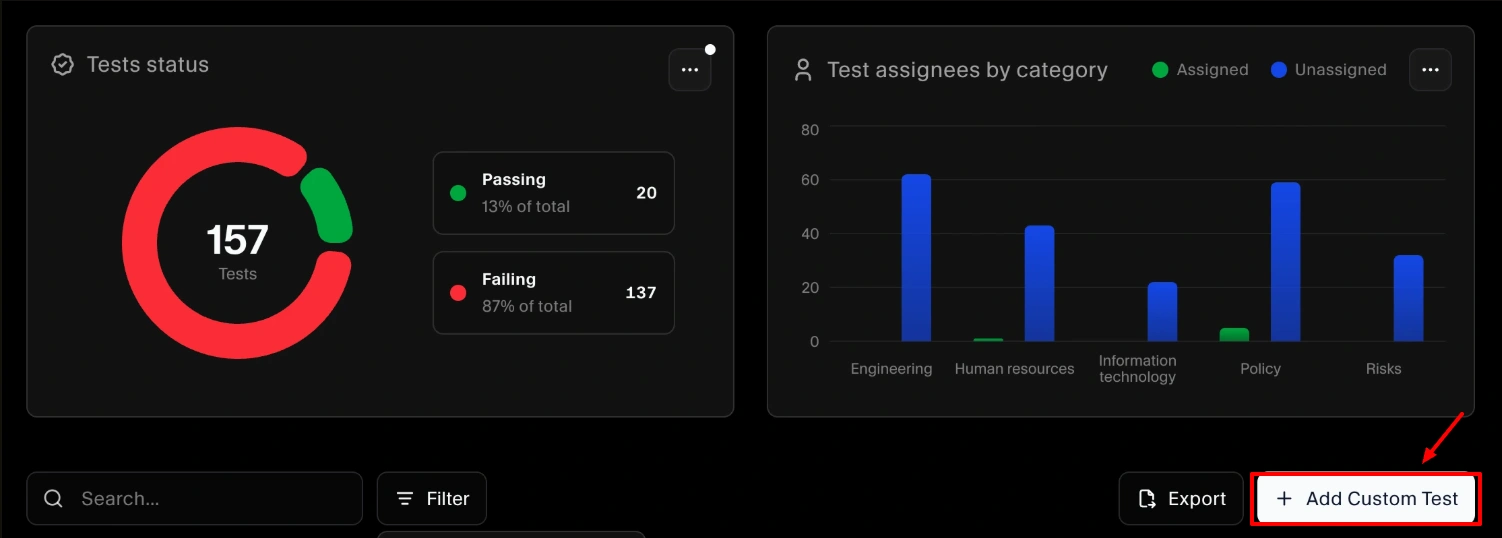
Step 1: Open the Tests page
- In the left sidebar, go to Compliance → Tests
- Click Add Custom Test
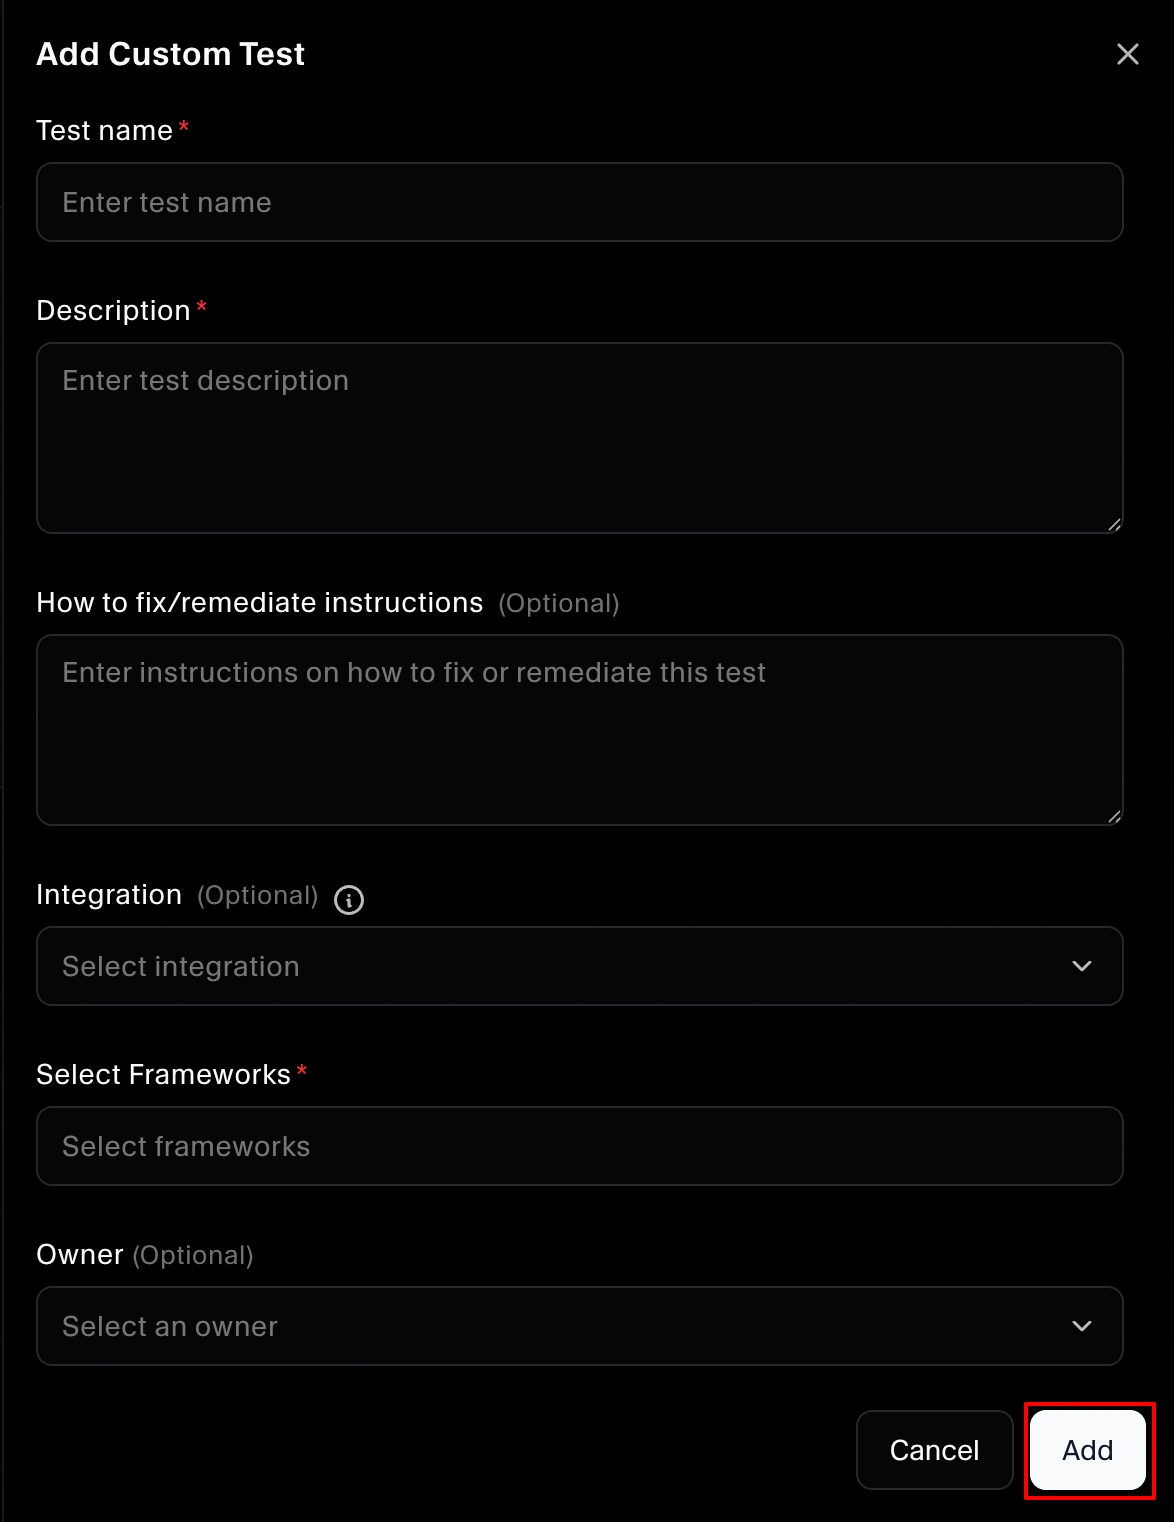
Step 2: Enter test details
Fill in the test information:
- Test name
- Description
- How to fix (optional)
- Integration (optional) - Link this test to a connected integration. You can create a custom test for any integration.
- Frameworks (add one or more that this test supports)
- Owner
Click Add to create the test.
What happens next
After creation:
- The custom test appears in the Tests table
- The test shows a Custom badge
- Clicking the test name opens the test drawer
Using the custom test drawer
When you open the custom test, you’ll see several tabs.
Overview tab (upload evidence)
Use the Overview tab to upload evidence for the test. This is where you attach files or artifacts that support audit requirements.
Linked Controls tab (map to a control)
To link the test to a control:
- Open Linked Controls
- Click the plus (+) icon
- Select the control(s) you want to link
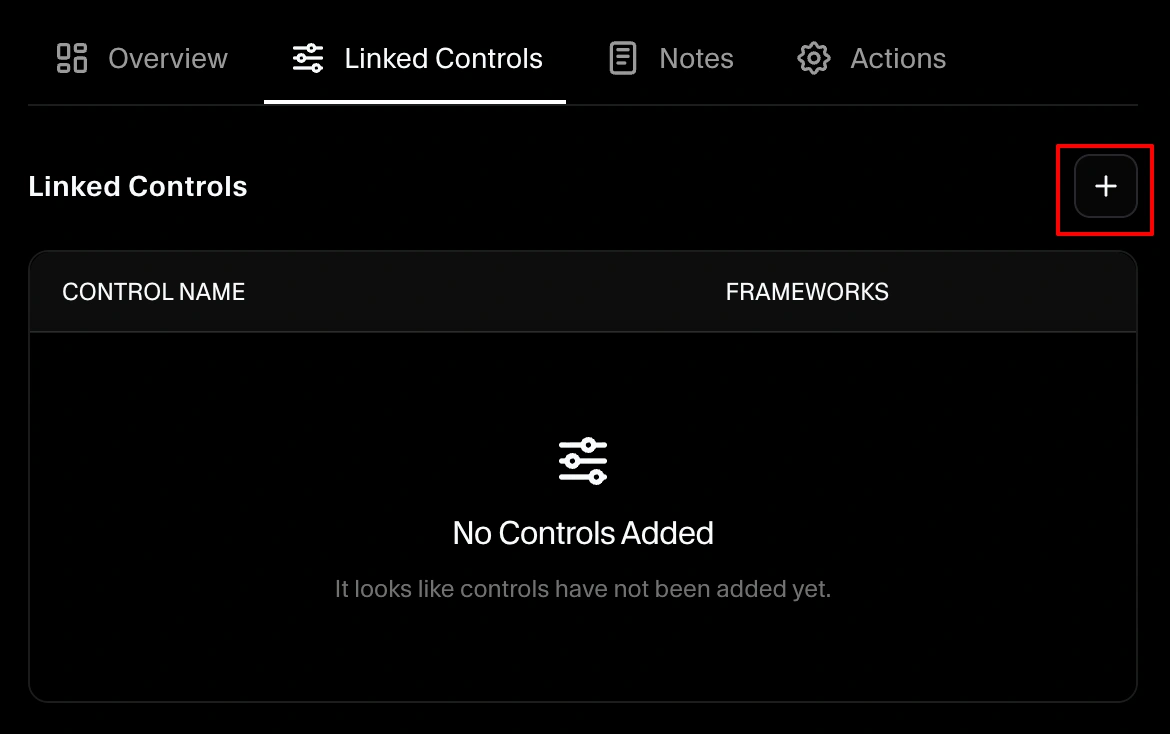
Linking ensures the evidence you upload for this custom test contributes to the relevant control(s).
Notes tab (leave auditor notes)
Use Notes to leave context for auditors (and your internal team), such as:
- What the evidence demonstrates
- Where it was sourced from
- Any exceptions, compensating controls, or implementation details
Actions tab (deactivate or delete)
In Actions, you can:
- Deactivate the custom test (pause monitoring/usage when it’s not relevant)
- Delete the custom test (remove it from SecureSlate)
