
Integrations
Connecting SecureSlate & Microsoft Sharepoint
Category: Document Management
Microsoft Sharepoint integrates with SecureSlate to let you sync policy and compliance documents directly from your Sharepoint site. It is read-only, with no files modified. Once connected, you can pull .docx, .xlsx, and .pdf files from dedicated Sharepoint folders into any policy or trust center document in SecureSlate.
Prerequisites
Before connecting, make sure you have:
- A Microsoft 365 account with access to a Sharepoint site
- Admin, Editor, or a custom role with Integrations permissions in SecureSlate
- A Microsoft account with sufficient permissions to grant OAuth consent for your organization
Note: Admin consent may be required during initial setup depending on your Microsoft 365 tenant configuration. After the first connection, no elevated permissions are needed for ongoing syncing.
Setting Up Your Sharepoint Folders
SecureSlate reads from two specific folders in your selected SharePoint site's Documents library. You must create these folders before connecting.
| Folder Name | Purpose |
|---|---|
SecureSlate Policies |
Policy documents (linked to policies in SecureSlate) |
SecureSlate Documents |
Supporting compliance documents (reports, certifications, etc.) |
To set up the folders:
- Open your Sharepoint site and navigate to the Documents library.
- Create a folder named exactly
SecureSlate Policies. - Optionally, create a second folder named
SecureSlate Documentsfor supporting compliance documents. - Upload your
.docx,.xlsx, or.pdffiles into the appropriate folders.
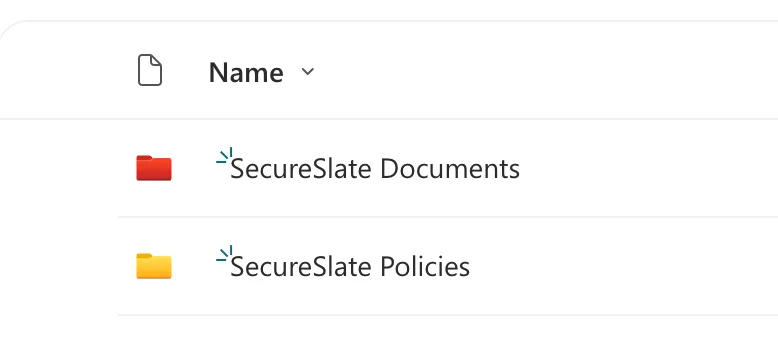
Important: Folders must be at the root level of the Documents library, not nested inside other folders. Only
.docx,.xlsx, and
Connecting Sharepoint to SecureSlate
- From the main dashboard, click Integrations in the sidebar.
- Navigate to the Available tab and search for "Microsoft Sharepoint".
- Click the Microsoft Sharepoint card to open the integration drawer.
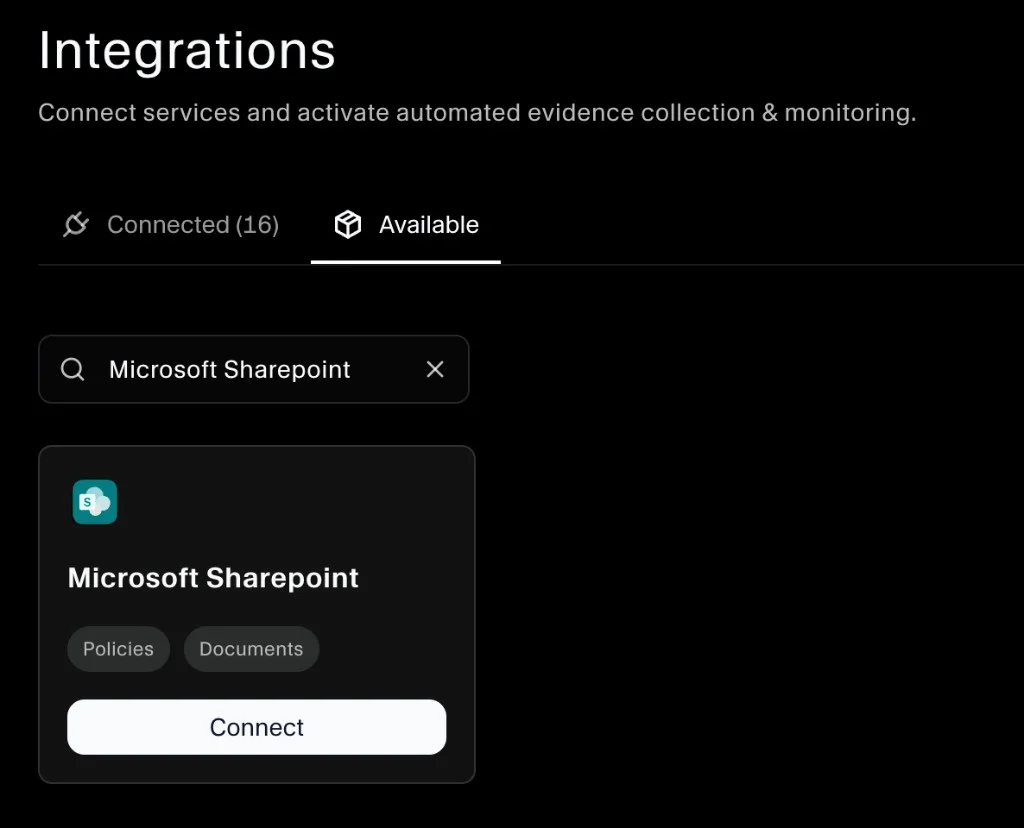
- Review the connection details and permission summary. SecureSlate uses OAuth with two Microsoft Graph permissions:
Sites.Read.All: read access to your SharePoint site and filesFiles.ReadWrite.All: required to generate read-only sharing links for auditor access (no file content is modified)
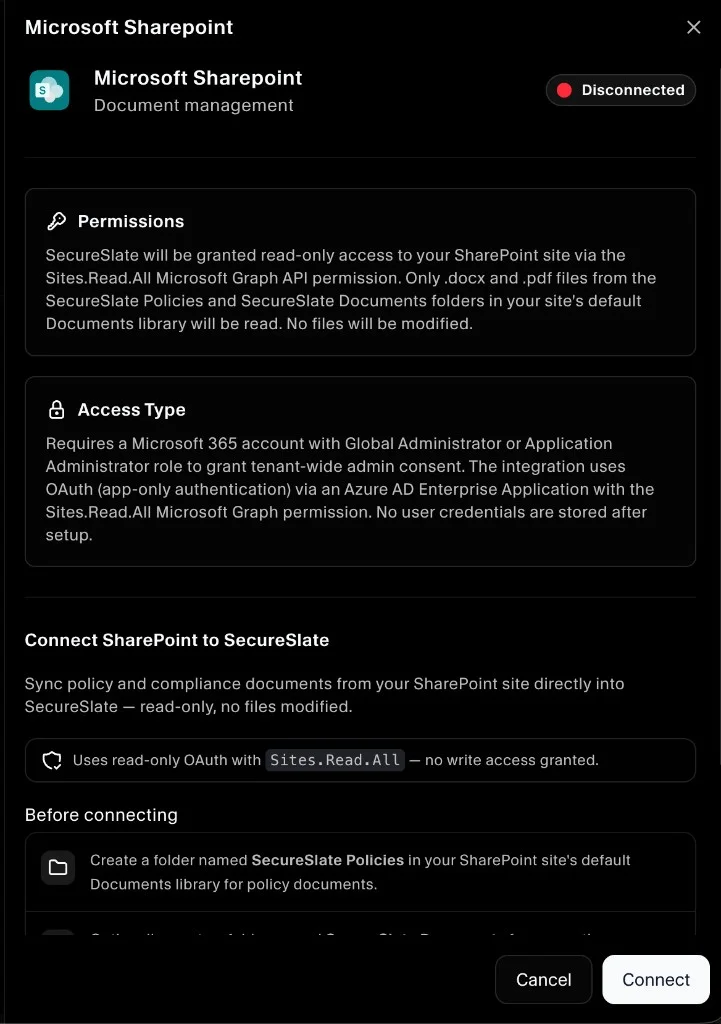
- Click Connect.
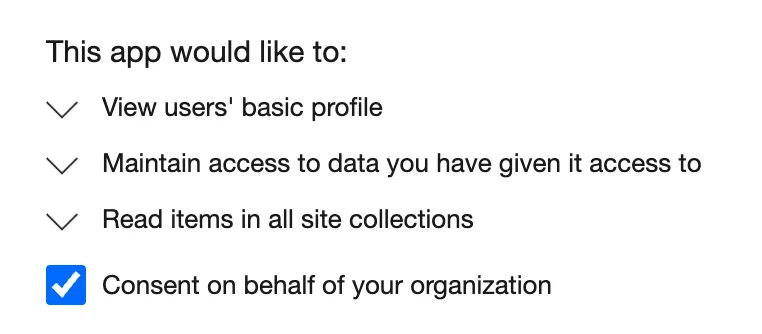
- You will be redirected to Microsoft's login page. Sign in with your Microsoft 365 account.
- Review and Accept the permission request. If prompted, check Consent on behalf of your organization to grant tenant-wide access.
- You'll be redirected back to SecureSlate automatically once consent is complete.
- A Select Your SharePoint Site dialog will appear automatically. Choose the SharePoint site that contains your
SecureSlate PoliciesandSecureSlate Documentsfolders, then click Confirm.
Important: The SharePoint site you select here is permanent for this connection. To use a different site, you must disconnect and reconnect the integration.
Upon success, the Sharepoint card will show a Connected status, and Microsoft Sharepoint will be added as a vendor in your Vendor Risk module automatically.
What SecureSlate Can Access
SecureSlate only reads from the two dedicated folders in your selected SharePoint site. It cannot:
- Write, edit, or delete any files in Sharepoint
- Access files outside the
SecureSlate PoliciesorSecureSlate Documentsfolders - Access other SharePoint sites (only the site selected during setup is used)
Note on
Files.ReadWrite.All: This permission is used solely to generate read-only anonymous sharing links for synced documents, enabling auditors to access files without needing a Microsoft account. No file content is ever written or modified.
Anonymous Sharing Requirement
To allow auditors to view SharePoint documents without a Microsoft login, you must enable anonymous sharing at both the tenant level and the specific site level.
Step 1: Tenant level
- Go to Microsoft 365 Admin Center → SharePoint → Policies → Sharing
- Set External sharing to Anyone (most permissive)
Step 2: Site level
Even if the tenant allows "Anyone" links, each SharePoint site has its own sharing setting that can be more restrictive. You must set the selected site to Anyone as well:
- Go to Microsoft 365 Admin Center → SharePoint → Sites → Active sites
- Click the site you selected during SecureSlate setup (e.g. "Compliance")
- Open the Settings tab
- Under External file sharing, change the dropdown from "New and existing guests" to Anyone
- Click Save
Important: If the site-level setting is more restrictive than the tenant setting (e.g. "New and existing guests"), anonymous link generation will fail with a 403 error even though the tenant allows it. Both levels must be set to Anyone.
Without this setting, synced files will still work inside SecureSlate for signed-in users, but external auditors will be prompted to log in when accessing document links sent via request access approval emails.
Managing the Integration
Once connected, the integration drawer shows:
- SharePoint site: The site you selected during setup
- Policies folder:
SecureSlate Policies - Documents folder:
SecureSlate Documents - Last synced: When SecureSlate last checked for file updates
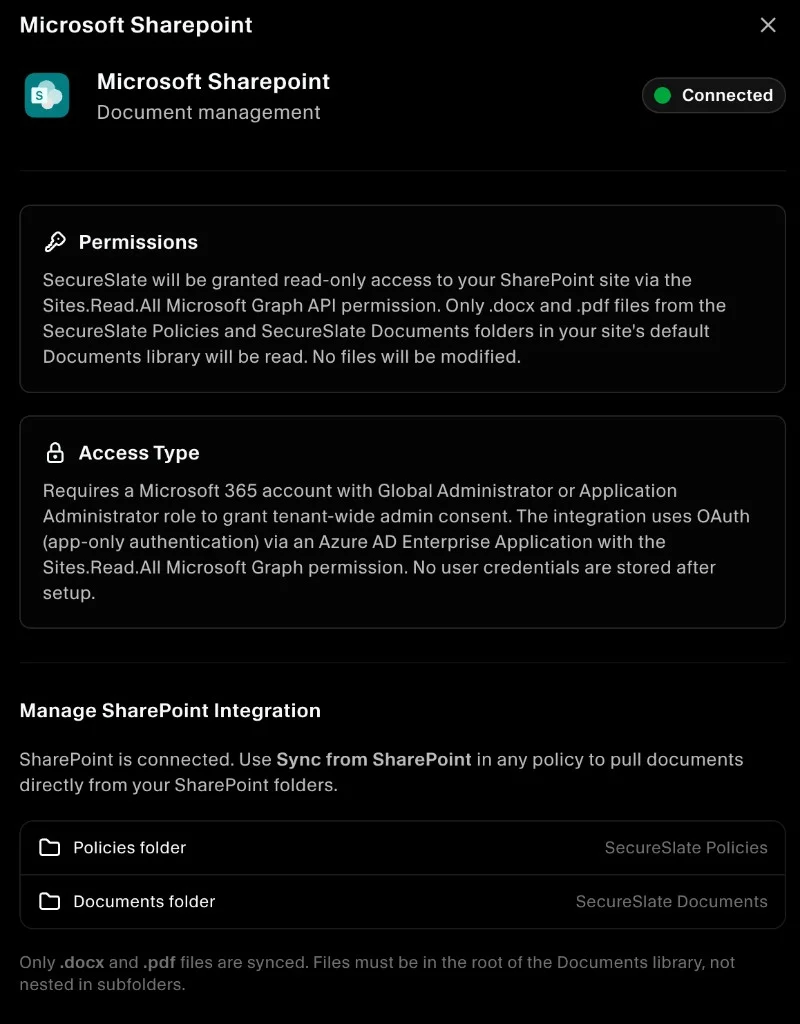
To use a different SharePoint site, disconnect and reconnect the integration. Site selection cannot be changed after the initial setup.
To disconnect, open the integration drawer and click Disconnect.
What happens to shared document links after disconnect
Disconnecting removes SecureSlate's stored access tokens but does not revoke the anonymous sharing links that were already created in SharePoint. Existing public URLs, for example links sent to auditors, will keep resolving because Microsoft stores those links on the file itself in your tenant, independent of SecureSlate's OAuth grant.
Existing links will only stop working if the file is:
- deleted or renamed in SharePoint,
- explicitly revoked from SharePoint admin (Manage Access on the file), or
- blocked by a tenant-level policy change (e.g. anonymous sharing turned off).
What does stop after disconnect: SecureSlate can no longer sync new files, refresh existing document metadata, or generate new sharing links for newly added documents. Reconnect the integration to resume these actions.
Troubleshooting
- OAuth redirects but nothing connects: Ensure pop-ups are not blocked in your browser. Try again in a fresh tab.
- Site picker shows "No sites found": Click Refresh in the site picker dialog. If the issue persists, ensure your Microsoft account has access to at least one SharePoint site and that the OAuth consent was granted for your organization.
- The wrong site was selected: Disconnect the integration and reconnect to go through the site picker again.
- "Sharepoint is not connected" error when syncing: The integration may have been disconnected. Reconnect from the Integrations page.
- No documents appear in the sync dialog: Confirm the folder name is spelled exactly as
SecureSlate PoliciesorSecureSlate Documentsand that files are.docx,.xlsx, or.pdf. - Token expired: SecureSlate automatically refreshes your access token in the background. If you see an authentication error, try disconnecting and reconnecting.
For further help, contact support@getsecureslate.com.
What's Next?
With Sharepoint connected, you can:
- Sync policies directly from SharePoint
- Sync supporting documents into your Trust Center
- Manage vendors added from the integration in Vendor Risk
